
You can fix scratches on leather chairs by applying a color-matched leather conditioner or a specialized filler, depending on the depth of the mark. Most surface scuffs happen because the top protective finish of the hide has been rubbed off, leaving the lighter-colored fibers underneath exposed. If the scratch feels rough or catches your fingernail, it’s likely a deep cut that requires more than just hydration to blend back into the surface.
Why leather chairs get scratches
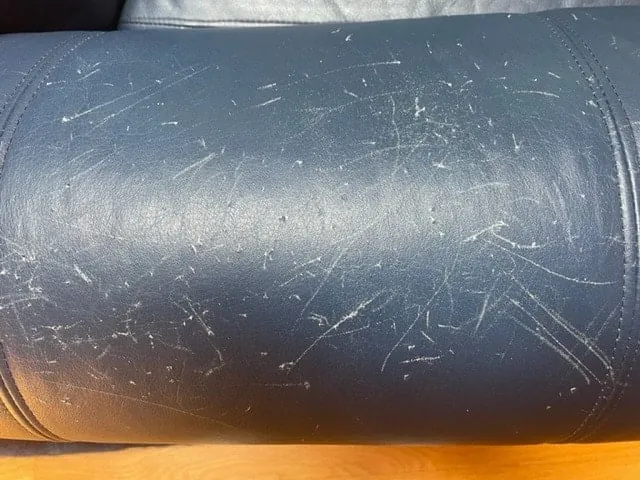
The most common reason for visible marks is dry, brittle leather. Leather is a natural material that needs oils to remain flexible; when it loses moisture, the surface becomes stiff and loses its resistance to friction. If you sit on a chair while wearing jeans with rivets or belts with metal buckles, these hard edges easily slice through the dry, unprotected top coat.
Another frequent cause is the buildup of body oils and dust, which act like sandpaper against the finish. Over time, these particles grind into the grain whenever you shift your weight, creating a network of tiny, light-colored lines. Pets are also a major factor, as their claws are sharp enough to puncture the protective pigment layer instantly.
It’s important to remember that not all leather is the same. Aniline leather, which is porous and soft, absorbs oils and stains very differently than protected, pigmented leather. If you use a product meant for protected leather on an aniline piece, you risk darkening the hide permanently.
Buffing out light surface scuffs
Use this method only for shallow marks where the texture of the leather remains smooth. If you run your fingernail over the area and feel no indentation, the damage is likely just a loss of surface pigment. You’ll need a high-quality leather conditioner and a clean, soft microfiber cloth to restore the appearance of the material.
Apply a small, pea-sized amount of leather conditioner to the cloth, not directly onto the chair. Rub the conditioner into the scratch using a gentle, circular motion. The goal is to hydrate the surrounding fibers so they swell slightly and hide the light-colored mark. After you finish, let the area sit for 10 minutes, then buff it dry with a fresh part of the cloth.
If the color doesn’t return, your leather has lost its pigment. In this case, you should stop and look for a leather recoloring balm that matches your chair’s exact shade. Always test the balm on a hidden spot, like the underside of the seat, before applying it to the main scratch. If you have aniline leather, don’t use heavy waxes or fillers, as these will leave a shiny, unnatural patch that you can’t easily remove.
Filling deep gouges and cuts
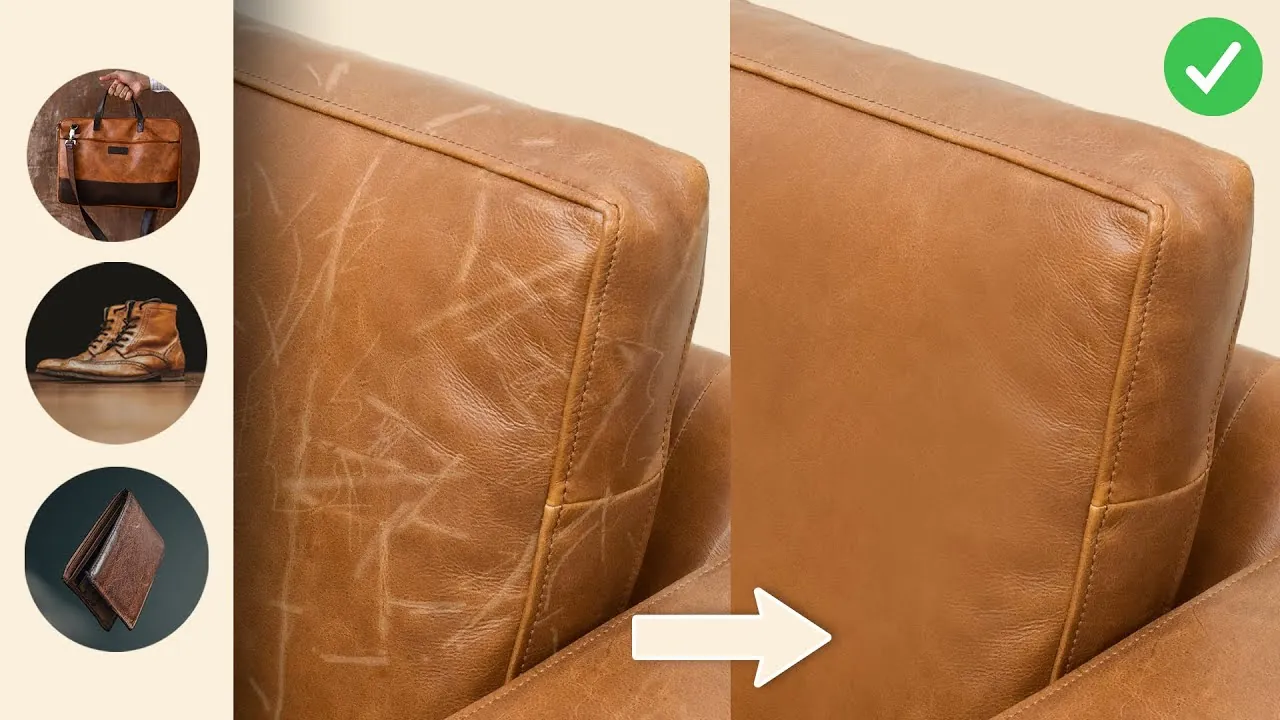
For scratches that catch your fingernail, a simple conditioner won’t work because the physical structure of the leather is broken. You need a flexible leather filler compound to bridge the gap. This repair is for structural cuts where the material has been pushed aside or partially removed by a sharp object.
Clean the area thoroughly with a damp cloth to remove any loose debris. Apply a tiny amount of leather filler into the scratch using a plastic spatula or a toothpick. Press it down firmly, then wipe away the excess with a damp sponge so that the filler is level with the surrounding surface. Let the filler dry according to the manufacturer’s time, usually about 30 minutes, before attempting to touch it up with color.
If you have a large tear or a cut longer than 2 inches, this is likely beyond a simple DIY repair. Such damage requires professional stitching or a leather patch to prevent the cut from spreading further under the tension of normal use. If the leather is cracked across a wide area, it’s usually a sign of structural failure, and no amount of filler will stop the material from splitting again soon.
Using leather recoloring kits
Recoloring kits are necessary when the surface color has been completely worn away, leaving a white or beige patch. This is the best fix for chairs that have faded in the sun or show heavy wear from daily use. A kit typically includes a cleaner, a pigment-based colorant, and a clear sealer to lock the finish in place.
Before you start, wipe the entire panel of the chair with the included degreaser to remove all oils. If you skip this step, the new color will peel off within weeks because it can’t bond to the greasy surface. Test your color match on an inconspicuous area, such as the underside of the seat, before applying it to the front. Wait thirty minutes for the sample to dry completely, as the pigment often shifts in tone once the moisture evaporates.
Apply the colorant using a sponge in thin, light layers. It’s better to apply three very thin coats than one thick one, as thin layers dry evenly and prevent a plastic-like appearance. Use a hair dryer on a cool setting between coats to speed up the process.
This process isn’t for everyone. If you’re color-blind or have trouble matching shades, you might end up with a patch that looks worse than the original scratch. If you find yourself struggling to match the undertones of your leather, stop and contact a local furniture restoration specialist. They can custom-mix a pigment that matches the aging of your specific chair, saving you the cost of a ruined piece.
Common mistakes to avoid
Never use shoe polish on furniture. It contains dyes that never fully cure and will inevitably rub off onto your clothes every time you sit down.
Avoid applying olive oil or baby oil to “moisturize” a scratch. These organic substances turn rancid over time and will rot the leather fibers from the inside out, causing the material to disintegrate.
Don’t use sandpaper to smooth out a surface scratch. This removes the natural grain and creates a permanent flat, dull spot that can’t be repaired without a professional refinishing.
Steer clear of hair dryers or heat guns to speed up the drying process. Excessive heat shrinks and hardens the leather, leading to brittle, new cracks that are often worse than the original blemish.
Always perform a test patch on a hidden area, such as the underside of a cushion or the back of a frame. If you skip this, you risk creating a permanent chemical stain that can’t be reversed.
If the scratch is deep enough to feel with your fingernail, stop trying to buff it out. That depth requires a professional filler rather than a surface conditioner. Attempting a DIY fix on a structural tear often costs double the price of a standard repair.
Preventing future damage
| If you’re doing this | Do this instead | Why |
|---|---|---|
| Placing chairs in sun | Move away from windows | UV light dries out natural oils |
| Using harsh cleaners | Use a damp cloth only | Chemicals strip the protective top coat |
| Skipping routine care | Condition every 6 months | Keeps fibers supple and resistant to cuts |
| Ignoring loose threads | Trim carefully with scissors | Prevents the tear from widening |
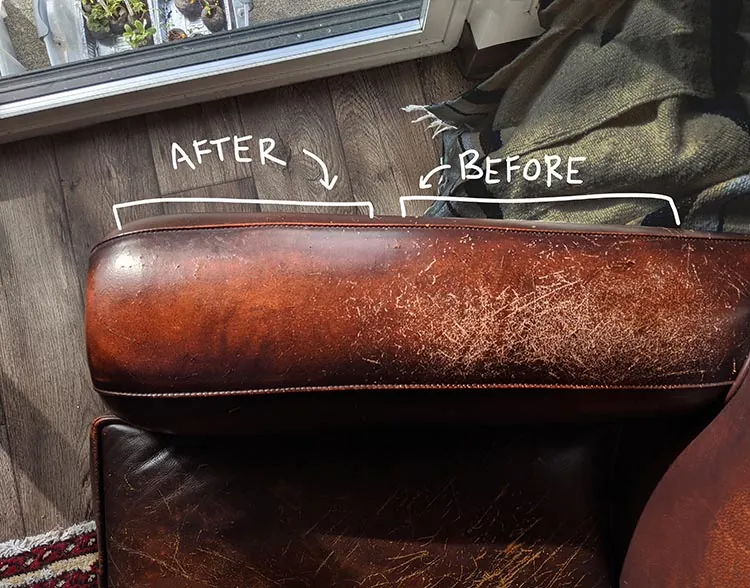
Position your furniture at least three feet from direct sunlight. Even indirect exposure through glass causes invisible, cumulative fading that weakens structural integrity over several years.
When cleaning, avoid any product containing ammonia or bleach. These agents break down the molecular bonds in wood finishes and leather, leading to brittle surfaces that crack under minimal pressure. If a spill occurs, blot immediately rather than rubbing. Rubbing pushes liquids deeper into the grain, causing permanent staining.
If you notice a loose thread, don’t pull it. Pulling unravels the surrounding weave and creates a permanent pucker. Use a sharp pair of embroidery scissors to snip the thread flush with the surface. If the weave feels loose, apply a tiny drop of clear fabric adhesive to the base to anchor the fibers before trimming. This simple step prevents a minor snag from becoming a structural failure.
Related guides
Frequently asked questions
Can I use super glue to fix a leather scratch?
No, never use super glue because it dries into a brittle plastic that causes leather to crack. Leather is a flexible material that requires a pliable filler to move with the chair. Using super glue creates a stiff spot that will eventually tear the surrounding leather fibers.
How long does a leather repair last?
A proper repair using high-quality leather filler and colorant typically lasts for several years with normal use. The lifespan depends on how often the chair is used and whether you maintain it with conditioner. If the hide remains dry, the area surrounding your repair may crack again.
Is it safe to use leather dye on a scratch?
You should only use specialized leather colorants or balms, avoiding standard clothing dyes or ink-based products. These substances aren’t designed for leather and will fade or bleed into your clothing. Always use products labeled for furniture and apply a clear top coat to prevent rubbing.
What happens if I use too much conditioner?
Using too much conditioner makes leather sticky, attracting dust that grinds into the grain and causes scratches. Leather can only absorb a limited amount of oil, leaving excess product on the surface to collect dirt. If you over-apply, wipe the chair with a dry cloth until smooth.
How do I know if the scratch is too deep?
A scratch is too deep if you see a significant color difference or if the leather feels physically sliced. Surface scuffs involve minor texture changes, while deep cuts show a distinct gap in the material. If you can see the backing fabric, the damage requires professional upholstery repair.
Conclusion
Regular maintenance is the most effective way to keep your furniture looking new. By keeping the leather hydrated and avoiding contact with sharp objects, you prevent the conditions that lead to scratches in the first place. When a mark does appear, address it early with the right products to stop it from becoming a permanent tear.