
To fix loose dining chairs, you should apply wood glue to the joints and use deep-reach clamps to pull the frame back together until it sets. The most common cause for this instability is the natural expansion and contraction of wood over time, which shrinks the tenons and causes the original glue to crack and lose its bond. If you notice a joint moving, stop using the chair immediately to prevent the wood from splitting or the frame from warping under your weight.
Why your dining chairs become loose

The primary reason for loose chairs is the fluctuating humidity in your home. Wood is a natural material that absorbs and releases moisture; as it cycles through these changes, the wood fibers compress and expand. Over many years, the glue inside the joint becomes brittle and can no longer bridge the gap between the tenon and the mortise. Once the glue gives way, the joint begins to wobble, putting uneven stress on the other connections.
Another common cause is the loss of mechanical fasteners. Many modern chairs use corner blocks or metal brackets that rely on screws to stay tight. If these screws loosen, the frame loses its rigid geometry. You can verify this by flipping the chair over and inspecting the underside. If you see screws that spin without catching, the wood around the hole has likely stripped, meaning the fastener can no longer hold the frame in place.
Finally, heavy or uneven use often accelerates the wear. If a chair is frequently dragged across a floor rather than lifted, the legs experience lateral force that they weren’t designed to handle. This force puts constant pressure on the joints, eventually causing them to pull apart.
Clean and re-glue the loose joints
This repair is for anyone who has a chair with joints that have visibly pulled apart but the wood itself isn’t shattered. First, you must carefully tap the loose joint apart using a rubber mallet; if it doesn’t move easily, don’t force it, as you might break the wood.
Once separated, use a wood scraper or fine-grit sandpaper to remove the old, hardened glue from the surfaces. If the old glue remains, the new adhesive won’t bond to the wood fibers.
Apply a thin, even layer of wood glue to both parts of the joint. You should use a high-quality wood glue designed for furniture, as it provides the necessary shear strength to withstand daily sitting. After applying the glue, push the parts together and use a bar clamp to hold them tight. If you don’t have a clamp, you can use a heavy-duty strap or a tourniquet made of rope, but be careful not to crush the wood.
If the joint remains loose even after cleaning, the wood may have worn down too much. In this case, you can glue a thin piece of wood veneer into the gap to act as a shim. This isn’t for beginners who lack experience with precise cutting, as it requires a tight fit to be effective. If the wood is cracked or splintered, you should consult a professional furniture restorer.
Tighten hardware and corner blocks
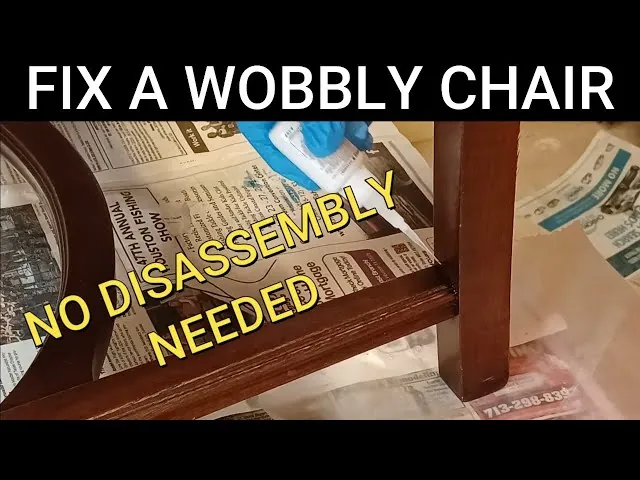
If your chair uses metal brackets or corner blocks, you need a screwdriver or a socket wrench to secure them. Flip the chair over and check every screw under the seat. If a screw turns but won’t tighten, the hole is too wide.
A simple trick is to push a few wooden toothpicks dipped in wood glue into the hole, snap them off flush, and then re-insert the screw. The wood fibers will give the screw something new to bite into once the glue dries.
This method works well for minor gaps, but it isn’t for chairs with deep, structural cracks in the legs or seat frame. If you see a crack running along the grain of a leg, that chair is no longer safe for daily use. You should set it aside and have a professional look at it, as a cracked leg can fail suddenly under weight.
To ensure the chair is square, measure diagonally from the top of one leg to the bottom of the opposite leg. If the two diagonal measurements aren’t equal, the chair is leaning. Adjust your clamps slightly until the measurements match before the glue sets. Once the glue has cured for at least 24 hours, remove the clamps and test the chair on a flat floor. If it still wobbles, you may need to level the bottom of the legs.
Use professional reinforcement methods
For chairs that have been loose for a long time, simple glue may not be enough. You might need to install steel mending plates or corner braces to provide extra support to the frame. This is worth the effort if the chair is a valuable antique or a sturdy piece you want to keep for many years. It isn’t for chairs made of cheap particleboard or thin plastic, as these materials won’t hold screws or heavy-duty brackets.
If you choose to add metal hardware, ensure the screws are the right length so they don’t poke through the finished surface of the seat.
You should pre-drill small pilot holes to prevent the wood from splitting when you drive the screws in. If you aren’t comfortable using a power drill or working with metal hardware, it’s better to take the chair to a professional. Poorly installed brackets can weaken the frame further by introducing new holes in the wrong places.
This approach is also for chairs that see very heavy daily use. Adding a corner brace creates a rigid triangle that stops the frame from twisting. If you don’t have the right tools, like a drill or a set of clamps, don’t attempt this yourself. The cost of a professional repair is often much lower than the price of replacing a high-quality set of dining chairs.
Common repair mistakes to avoid
-
Using nails instead of screws: Nails don’t have the pulling power to draw a joint tight. They will eventually work their way out of the wood. Screws pull the mating surfaces together as you drive them in. Use flathead wood screws so the heads sit flush with the surface.
-
Over-tightening clamps: Too much pressure can crush the wood fibers. It also causes the frame to twist out of square, making the chair sit unevenly. Tighten the clamp only until a thin bead of glue squeezes out along the seam. Stop turning the handle the moment you see that bead appear.
-
Ignoring the old glue: Applying new glue over old residue creates a weak bond. The repair will break again within a few weeks of use. Scrape the old adhesive down to bare wood first. A sharp chisel works faster than sandpaper and leaves a flat surface for the new glue.
-
Applying too much glue: Excess glue that squeezes out of the joint can stain the finish. Wipe it away immediately with a damp cloth before it dries.
Prevent future chair instability
| If you’re doing this | Do this instead | Why |
|---|---|---|
| Dragging chairs across floors | Lift the chair to move it | Dragging puts lateral force on legs |
| Ignoring a slight wobble | Tighten joints immediately | Small gaps grow into broken joints |
| Using chairs on uneven floors | Use felt pads on leg bottoms | Pads absorb uneven surface pressure |
| Storing in a damp basement | Keep chairs in climate-controlled areas | Moisture cycles weaken wood bonds |
Lateral stress is the silent killer of furniture. When you drag a chair, the legs act as levers, prying apart the glue joints at the seat frame. If you feel a wobble, check the corner blocks first. These blocks transfer weight to the legs; if they’re loose, the entire structure fails.
Use a simple rule: if a chair rocks by more than a sixteenth of an inch, stop using it until you tighten the fasteners. Ignoring this movement forces the wood fibers to compress, creating permanent gaps that glue alone can’t fill.
Worn pads hold grit that acts like sandpaper, grinding down the leg finish. If the chair remains unstable after tightening, the issue is likely a warped frame. In that case, professional clamping is the only way to restore squareness.
Related guides
- How to Tighten Dining Room Chairs: A Step-by-Step Fix
- 8 Best Dirt Bike Tire for Woods Riding Picks and Reviews in 2026
- Best Weather Resistant Patio Chairs for Lasting Comfort and Style in 2026
Frequently asked questions
Can I use super glue to fix a loose chair?
No, you shouldn’t use super glue for chair joints because it’s too brittle to withstand daily stress. Wood glue soaks into wood fibers to create a bond stronger than the wood itself. Note that super glue only creates a surface bond that will eventually fail.
How long does wood glue take to dry?
Most wood glues require 24 hours to reach full strength, even if the joint feels solid sooner. You should leave clamps in place for the full day to ensure the bond is permanent. Removing pressure too early may cause the joint to shift and result in a weak connection.
Is it safe to sit on a chair that has been glued?
Yes, you can sit on the chair once the glue has cured for 24 hours, provided the frame is rigid. A successful repair will show no movement or creaking when weight is applied. If you hear sounds, the joint remains loose and requires cleaning and re-gluing.
Why does my chair wobble even after I tighten the joints?
Your chair likely wobbles because the legs are no longer the same length due to uneven wear or warping. Even if joints are tight, a difference of a few millimeters will cause the chair to rock. Check this by placing the chair on a perfectly flat surface to identify the short leg.
What should I do if the wood is stripped where the screw goes?
You should fill the stripped hole with a mixture of wood glue and wooden toothpicks or dowels before trying to drive the screw back in. Once the glue has dried, the new wood will provide a solid surface for the screw threads to grip. Never try to use a larger screw if the hole is stripped, as this can split the wood and permanently ruin the frame of the chair.
Conclusion
Once the glue is fully cured, you’ll have a sturdy seat that’s ready for many more family dinners. It’s a good idea to check your other chairs for any early signs of wobbling, too. Tightening them up now will save you from bigger repairs later, so don’t hesitate to keep them in top shape.