
Building an electric scooter takes roughly four to six hours if you use a pre-built kick scooter frame and matching modular parts. The project costs moderate money for the frame, battery, and motor hub, and it needs care because lithium battery packs carry serious fire risks if wired wrong. You must have a sound donor kick scooter with working brakes before you start.
Parts for your electric scooter
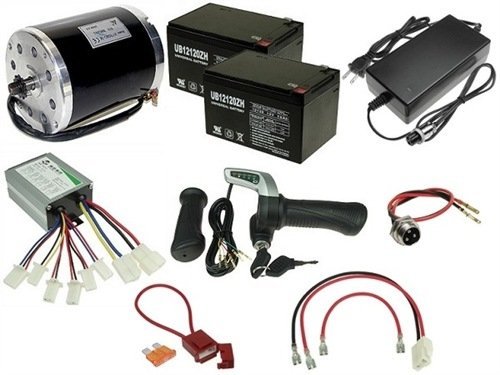
| Item | How much | Why it’s needed | A substitute |
|---|---|---|---|
| Adult kick scooter | 1 unit | Base frame and deck | none — don’t swap this |
| Hub motor wheel (36V) | 1 unit | Drives the rear wheel | Chain-drive brushless motor kit |
| Motor controller (36V) | 1 unit | Sends power to motor | none — don’t swap this |
| Lithium battery pack (36V) | 1 pack | Powers the entire system | none — don’t swap this |
| Thumb throttle | 1 piece | Controls scooter road speed | Twist-grip electric throttle |
| Inline fuse holder | 1 piece | Stops dangerous short circuits | 12V-48V rated circuit breaker |
Before you start
- Disconnect the battery pack leads completely and store the battery in a dry, room-temperature room away from open flames.
- Remove the rear wheel and clean all dirt off the rear dropouts using a dry rag.
- Wrap all bare copper wire ends with electrical tape to avoid accidental spark discharge while you handle metal components.
- Check your frame for metal cracks; skipping this frame check often leads to structural snaps at road speeds.
- This project isn’t for public road use where local laws require certified motor vehicles. If you must build a custom battery pack from loose cells, stop now and take it to a certified battery builder; assembling loose 18650 cells without factory spot-welding gear risks severe chemical burns and house fires.
Step by step
- Slide the 36V hub motor wheel into the rear fork dropouts, keeping the power cable on the side with frame clearance. Tighten the axle nuts securely according to the motor manufacturer’s specifications. You’ll know it worked when the wheel spins freely by hand without rubbing the inner metal frame.
- Bolt your motor controller box firmly onto the scooter stem or under the deck using two M5 machine screws. You’ll know it worked when the controller box doesn’t shift or rattle when pulled by hand.
- Clamp the thumb throttle onto the right side of the handlebar next to the grip using a 3-millimeter hex key. You’ll know it worked when the spring returns the throttle lever smoothly upon release.
- Mount the mechanical hand brake lever on the left handlebar and route the braided steel cable straight to the rear brake caliper. You’ll know it worked when pulling the lever stops the rear wheel from turning by hand.
- Plug the motor’s three thick phase wires and five thin sensor wires directly into the matching ports on the controller. You’ll know it worked when the color-coded plastic connector clicks shut firmly.
- Plug the throttle wire connector into the throttle input harness coming out of the speed controller. You’ll know it worked when the locking clip on the plastic harness snaps in place.
- Splice a 30-amp fuse holder onto the positive red power wire of the controller before attaching any power supply lines. You’ll know it worked when the fuse sits tightly between the red lines.
- Connect the positive red wire first, then connect the negative black wire to link the 36-volt battery pack to the controller. You’ll know it worked when you see no continuous smoke or sparks at the terminal pins.
- Lift the rear wheel off the floor, switch the power switch on, and press the throttle lightly for two seconds. You’ll know it worked when the motor runs forward without grinding sounds.
How to know it worked
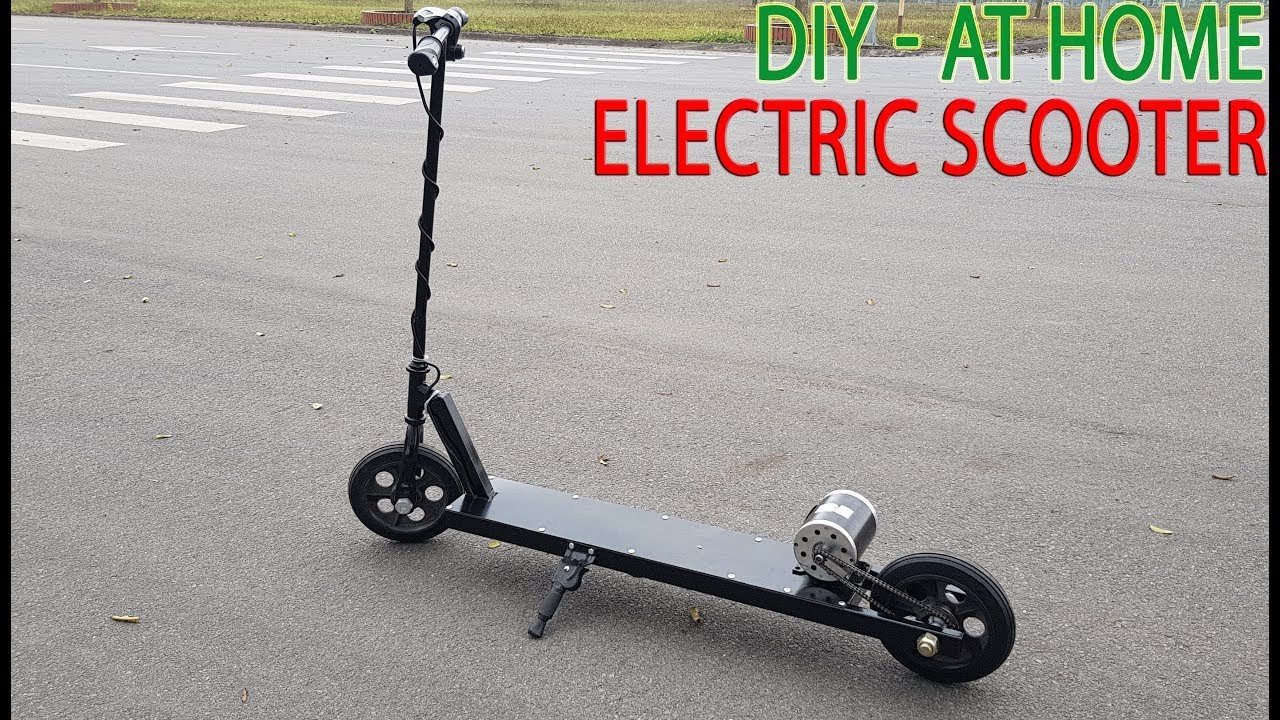
The rear wheel must spin smoothly forward when you press the throttle lever with the scooter lifted off the ground. The hub motor should make a quiet humming sound rather than a grinding or loud vibrating noise. Look at your throttle battery display: it should light up with a steady green or full-voltage readout, which shows a full charge. If the wheel spins backward, your motor phase wires are plugged in reverse. When you pull the brake lever, the motor cutoff switch must kill power instantly, stopping the wheel rotation within one second.
If something goes wrong
| What happened | Why | What to do |
|---|---|---|
| Motor shudders loudly | Phase wires wired wrongly | Swap two motor phase wires |
| Throttle shows no lights | Blown battery fuse line | Replace the inline blade fuse |
| Wheel spins reverse | Wrong motor direction phase | Swap green and blue phases |
| Frame feels loose | Loose headset steering bearings | Tighten main headset clamp bolt |
| Motor gets hot | Brake pad rubs drum | Adjust brake cable barrel nut |
How often to do this
Inspect the main frame, axle bolts, and cable connections regularly. Heavy rider weight and bumpy road conditions will change this check schedule quickly; rough roads loosen axle hardware much faster than smooth asphalt tracks. If you ride on smooth paths, checking bolts as part of your usual clean is enough; if you ride on cracked pavement daily, check every bolt frequently. Look at your tire wear and check battery wire insulation as part of your usual clean to make sure no moving parts rub against electrical cables.
Frequently asked questions
Can I build an electric scooter from a regular kick scooter?
Yes, you can convert a regular kick scooter if it has a strong metal frame, large eight-inch wheels, and working brakes. Tiny plastic children’s scooters can’t handle motor weight or road vibrations safely. Check the frame’s rated weight limit stamped on the base before purchasing any conversion parts.
Why does the motor cut off when I hit the throttle?
The battery voltage is sagging below the controller’s low-voltage cutoff point. This happens when the battery pack is almost empty, or when your battery’s continuous discharge rating is lower than the motor draws. Charge the battery fully, or replace it with a pack with a higher discharge rating.
How long does a conversion battery last on one charge?
About 10 to 15 miles per charge, assuming a 36-volt 10-amp-hour battery and a smooth, flat road. Heavy rider weight, steep hills, and fast speeds will reduce this range significantly. Check your battery case label for the watt-hour rating to calculate realistic distances.
Is it safe to ride a homemade electric scooter in the rain?
No, homemade scooters are rarely sealed against water penetration. Rain quickly enters basic controllers and non-waterproof hub motors, causing short circuits that ruin the electronics or lock the drive wheel. Keep your scooter dry, and store it inside away from wet weather.
What happens if I connect the battery wires backward?
The motor controller will blow its internal capacitors immediately with a loud pop and smoke. Reverse polarity permanently destroys most standard speed controllers in less than a second. Always verify the red positive and black negative wires with a meter before plugging them together.
Does motor wattage matter for hill climbing?
Yes, motor wattage decides how easily you climb steep slopes. A 250-watt motor slows to a crawl on modest hills, while a 500-watt motor carries an adult up slopes without stalling. Check the motor stamp for the continuous wattage rating to ensure it matches your local terrain.
Final Thoughts
Once everything is securely mounted, take your new ride for a slow test spin on a flat, empty sidewalk. Don’t forget to wear a helmet as you get used to the throttle’s sensitivity. You’ll find that maintaining your connections and checking the tire pressure regularly keeps things running smoothly for years.
Related guides