
A broken cane seat doesn’t mean the chair is ruined. Repairing a cane bottom chair involves pulling out the old spline, cleaning the groove, and pressing in a new pre-woven panel with wood glue. That’s the most common fix for a sagging or torn seat. The main cause of failure is dry rot from age and low humidity. You’ll know it worked when the new cane sits tight and flat after drying overnight.
Why cane chair seats break
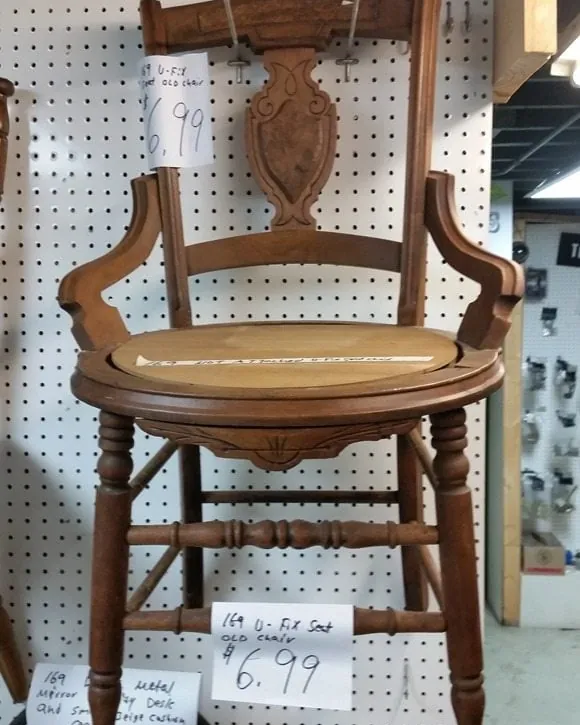
Cane is a natural plant fiber, and it dries out over time. When it loses moisture, the strands turn brittle. A person sitting down puts all their weight on a small area, and that stress snaps the dry fibers. This is why older chairs fail first at the center of the seat.
The groove holding the spline takes damage too. The spline is the thin wooden strip locking the cane into the frame. If someone pried out an old seat roughly, they might have chipped the groove walls. A damaged groove won’t hold new glue well. That means your fresh panel could pop loose after a few weeks.
Water is another enemy. Spills left to soak into the weave make the strands swell and then shrink as they dry. That constant movement loosens the whole webbing. Leaving a chair near a heating vent or in direct sunlight speeds up this drying process. The heat pulls moisture out faster than the room air can replace it.
You can check the condition yourself by pressing a fingernail into the old cane. If it crumbles instead of bending, the material has rotted past saving. For chairs with holes drilled through the frame for hand-woven strand cane, you’ll need to look at each hole for cracks. The American Chair Seat Weavers Guild publishes guidance on identifying different cane types if you aren’t sure which style your chair uses.
Remove the old spline and cane
This fix is for chairs with a routed groove around the seat opening, not ones with holes drilled through the frame. You don’t need special training, but work slowly so you don’t gouge the wood.
First, flip the chair upside down on a soft towel. Use a utility knife to score along both edges of the old spline. Don’t skip this step. Cutting the edge stops the wood from splintering when you pry it up.
Next, slide a narrow chisel under one end of the spline. Tap the handle gently with a mallet until the spline lifts out. Pull it free by hand once you have a good grip. Throw away the old spline; reusing it never works because it’s already compressed.
Now grab a pair of needle-nose pliers and pull out the old cane webbing. It usually comes out in large pieces. You’ll see dried glue stuck inside the groove. Take a stiff wire brush or a small flat screwdriver and scrape every bit of that old glue away. The new panel needs bare, clean wood to bond to.
Wipe the groove with a damp cloth to remove dust. Let it dry completely before moving on. You’ll know you’re ready when the groove feels smooth and looks like raw wood again. If the wood is still dark with old adhesive, keep scraping.
Press in a new pre-woven panel
Buy a sheet of pre-woven cane and a length of reed spline from a craft or woodworking store. Measure your chair’s groove from the outside edge, going all the way around. Add 2 inches to that total for the spline, and 1 inch to each side for the cane panel.
Soak the new cane panel in warm water for about 30 minutes. This makes it flexible enough to stretch without tearing. Soak the spline for 15 minutes. Don’t skip soaking; dry cane will snap when you push it into the groove.
Lay the wet panel over the seat opening. Make sure the weave lines up straight with the front of the chair. Apply a bead of wood glue all the way around the clean groove.
Use a blunt tool, like the back of a butter knife or a wooden dowel, to press the cane edges down into the glue. Start at the front center and work toward the corners, then do the back. Pull the cane taut as you go.
Trim the extra cane close to the groove with a sharp utility knife. Apply more glue inside the groove, then tap the soaked spline down on top of the cane edges using your mallet. Wipe away any squeezed-out glue immediately with a damp rag.
Let the chair sit upright in a dry room for 24 hours. As the cane dries, it shrinks and pulls itself drum-tight. You’ll hear faint popping sounds while it dries; that’s normal tension building.
Replace the spline if the cane is intact
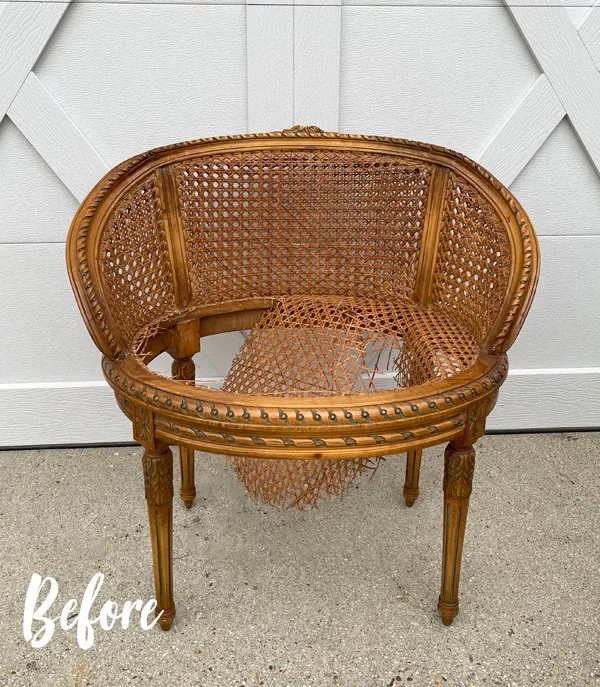
Sometimes the woven seat is fine, but the spline cracked or popped out. This happens when the chair gets bumped hard or the original glue failed. Fixing just the spline saves you from replacing the whole panel.
If the cane webbing is solid and only the wooden strip is loose, leave the seat alone and focus entirely on the border. Pry out the broken spline pieces carefully with a narrow chisel. Clean the groove exactly as you would for a full replacement, scraping out every bit of hardened glue.
Measure the perimeter of the groove and cut a new reed spline to match. Soak it in warm water for 15 minutes so it bends around the corners without snapping. Run a steady bead of wood glue into the empty channel.
Press the wet spline into the groove starting at the back center. Work your way around to the front, tapping it flush with a rubber mallet. Where the two ends meet, cut them at a 45-degree angle so they overlap neatly instead of butting together flat.
Clamp the spline down with masking tape pulled tight across the seat frame every 2 inches. Leave the tape on for 12 hours. Peel it off once the glue is fully cured. This fix costs very little compared to a whole new panel, but it only works when the weave itself hasn’t started to unravel.
How to repair cane bottom chairs by hand-weaving
Chairs with individual holes drilled around the frame instead of a continuous groove need a different approach. This method uses long strands of cane laced through the holes in a specific pattern. It’s worth the effort for valuable antiques or family heirlooms where keeping the original construction matters.
Don’t attempt this on a cheap dining chair you bought secondhand. Buying pre-woven panels and routing a groove into the frame is faster and costs less for everyday furniture. Hand-weaving takes several hours of focused work per seat.
You’ll need a hank of strand cane, a spline if the design calls for one, and a small awl. Soak three or four strands at a time in warm water for 20 minutes so they stay pliable while you work. Keep the rest dry until you need them.
Start by lacing the vertical strands through the front and back holes, pegging each one to hold tension. Then weave the horizontal strands over and under the verticals. Follow a standard seven-step pattern, which you can find in furniture restoration guides.
This work requires patience and basic manual dexterity. If the chair is a registered antique or holds significant financial value, take it to a professional restorer. Rushing the weave or forcing dry cane through tight holes can split the wooden frame, turning a simple repair into major carpentry.
Bad advice that ruins cane chairs
People pass around tips that sound helpful but actually destroy the seat faster. Here are the ones to ignore.
- Gluing a patch over the hole. Piling wood glue and a scrap piece of cane over a tear doesn’t fix the tension. The patch stays stiff while the rest of the seat flexes, and the surrounding strands rip within a month.
- Spraying the seat with polyurethane. Sealing cane with a thick finish traps moisture underneath and prevents the fibers from breathing. The coating also makes the seat slippery and cracks when someone sits down, leaving sharp edges.
- Using super glue on the spline. Cyanoacrylate dries hard and glass-like. Cane needs to expand and contract slightly with humidity changes. Super glue locks it rigidly, causing the reed to snap when the wood shifts.
- Skipping the water soak. Pushing dry cane into a groove seems faster, but the material lacks flexibility. It splits along the weave lines as soon as you apply pressure, wasting the whole panel.
- Painting the seat to hide wear. Paint fills the gaps between strands and glues them together into a solid board. Once painted, you can’t reweave or replace the seat without sanding every hole completely clean, which often damages the frame.
Keeping your cane seat tight longer
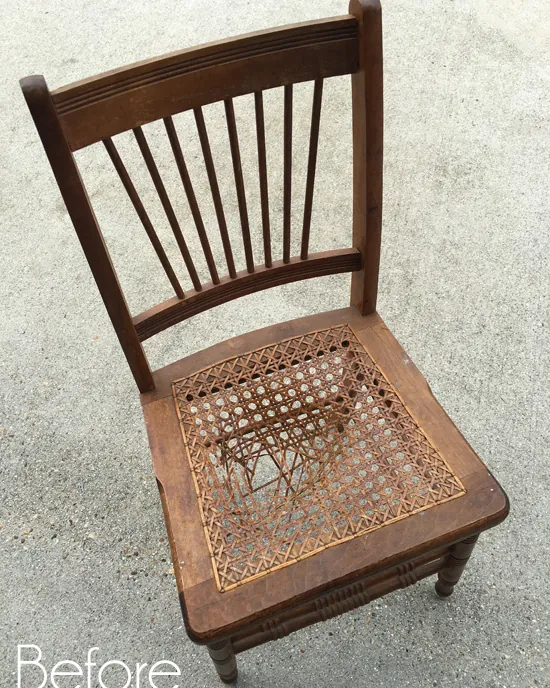
How you treat the chair after the repair decides how long the new cane lasts. Small habits prevent the dry rot and physical stress that caused the first break.
| If you’re doing this | Do this instead | Why |
|---|---|---|
| Dragging the chair across hard floors | Lift it by the frame to move it | Dragging twists the legs, stressing the joints and pulling the seat groove apart. |
| Placing it next to a heating vent | Keep it at least 3 feet from radiators | Direct hot air bakes the moisture out of the natural fibers, making them brittle. |
| Wiping spills with a soaking wet rag | Dab liquids with a barely damp cloth | Excess water pools in the groove, softening the wood glue and rotting the spline. |
| Standing on the seat to reach high shelves | Use a proper step stool | Cane supports seated weight spread evenly, not the concentrated force of standing feet. |
| Leaving it in a sunroom all summer | Move it out of direct afternoon light | UV rays break down the plant cellulose, fading the color and weakening the strands. |
| Ignoring a single loose strand | Tuck it back and add a drop of glue | One loose thread catches on clothing and unravels the entire woven row quickly. |
Related guides
- How to Tighten Dining Room Chairs: A Step-by-Step Fix
- 10 Best Kitchen Sink Bottom Grids for Every Sink Style in 2026
- 10 Best Thermal Underwear Bottoms for Women: Our Top Picks in 2026
Frequently asked questions
How long does it take to replace a cane seat?
Replacing a pre-woven panel takes about 45 minutes of active work, assuming a standard dining chair with a 16-inch seat. You must then wait 24 hours for the glue to cure and the cane to shrink tight. Hand-weaving a seat through drilled holes takes 4 to 8 hours depending on the pattern complexity. Don’t sit on the chair until the full drying time passes.
Can you use wood filler instead of a spline?
No, wood filler dries rigid and can’t flex with the cane. A chair seat moves slightly every time someone sits down. Filler will crack and fall out of the groove within a few weeks. Always use a real reed spline, which bends and compresses naturally with the wood frame.
Is it safe to sit on a chair with a small hole?
It isn’t safe to put your full weight on a torn cane seat. A small hole concentrates stress on the remaining strands around it. Those strands will snap one by one under normal body weight, turning a quick fix into a complete failure. Stop using the chair until you patch or replace the panel.
How much does cane webbing cost?
A sheet of pre-woven cane and a length of spline are inexpensive relative to replacing the entire chair. Prices change based on the width of the weave and whether you buy online or at a local shop. Check current prices at a dedicated woodworking supplier before buying, as big-box stores rarely carry the right sizes.
Why did my new cane seat sag after a week?
The cane wasn’t soaked long enough before installation, or it dried too slowly in a humid room. Soaking for 30 minutes lets the fibers stretch tight as they shrink during the 24-hour drying period. If you skipped the soak, the panel went in loose and stayed loose. You’ll need to pull it out and start over.
What type of glue works best for cane chairs?
Standard PVA wood glue is the right choice for setting the spline and securing the cane edges. It dries clear, remains slightly flexible, and bonds well to both wood and natural plant fibers. Don’t use construction adhesive or epoxy, as they’re too thick to flow into the narrow groove properly.
Can I paint over the new cane to match my table?
You shouldn’t paint cane seating. Paint clogs the open weave, traps moisture against the fibers, and turns a flexible surface into a stiff one that cracks under weight. If you need a specific color, buy manufacturer-dyed cane or stain the wooden frame separately while keeping the seat masked off.
Conclusion
Once the glue is fully set, you can gently wipe away any excess residue with a damp cloth. If you’d like to protect your work, apply a light coat of clear furniture wax to keep the fibers supple. Your refreshed seat shouldn’t just look great; it’s ready to be enjoyed for years to come.