
The silent guardian of your bathroom floor, the wax ring is a small but mighty component that prevents unpleasant odors and leaks from escaping the base of your toilet. While most attention is rightly focused on the porcelain throne itself, the seal beneath it is equally crucial for a functional and hygienic bathroom. This is especially true for wall-mounted toilets, which present unique considerations for their wax ring installation and maintenance. Unlike their floor-mounted counterparts, wall-mounted toilets rely on a robust internal sealing mechanism within the flushometer or the concealed cistern system, but the principle of creating a watertight and airtight seal remains paramount.
Understanding how this seal works, what can go wrong, and how to address issues is vital for any homeowner or facility manager. A failing wax ring can lead to costly water damage, mold growth, and persistent sewer gas smells, turning your sanctuary into a source of stress.
This guide will delve deep into the world of wall-mounted toilet wax rings, exploring their function, common problems, replacement procedures, and preventative measures, ensuring your bathroom remains a pleasant and problem-free space.
Key Takeaways
- Wall-mounted toilets utilize specialized sealing mechanisms, often integrated within the flushometer or cistern, which function similarly to traditional wax rings in preventing leaks and odors.
- While not a physical wax ring in the traditional sense, the sealing components for wall-mounted toilets are critical and prone to similar failure modes as floor-mounted wax rings.
- Signs of a failing seal include water pooling around the toilet base (if visible), persistent sewer gas odors, and a wobbly toilet.
- Replacement of these seals is a complex task, often requiring specialized tools and knowledge due to the in-wall cistern and mounting system.
- Preventative maintenance involves regular cleaning, avoiding harsh chemicals, and addressing minor issues promptly to avert major problems.
- The type of wall-mounted toilet system (e.g., exposed flushometer vs. concealed cistern) dictates the specific sealing components and replacement process.
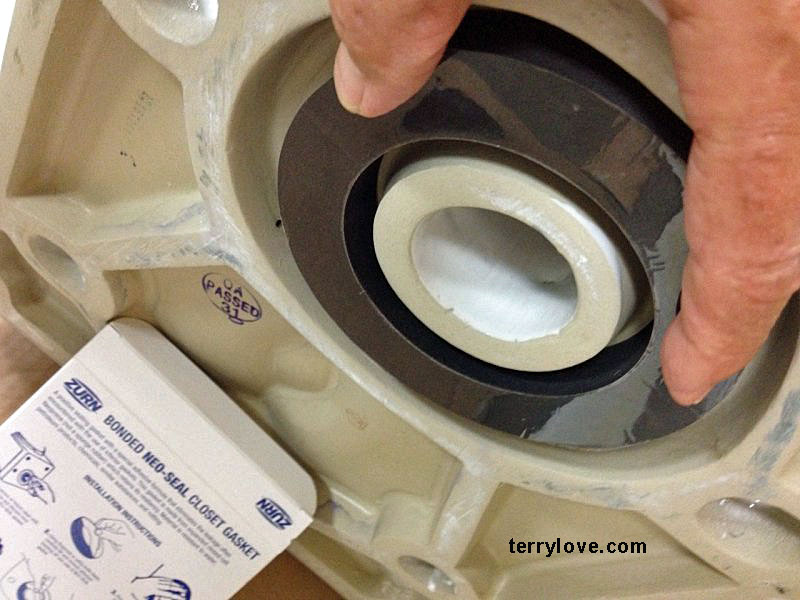
Credit: terrylove.com
Understanding The Wall-mounted Toilet Seal
The concept of a “wall-mounted toilet wax ring” is slightly nuanced. Traditional floor-mounted toilets use a thick, pliable wax ring placed between the toilet flange on the floor and the toilet’s base. This wax deforms under the weight of the toilet, creating a watertight and airtight seal. Wall-mounted toilets, however, often integrate their sealing mechanisms differently. They typically connect directly to a flushometer valve or a concealed cistern system that is recessed within the wall.
The Role Of The Flushometer Valve Seal
For wall-mounted toilets directly connected to a flushometer valve (often seen in commercial or public restrooms), the primary seal preventing leaks and odors occurs at the connection point between the toilet’s outlet and the flushometer assembly. This connection might use a rubber gasket, a neoprene seal, or a specialized flange with an integrated sealing material. The flushometer itself is designed to create a powerful, direct flush, and its seal with the toilet’s waste outlet is critical.
- Mechanism: The toilet’s outlet horn fits snugly into the flushometer’s inlet. A rubber gasket or a precisely engineered flange ensures that no water or sewer gas can escape upwards or sideways.
- Failure Points: Over time, the rubber gasket can degrade, crack, or become brittle due to age, chemical exposure (from cleaning products), or improper installation. This can lead to water seeping out or sewer gases entering the bathroom.
The Concealed Cistern System Seal
Wall-mounted toilets intended for residential use often feature a concealed cistern, where the water tank is hidden within the wall cavity. The toilet bowl then connects to an outlet pipe that leads to this cistern’s flush mechanism. The sealing in these systems is typically located within the flush valve assembly of the cistern and at the point where the toilet bowl connects to the waste pipe exiting the wall.
- Flush Valve Seal: Inside the concealed cistern, the flush valve seat and its accompanying flapper or dual-flush mechanism create a seal to hold water in the tank. While not directly related to the toilet’s external seal, a faulty flush valve can cause running toilets, which indirectly puts more stress on the entire system.
- Wall Outlet Seal: The critical seal for preventing external leaks and odors is where the toilet bowl’s outlet connects to the waste pipe that passes through the wall and connects to the concealed cistern’s flush mechanism. This connection often uses a specialized rubber spigot seal or an O-ring, designed to create a tight fit within the waste pipe fitting.
Why “wax Ring” Is Still A Relevant Concept
Even though a literal block of wax might not be present in many wall-mounted systems, the function of a wax ring, creating a robust, watertight, and odor-proof seal between the toilet and the drainage system, is still the core principle. The materials and designs used in wall-mounted toilets are engineered to achieve this same outcome, albeit through different components like specialized gaskets, O-rings, and precisely fitted flanges. When these specialized seals fail, the symptoms and consequences are remarkably similar to a failed wax ring in a floor-mounted toilet.
Credit: terrylove.com
Common Issues And Warning Signs
Identifying problems with the sealing mechanism of a wall-mounted toilet is crucial for preventing more significant damage. Because much of the plumbing is hidden within the wall, subtle signs can be the first indicators of trouble.
Persistent Odors
One of the most common and unsettling signs of a failing seal is the presence of sewer gas odors in the bathroom. These gases, primarily methane and hydrogen sulfide, are naturally occurring byproducts of waste decomposition. A properly sealed toilet prevents these gases from escaping into your living space.
- The Smell: The odor is often described as sulfuric, like rotten eggs, or simply a general “sewage” smell. It can be intermittent or constant.
- Cause: If the seal between the toilet outlet and the waste pipe is compromised, these gases can bypass the water trap in the toilet bowl and waft into the room. In wall-mounted systems, this could be due to a degraded O-ring or a loose connection at the flushometer or cistern outlet.
Water Leaks And Pooling
While less obvious in wall-mounted systems compared to floor-mounted ones (where water pools directly on the floor), leaks can still occur, often in less visible areas.
- Hidden Leaks: Water might leak from the connection point behind the wall and seep into the wall cavity, leading to hidden water damage. This can manifest as damp spots on the wall near the toilet, discolored drywall, or even mold growth within the wall.
- Flushometer Leaks: If the leak is at the flushometer connection, you might notice water dripping down the outside of the pipework or pooling at the base of the flushometer assembly, even if it’s not directly on the floor.
- Visible Water (Rare): In some installations, particularly if the wall is not perfectly sealed around the toilet base, minor leaks might eventually find their way to the floor, appearing as small puddles.
Toilet Instability Or Movement
A wobbly toilet is a clear sign that the seal at its base is compromised. While less common with wall-mounted toilets that are securely fastened to the wall frame, any looseness can indicate a problem with the connection to the waste pipe.
- Connection Looseness: If the pipe connecting the toilet bowl to the waste outlet within the wall is not securely fastened or if the seal material has failed, the toilet might exhibit a slight rocking motion when sat upon.
- Impact: This instability can further exacerbate the seal failure, leading to more significant leaks and potential damage to the wall or the toilet itself.
Reduced Flushing Performance Or Unusual Noises
While not always a direct indicator of the *seal*, issues with the sealing components can sometimes coincide with problems in the flushing mechanism.
- Incomplete Flush: A poor seal might affect the pressure dynamics of the flush, leading to a weaker or incomplete flush.
- Gurgling Sounds: Unusual gurgling sounds during or after flushing can indicate that air is being drawn into the waste pipe due to a faulty seal, or that sewer gases are being pushed back up.
Replacing The Seal In Wall-mounted Toilets
Replacing the sealing components in a wall-mounted toilet is generally a more complex and involved process than replacing a wax ring on a floor-mounted toilet. It often requires partial disassembly of the toilet and access to the in-wall plumbing. The exact procedure depends heavily on the type of system installed.
Replacing Flushometer Valve Seals
For wall-mounted toilets using a flushometer valve, the process involves carefully disconnecting the valve from the toilet outlet.
Steps:
- Turn Off Water Supply: Locate the shut-off valve for the toilet and turn it off completely. Flush the toilet to drain as much water as possible from the system.
- Disconnect Supply Line: Unscrew the water supply line connecting the valve to the water source.
- Loosen Mounting Bolts/Nuts: Identify and loosen the nuts or bolts that secure the flushometer valve to the toilet’s outlet horn. This may involve accessing them from behind the toilet or through an access panel.
- Remove Old Seal: Once the valve is loosened, carefully pull it away from the toilet outlet. The old gasket or seal will likely be visible at this connection point. Remove any residue of the old seal.
- Clean Surfaces: Thoroughly clean both the toilet outlet horn and the mating surface on the flushometer valve. Ensure no debris or old sealant remains.
- Install New Seal: Fit the new, compatible gasket or seal onto the flushometer valve or the toilet outlet, ensuring it sits correctly.
- Reassemble: Reconnect the flushometer valve to the toilet outlet, tightening the mounting nuts or bolts securely but without overtightening, which could damage the new seal or the porcelain.
- Reconnect Supply Line: Reattach the water supply line.
- Turn On Water and Test: Slowly turn the water supply back on and check for leaks. Flush the toilet several times to ensure the seal is holding and the flush is effective.
Pro Tip: Always purchase a replacement seal specifically designed for your model of flushometer valve. Generic seals may not provide an adequate fit and could fail prematurely.
Replacing Concealed Cistern Seals
Replacing seals in a concealed cistern system is more intricate because the flush valve assembly is hidden within the wall. Access is typically gained through an access panel, often located above or behind the toilet cistern.
Steps:
- Turn Off Water Supply: Shut off the main water supply to the toilet at the shut-off valve.
- Access the Cistern: Open the access panel to the concealed cistern. This might involve removing screws or simply lifting a cover.
- Identify the Flush Valve: Locate the flush valve mechanism within the cistern. This is the component that releases water into the toilet bowl.
- Disconnect Outlet Pipe (if applicable): In some systems, the pipe connecting the cistern to the toilet bowl might need to be disconnected from the cistern outlet. This usually involves loosening a large nut or securing clamp.
- Remove the Flush Valve Assembly: Depending on the design, the entire flush valve assembly may need to be removed from the cistern. This often involves unscrewing a large retaining nut from underneath the cistern.
- Replace Internal Seals: Once the flush valve is out, you can access and replace the internal seals, such as the main flush valve seal (often a large rubber diaphragm or flapper) and any O-rings on the outlet connection.
- Clean and Reassemble: Clean all mating surfaces. Reassemble the flush valve mechanism, ensuring all seals are correctly seated. Reconnect the outlet pipe to the cistern if it was detached.
- Secure Cistern and Panel: Reinstall the flush valve assembly into the cistern, tightening the retaining nut. Close and secure the access panel.
- Turn On Water and Test: Turn the water supply back on slowly and check for leaks around the cistern and the toilet connection. Flush the toilet multiple times to test the seal and flushing performance.
Example: When dealing with a Geberit concealed cistern, the flush valve unit can often be removed by simply unscrewing a large plastic nut from below. The seals are integrated into this unit and are typically replaced as a complete assembly or with specific replacement seal kits.

Credit: www.youtube.com
Choosing The Right Replacement Seal
The market offers various types of seals, and selecting the correct one is paramount for a successful repair. Unlike the ubiquitous universal wax ring for floor-mounted toilets, seals for wall-mounted systems are often model-specific.
Factors To Consider:
- Toilet Brand and Model: The most crucial factor. Different manufacturers use proprietary designs. Always refer to your toilet’s manual or identify the exact model number.
- Type of System: Is it a flushometer valve system or a concealed cistern system? Within concealed cisterns, are there different flush valve designs (e.g., dual-flush, single-flush)?
- Material: Seals are typically made from durable rubber, neoprene, or silicone. Ensure the material is compatible with your plumbing and resistant to common cleaning chemicals.
- Size and Dimensions: Precise measurements are critical. An ill-fitting seal will not create a proper barrier and will likely fail.
Where To Find Replacements:
- Manufacturer’s Website: The most reliable source for genuine replacement parts.
- Plumbing Supply Stores: Reputable stores often stock parts for major brands or can help you order them.
- Online Retailers: Websites like Amazon, Build.com, or specialized plumbing parts sites can be good resources, but ensure you are buying from a trusted seller and verify compatibility.
Data Point: According to a survey by the National Association of Home Builders, plumbing repairs, including toilet issues, are among the most common home maintenance tasks, with costs varying significantly based on complexity. Replacing a simple wax ring might cost $100-$200 in labor and parts, while in-wall system repairs can range from $250 to $700 or more due to the increased labor and potential for hidden issues.
Installation And Maintenance Best Practices
Proper installation and regular maintenance are key to extending the life of your wall-mounted toilet’s sealing components and preventing future problems.
Installation Tips:
- Read the Manual: Always consult the installation manual for your specific toilet and flushing system.
- Cleanliness is Key: Ensure all surfaces where the seal will make contact are clean, dry, and free from debris or old sealant.
- Correct Torque: Do not overtighten connections. This can crack porcelain or damage the seal, leading to leaks. Use a wrench carefully and stop when the connection feels snug.
- Test Thoroughly: After installation, run water through the system and check meticulously for any signs of leaks or unusual noises.
Regular Maintenance:
- Avoid Harsh Chemicals: Strong chemical cleaners, especially those containing bleach or abrasive agents, can degrade rubber and plastic seals over time. Opt for milder, toilet-specific cleaners.
- Regular Cleaning: Keep the area around the toilet clean. While wall-mounted toilets reduce floor-level dirt, regular cleaning of the bowl and visible components helps maintain overall hygiene.
- Inspect Periodically: If you have access panels, take a moment to visually inspect the visible plumbing for any signs of moisture or corrosion.
- Address Small Issues Promptly: If you notice a slight odor, a minor drip, or a change in flushing performance, investigate the cause immediately. Addressing small problems early can prevent them from escalating into major, costly repairs.
- Professional Check-ups: Consider having a plumber inspect your plumbing system, including the wall-mounted toilet, during routine maintenance checks, especially if your home is older.
When To Call A Professional Plumber
While some minor repairs, like replacing a visible gasket on a flushometer, might be within the reach of a confident DIYer, many issues with wall-mounted toilets are best left to the professionals.
Reasons To Hire A Plumber:
- Lack of Experience: If you’re uncomfortable working with plumbing or lack the necessary tools, it’s safer to hire a professional.
- In-Wall Systems: Working with concealed cisterns and in-wall plumbing requires specific knowledge and tools. Mistakes can lead to significant water damage within the walls.
- Persistent Odors: If odors persist after attempting a repair, or if you can’t locate the source, a plumber has specialized equipment (like leak detectors or cameras) to diagnose the issue.
- Water Damage: If you suspect water damage within the walls, it’s crucial to have a plumber assess the extent of the problem and perform necessary repairs to prevent mold growth and structural issues.
- Complex System Designs: Some high-end or older wall-mounted systems might have unique components that require expert knowledge for repair.
In my experience, attempting to force a repair on a complex in-wall system without understanding its intricacies can often lead to more costly damage. It’s usually more economical in the long run to invest in professional expertise for these types of installations.
Comparison Of Sealing Methods
To better understand the context, let’s compare the sealing methods used in different toilet types.
| Toilet Type | Primary Sealing Component | Location of Seal | Complexity of Replacement | Typical Issues |
|---|---|---|---|---|
| **Floor-Mounted Toilet** | **Wax Ring** (standard or wax-free alternative) | Between toilet flange on floor and toilet base | Moderate | Leaks, odors if wax ring is damaged, dried out, or improperly seated. |
| **Wall-Mounted (Flushometer)** | **Rubber Gasket / Neoprene Seal** | Between toilet outlet horn and flushometer valve | Moderate | Gasket degradation, improper fit, leading to leaks and odors. |
| **Wall-Mounted (Concealed Cistern)** | **Rubber O-ring / Spigot Seal** (at waste pipe connection) & **Flush Valve Seals** (internal to cistern) | Toilet outlet to waste pipe; within cistern flush valve assembly | High | O-ring/spigot seal failure, flush valve seal wear, leading to leaks/odors. |
Frequently Asked Questions
What Is The Difference Between A Wax Ring And The Seal In A Wall-mounted Toilet?
A traditional wax ring is a thick, pliable ring of wax used in floor-mounted toilets to create a seal between the toilet flange and the toilet base. Wall-mounted toilets typically use rubber gaskets, O-rings, or specialized seals integrated into the flushometer valve or the connection between the toilet and the in-wall waste pipe. While the material differs, the function, creating a watertight and airtight barrier, is the same.
How Often Should I Replace The Seals In My Wall-mounted Toilet?
There is no fixed schedule for replacing seals in wall-mounted toilets, as their lifespan depends on usage, water quality, and cleaning products used. However, seals can degrade over 5-10 years or more. The best approach is to replace them when you notice signs of failure, such as leaks or persistent odors, or during major renovations that involve accessing the plumbing.
Can I Use A Standard Wax Ring For A Wall-mounted Toilet?
No, you cannot use a standard wax ring for a wall-mounted toilet. These toilets use specialized sealing components designed for their specific plumbing configurations (flushometer or concealed cistern systems) and mounting methods. Using a wax ring would be ineffective and could lead to leaks and improper sealing.
My Wall-mounted Toilet Smells Like Sewage. What Should I Do?
A persistent sewage smell is a strong indicator of a seal failure. For a wall-mounted toilet, this could be an issue with the seal between the toilet bowl and the waste pipe inside the wall, or potentially a problem with the flush valve within a concealed cistern. Turn off the water supply to the toilet and call a qualified plumber immediately to diagnose and repair the source of the odor. Attempting to fix it yourself without proper knowledge can worsen the problem.
How Do I Know If My Wall-mounted Toilet Is Leaking Inside The Wall?
Signs of a leak inside the wall include dampness or discoloration on the wall surface near the toilet, mold or mildew growth, peeling paint or wallpaper, or an unexplained increase in your water bill. If you suspect an internal leak, shut off the water supply to the toilet and contact a plumber urgently to prevent extensive water damage.
The integrity of the seal in any toilet system is fundamental to its proper function and the hygiene of your bathroom. For wall-mounted toilets, while the components may differ from the familiar wax ring, the principle of maintaining a robust barrier against leaks and odors remains identical.
By understanding the specific sealing mechanisms involved, recognizing the warning signs of failure, and knowing when to seek professional help, you can ensure your wall-mounted toilet operates efficiently and without issue for years to come. Regular checks and prompt attention to any developing problems are the best defense against costly water damage and unpleasant bathroom odors.