
You can fix cracks or holes in your furniture by using a strong two-part epoxy or a plastic welding kit to fuse the material together. Most people find out how to repair plastic patio chairs when they notice small hairline cracks that slowly grow into larger splits over time. The most common cause of this damage is long-term exposure to ultraviolet light, which breaks down the polymers in the plastic and makes it brittle.
Why plastic patio chairs break
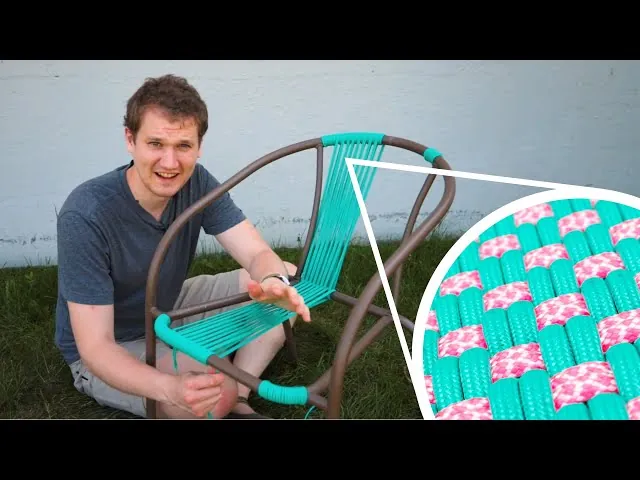
Plastic patio chairs are usually made from polypropylene or high-density polyethylene. These materials are durable, but they aren’t immune to the environment. Over several years, the sun’s rays cause a chemical process called photo-oxidation. This process breaks the polymer chains, causing the material to lose its inherent flexibility and become brittle.
As the plastic loses its elasticity, it becomes stiff and prone to cracking under the weight of a person sitting on it. You can spot this degradation early when the surface feels chalky to the touch or when the color fades unevenly across the seat. Ignoring these signs often leads to sudden failure during a normal dinner party, turning a relaxing evening into a trip to the emergency room for stitches.
Another factor is temperature fluctuation. Plastic expands when it’s hot and contracts when it’s cold. If your chairs stay outside all year, these constant changes put stress on the joints and the molded frame. Eventually, this stress manifests as stress fractures, especially near the legs or where the backrest meets the seat. If you live in a climate with extreme heat, the material reaches its limit faster than it would in a temperate zone.
Chairs left uncovered in direct summer sun may fail much sooner than those stored in a garage during winter. You can check the manufacturer’s guidance on the original packaging or their website to see if your chairs are rated for all-weather use or if they require seasonal storage. Moving them inside when temperatures drop below freezing prevents the material from becoming brittle enough to snap under minor pressure.
Use epoxy for small cracks
To fix small cracks, you need a two-part epoxy that’s specifically labeled for use on plastic surfaces. Start by cleaning the area thoroughly with soap and water to remove any dirt or oils. Once the surface is dry, use a fine-grit sandpaper to rough up the plastic around the crack. This helps the adhesive grip the material better. Apply the epoxy into the crack using a small spreader or a putty knife, ensuring it fills the gap completely.
If you have a crack that goes all the way through the material, place a piece of fiberglass mesh or a thin plastic patch behind the crack before applying the epoxy. This provides a bridge for the resin to bond to.
If the crack is less than 2 inches long, you can usually handle it with a standard repair kit; for larger structural splits, you should consider replacing the chair instead of attempting a patch. Allow the epoxy to cure for at least 24 hours before you put any weight on the seat. You can tell it worked if the bond feels solid and there’s no movement in the crack when you apply gentle pressure.
Weld larger breaks with heat
For larger holes or deep splits, a plastic welding kit is the most effective tool. This device uses a heated tip to melt a plastic filler rod into the gap, effectively fusing the new material with the old. You must work in a well-ventilated area because melting plastic releases fumes that can be harmful if inhaled.
First, align the broken edges of the plastic. If the edges are jagged, use a utility knife to trim them so they fit together cleanly. Turn on your welding tool and let it reach the recommended temperature, which is usually around 500 to 600 degrees Fahrenheit for most patio plastics. Run the heated tip along the seam to melt the plastic, then feed the filler rod into the molten area.
Once the repair cools, use sandpaper to smooth out any rough edges until the surface feels even with the rest of the chair. This method isn’t for someone who has never worked with heated tools before; if you aren’t comfortable managing high-heat equipment, seek a professional or replace the item. A successful weld will be rigid and show no light through the seam when held up to the sun.
Reinforce stress points with backing plates
If a chair cracks in the same spot twice, the material is too thin to support weight. Chemical bonds will fail again. You need mechanical reinforcement. Cut a piece of rigid, non-corrosive material like aluminum or thick PVC board to fit behind the crack. Use stainless steel bolts and washers to secure this backing plate to the underside. This approach works best for chairs that are structurally sound but have a weak spot near a leg attachment.
Select a drill bit slightly smaller than your bolts to create pilot holes. Tighten the hardware until the plate pulls the plastic edges together firmly. Don’t overtighten, as this can strip the threads or crush the plastic further.
If the crack sits on a curved surface, a flat metal plate will gap and fail. In that situation, you must use a flexible plastic strip that matches the curve of the chair exactly. Bend the strip gently to test the fit before drilling any holes.
This repair isn’t for someone seeking a seamless aesthetic finish. The bolt heads will remain visible on the front side of the seat. However, it’s the most reliable way to ensure the chair remains safe for daily sitting. Ignore cosmetic concerns if safety is at stake. A visible bolt is better than a sudden collapse. Check the tightness of these bolts every three months.
Vibration from regular use can loosen them over time. If you hear creaking, tighten them immediately. This simple maintenance step prevents the crack from reopening under stress. Always wear eye protection when drilling into old plastic. Shards can fly unpredictably. Clean the area with alcohol before attaching the plate to remove oils that might cause slippage during installation.
Common repair mistakes to avoid
Using super glue creates a brittle bond that snaps the moment someone sits down because it can’t flex with the plastic. Always choose a flexible epoxy or a specialized plastic welder for load-bearing joints.
If you leave dust or grease on the plastic, the adhesive sticks only to the surface debris, causing the repair to fail within weeks. Wipe every surface with isopropyl alcohol before applying any bonding agent.
Sanding too deep thins the plastic further, which creates a new weak spot right next to the one you’re trying to fix. Limit your sanding to a light scuffing just to provide texture for the glue to grip.
Most people try to use the chair too soon, which prevents the adhesive from reaching its full structural strength. Wait at least twenty-four hours before applying weight. If the ambient temperature is below sixty degrees, double that wait time to ensure the bond reaches full structural integrity.
Prevent further damage to chairs

The best way to stop future cracks is to reduce the environmental stress on the plastic. If you’re currently leaving your furniture in direct sunlight for 8 hours or more, move them to a shaded area during the hottest part of the day. UV exposure breaks down polymer chains, making the material brittle and prone to snapping under weight.
If you stack chairs outdoors, moisture traps between the seats and accelerates degradation. Move them to a shed or garage during the off-season. If you have limited space, use a breathable cover rather than plastic tarps, which trap heat and moisture against the surface.
Avoid using harsh chemical cleaners or abrasive scrubbers. These create micro-fissures that act as starting points for larger cracks. Use mild soap and a soft cloth instead. If you notice white stress marks appearing near the joints, stop using the chair immediately. These marks indicate the plastic has reached its fatigue limit and will likely fail under load. Always lift your chairs to move them. Dragging them across concrete creates deep gouges that weaken the structural integrity of the legs.
Frequently asked questions
Is it safe to repair a chair that has a deep crack?
No, it isn’t safe to repair a chair if the crack is located on a structural load-bearing point. Deep splits indicate the material has lost its integrity and could collapse suddenly. Always test the repair with a heavy, non-living object before use.
How long does a plastic repair last?
A high-quality repair using two-part epoxy or plastic welding can last several seasons if stored out of direct sunlight. The lifespan depends on weight and frequency of use. If the area turns white or shows new fractures, the plastic has become too brittle to use.
Can I use duct tape for a temporary fix?
No, duct tape isn’t a suitable repair because the adhesive fails quickly when exposed to heat and moisture. It also leaves a sticky residue that prevents proper epoxy or welding later. Use a heavy-duty zip tie for a temporary fix, then perform a proper repair.
What is the best way to clean plastic before fixing it?
Clean the surface using mild dish soap, warm water, and a nylon brush to remove dirt without damaging the plastic. Stubborn grease can be removed with isopropyl alcohol. Ensure the plastic is completely dry before applying any adhesive to ensure a strong bond.
How do I know if my chair is made of recyclable plastic?
Check the underside for a recycling symbol containing a number between 1 and 7 to identify the material. Most chairs are made from HDPE or polypropylene, which respond well to welding. If the chair feels rigid and shatters like glass, it’s a thermoset plastic that can’t be welded.
Conclusion
Once it’s cured, give the chair a gentle test to make sure it holds. You’ll likely want to move it into the shade or cover it when not in use, which helps prevent future sun damage. That simple habit keeps your repairs solid and your outdoor space looking fresh for seasons to come.