
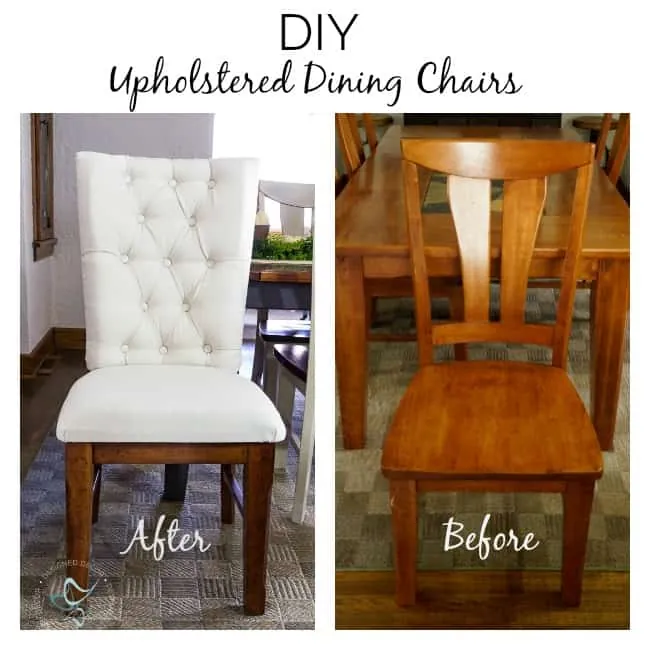
Recovering upholstered dining chairs means stripping the old fabric and padding from a chair frame and replacing it with new materials so the seat looks and feels like new again. This process works on most chairs with wood frames and removable seats, from vintage side chairs to modern dining sets, and it costs far less than buying new furniture. The following guide walks through every stage, from assessing whether a chair is worth saving to attaching the final layer of fabric, plus the tools, supplies, and troubleshooting tips that make the job succeed.
Key Takeaways
- Remove the seat from the frame before you start so you can work on a flat surface and reach every staple.
- Pull new fabric tight and staple from the center outward to avoid wrinkles and sagging.
- Replace foam or batting only when the old padding is compressed, torn, or smells musty; otherwise clean and reuse it.
- Choose upholstery-grade fabric rated for at least 15,000 double rubs so the seat survives daily dining use.
- Leave two to three inches of extra fabric around all sides to wrap and staple without running short.
- Use a pneumatic or electric staple gun with 3/8-inch staples for wood frames; hand tackers often jam on hardwoods.
Assess the Chair Before You Start
Not every dining chair is worth recovering. Check the frame for wobbly joints, cracked wood, or broken stretchers before you buy fabric. A solid wood frame with a drop-in seat is the easiest candidate. If the seat is upholstered directly to the frame with no removable panel, the job takes longer because you must work around legs and aprons.
Look at the existing foam or batting. Padding that springs back when pressed can usually be cleaned and reused. Foam that crumbles, stays compressed, or holds a musty smell should be replaced. Also check the old fabric for signs of bedbugs, mold, or heavy pet staining; if any of those are present, dispose of the old materials outdoors and sanitize the frame before recovering.
Tools and Materials You Need
Gather everything before removing the old upholstery so the frame doesn’t sit exposed longer than necessary.
Essential tools
- Staple gun — pneumatic, electric, or heavy-duty manual
- Staple remover or flathead screwdriver and pliers
- Scissors or a rotary cutter
- Tape measure
- Marker or chalk
- Screwdriver or drill to remove the seat
- Safety glasses and work gloves
Materials
- Upholstery fabric — enough for all chairs plus 10 percent extra
- Batting or Dacron wrap — optional, for softening edges
- Replacement foam — 1 to 2 inches thick, high-density if replacing
- 3/8-inch staples for wood frames
- Wood glue and clamps — only if frame joints need repair
Pro Tip: Buy all fabric from the same bolt at one time. Dye lots vary between shipments, and two chairs upholstered from different bolts can look mismatched under dining-room light.
Remove the Old Upholstery
Flip the chair upside down and unscrew the seat from the frame if it’s a drop-in style. Set the screws aside in a small container so they don’t roll away. Lay the seat upside down on your work surface and use the staple remover to pry out the old staples. Work slowly around the perimeter; ripping the fabric can leave fibers stuck in the foam and make the next steps messier.
Once the staples are out, peel away the old fabric. Remove the dust cover on the bottom if your chair has one. Inspect the padding underneath. If the foam is still in good shape, brush off dust and set it aside. If you’re replacing it, peel the old foam off the seat board and scrape away any dried adhesive with a putty knife.
Choose the Right Fabric
Dining chairs take daily abuse, so fabric choice matters more than color. Look for upholstery-grade textiles with a double-rub rating of 15,000 or higher. Tight weaves such as cotton duck, linen blends, and performance velvet resist snags and show fewer crumbs than loose weaves. Avoid delicate silks, open-weave burlaps, or lightweight quilting cottons, which tear under regular use.
Pattern placement is another consideration. A centered stripe or large floral motif looks intentional when you align it before cutting. Solid colors hide stains better than light prints, while dark charcoal or navy conceals pet hair between washes.
Fabric Comparison for Dining Chairs
| Fabric Type | Durability | Stain Resistance | Best For |
|---|---|---|---|
| Cotton duck | High | Moderate | Everyday family dining |
| Linen blend | Moderate | Low | Formal rooms, light use |
| Performance velvet | High | High | Homes with kids or pets |
| Leather or faux leather | Very High | High | Easy wipe-down, modern styles |
Measure and Cut the New Fabric
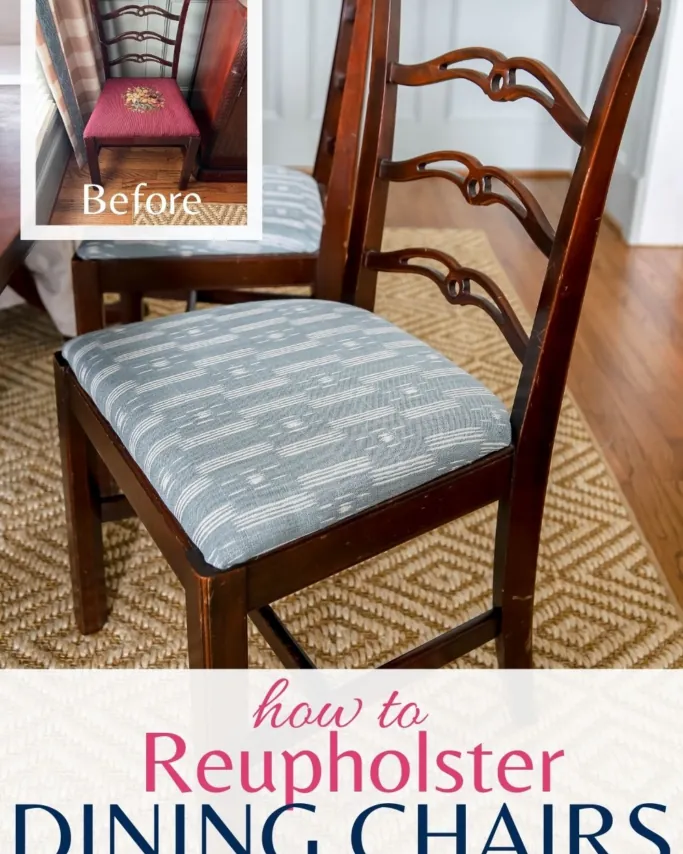
Lay the seat board right-side up on the old fabric to use it as a template, or measure the board and add two to three inches on every side for wrapping. Mark the cutting lines with chalk or a marker. Cut one piece per seat. If you’re using batting, cut it the same size as the fabric.
For multiple chairs, cut all pieces at once so grain direction and pattern alignment stay consistent. Number the pieces and matching seats with painter’s tape if the chairs aren’t identical.
Add or Replace Padding
If the old foam is still firm, lay it on the seat board and cover it with a layer of batting to smooth out edges and prevent the fabric from wearing against the foam. Stretch the batting over the board and staple it temporarily at the center of each side.
When replacing foam, cut high-density upholstery foam to the exact dimensions of the seat board. Spray adhesive made for foam can hold it in place while you work, but it isn’t required if the fabric tension keeps it seated. Wrap the foam with batting before applying the fashion fabric for a softer, more rounded edge.
Warning: Don’t use spray adhesive near an open flame or in a poorly ventilated room. The fumes are flammable and irritating.
Staple the Fabric in Place
Center the seat board on the fabric, wrong side up. Pull the fabric taut at the center of one side and fire one staple to hold it. Move to the opposite side, pull equally tight, and staple. Repeat on the remaining two sides. Working from the center outward keeps the fabric evenly tensioned and prevents wrinkles from migrating to the middle.
At the corners, fold the fabric like wrapping a present: make one neat diagonal fold, pull the side flap tight, and staple. Trim excess bulk if needed, but leave enough fabric to hold the staple without tearing. Continue adding staples every inch or two around the perimeter, always pulling toward the center of the seat so the top stays drum-tight.
Reattach the dust cover to the underside if your chair had one; it hides staples and keeps dust out of the padding.
Reattach the Seat to the Frame
Place the recovered seat back onto the chair frame and align the screw holes. Drive the original screws back in, or use new wood screws if the old ones are stripped. Tighten until the seat doesn’t shift, but don’t overtighten and crack the wood.
If the chair frame itself feels wobbly, now is the time to regluing joints. Apply wood glue to loose connections, clamp them, and let them dry according to the manufacturer’s instructions before putting weight on the chair.
Costs and Time Estimate
Recovering dining chairs is significantly cheaper than replacing them, especially if you already own basic tools.
Typical Cost Range per Chair
| Item | Low | High |
|---|---|---|
| Upholstery fabric (1 yard) | $12 | $45 |
| Foam replacement | $0 | $18 |
| Batting | $2 | $8 |
| Staples | $1 | $4 |
| Seat screws or hardware | $0 | $3 |
| Total per chair | $15 | $78 |
A set of six chairs usually falls between $90 and $470 in materials. Time runs about one to two hours per chair for a beginner, including foam replacement and corner folding.
Troubleshooting Common Problems
Wrinkles across the seat usually mean the fabric wasn’t pulled tight enough before stapling. Remove the staples in that area, re-tension the fabric, and restaple.
Fabric tearing at the corners happens when there isn’t enough material to wrap around the thickness of the foam. Leave at least two inches of excess on all sides, or use a thinner foam layer.
Staples that won’t hold often indicate the staple gun is underpowered for hardwood. Switch to a pneumatic gun or use slightly longer staples, but not so long that they poke through the top of the seat board.
Seat feels uneven after stapling can mean the foam shifted under the fabric. Lift the staples near the high spot, press the foam flat, and restaple.
Frequently Asked Questions
Can I recover a chair without removing the seat?
Yes, but it’s much harder. Working around the legs and apron limits your leverage, makes corner folds difficult, and usually leaves a less professional result. Removing a drop-in seat takes five minutes and is worth the effort.
How much fabric do I need for six chairs?
Plan on one yard of 54-inch-wide fabric per chair as a safe estimate, so six yards total. If your seats are small and square, you might get two seats from a single yard, but buying per chair guarantees pattern matching and extra for mistakes.
What if the frame is wobbly?
Tighten any loose screws first. If joints still rock, disassemble them, apply wood glue, clamp, and let dry fully before recovering the seat. A recovered seat can’t fix a structurally unsound frame.
Can I use regular craft fabric?
You can, but it won’t hold up. Craft and quilting cottons lack the abrasion resistance of upholstery fabric and tend to pill, tear, or stretch out within months of daily dining use. Choose fabric marketed for upholstery with a published double-rub rating.
Do I need to replace the foam every time?
No. Reuse foam that’s still firm, clean, and odor-free. Add a layer of batting over it for comfort. Replace foam only when it’s crumbling, permanently compressed, or contaminated.
Conclusion
Recovering upholstered dining chairs is a satisfying weekend project that extends the life of furniture you already own. Start with one chair to practice the staple pattern and corner folds before moving on to the rest of the set.