
Refinishing a table and chairs means stripping away the old finish, sanding the wood smooth, applying a new stain or paint, and sealing it so the set looks fresh and lasts for years. You can do it in a weekend or two with basic hand tools, safety gear, and patience for drying time between coats. The process works on most solid wood dining sets, though veneer and laminate need gentler handling.
Key Takeaways
- Remove the old finish completely before sanding so the new stain or paint bonds evenly.
- Sand with the grain, moving from 80 or 100 grit up to 220 grit for a smooth surface.
- Test stain on a hidden spot or scrap piece before committing to the whole set.
- Apply two to three thin coats of polyurethane, sanding lightly between coats.
- Work in a well-ventilated space and wear a respirator when stripping or spraying.
- Allow at least 24 to 48 hours of cure time before using the table and chairs normally.
Tools and Materials You Will Need
Gather everything before you start so you aren’t hunting for supplies mid-project.
- Orbital sander or sanding block
- Sandpaper in 80, 120, 150, and 220 grit
- Chemical stripper or liquid deglosser
- Scraper and steel wool
- Wood stain or paint
- Brushes, foam applicators, or lint-free cloths
- Polyurethane, wax, or oil finish
- Respirator, safety glasses, and nitrile gloves
- Tack cloth and shop vacuum
- Drop cloths and painter’s tape
Pro Tip: Buy an extra quart of finish. You’ll likely need it for touch-ups, and matching a batch later is nearly impossible.
Prepare Your Workspace
Choose a garage, basement, or covered patio with steady airflow and temperatures between 65 and 75 degrees Fahrenheit. Lay down drop cloths to catch dust and drips. Remove cushions, seat pads, and any hardware you can take off. Label chair seats and table leaves with masking tape so they go back in the right spots. Open windows and run a fan to push fumes outside.
Remove the Old Finish
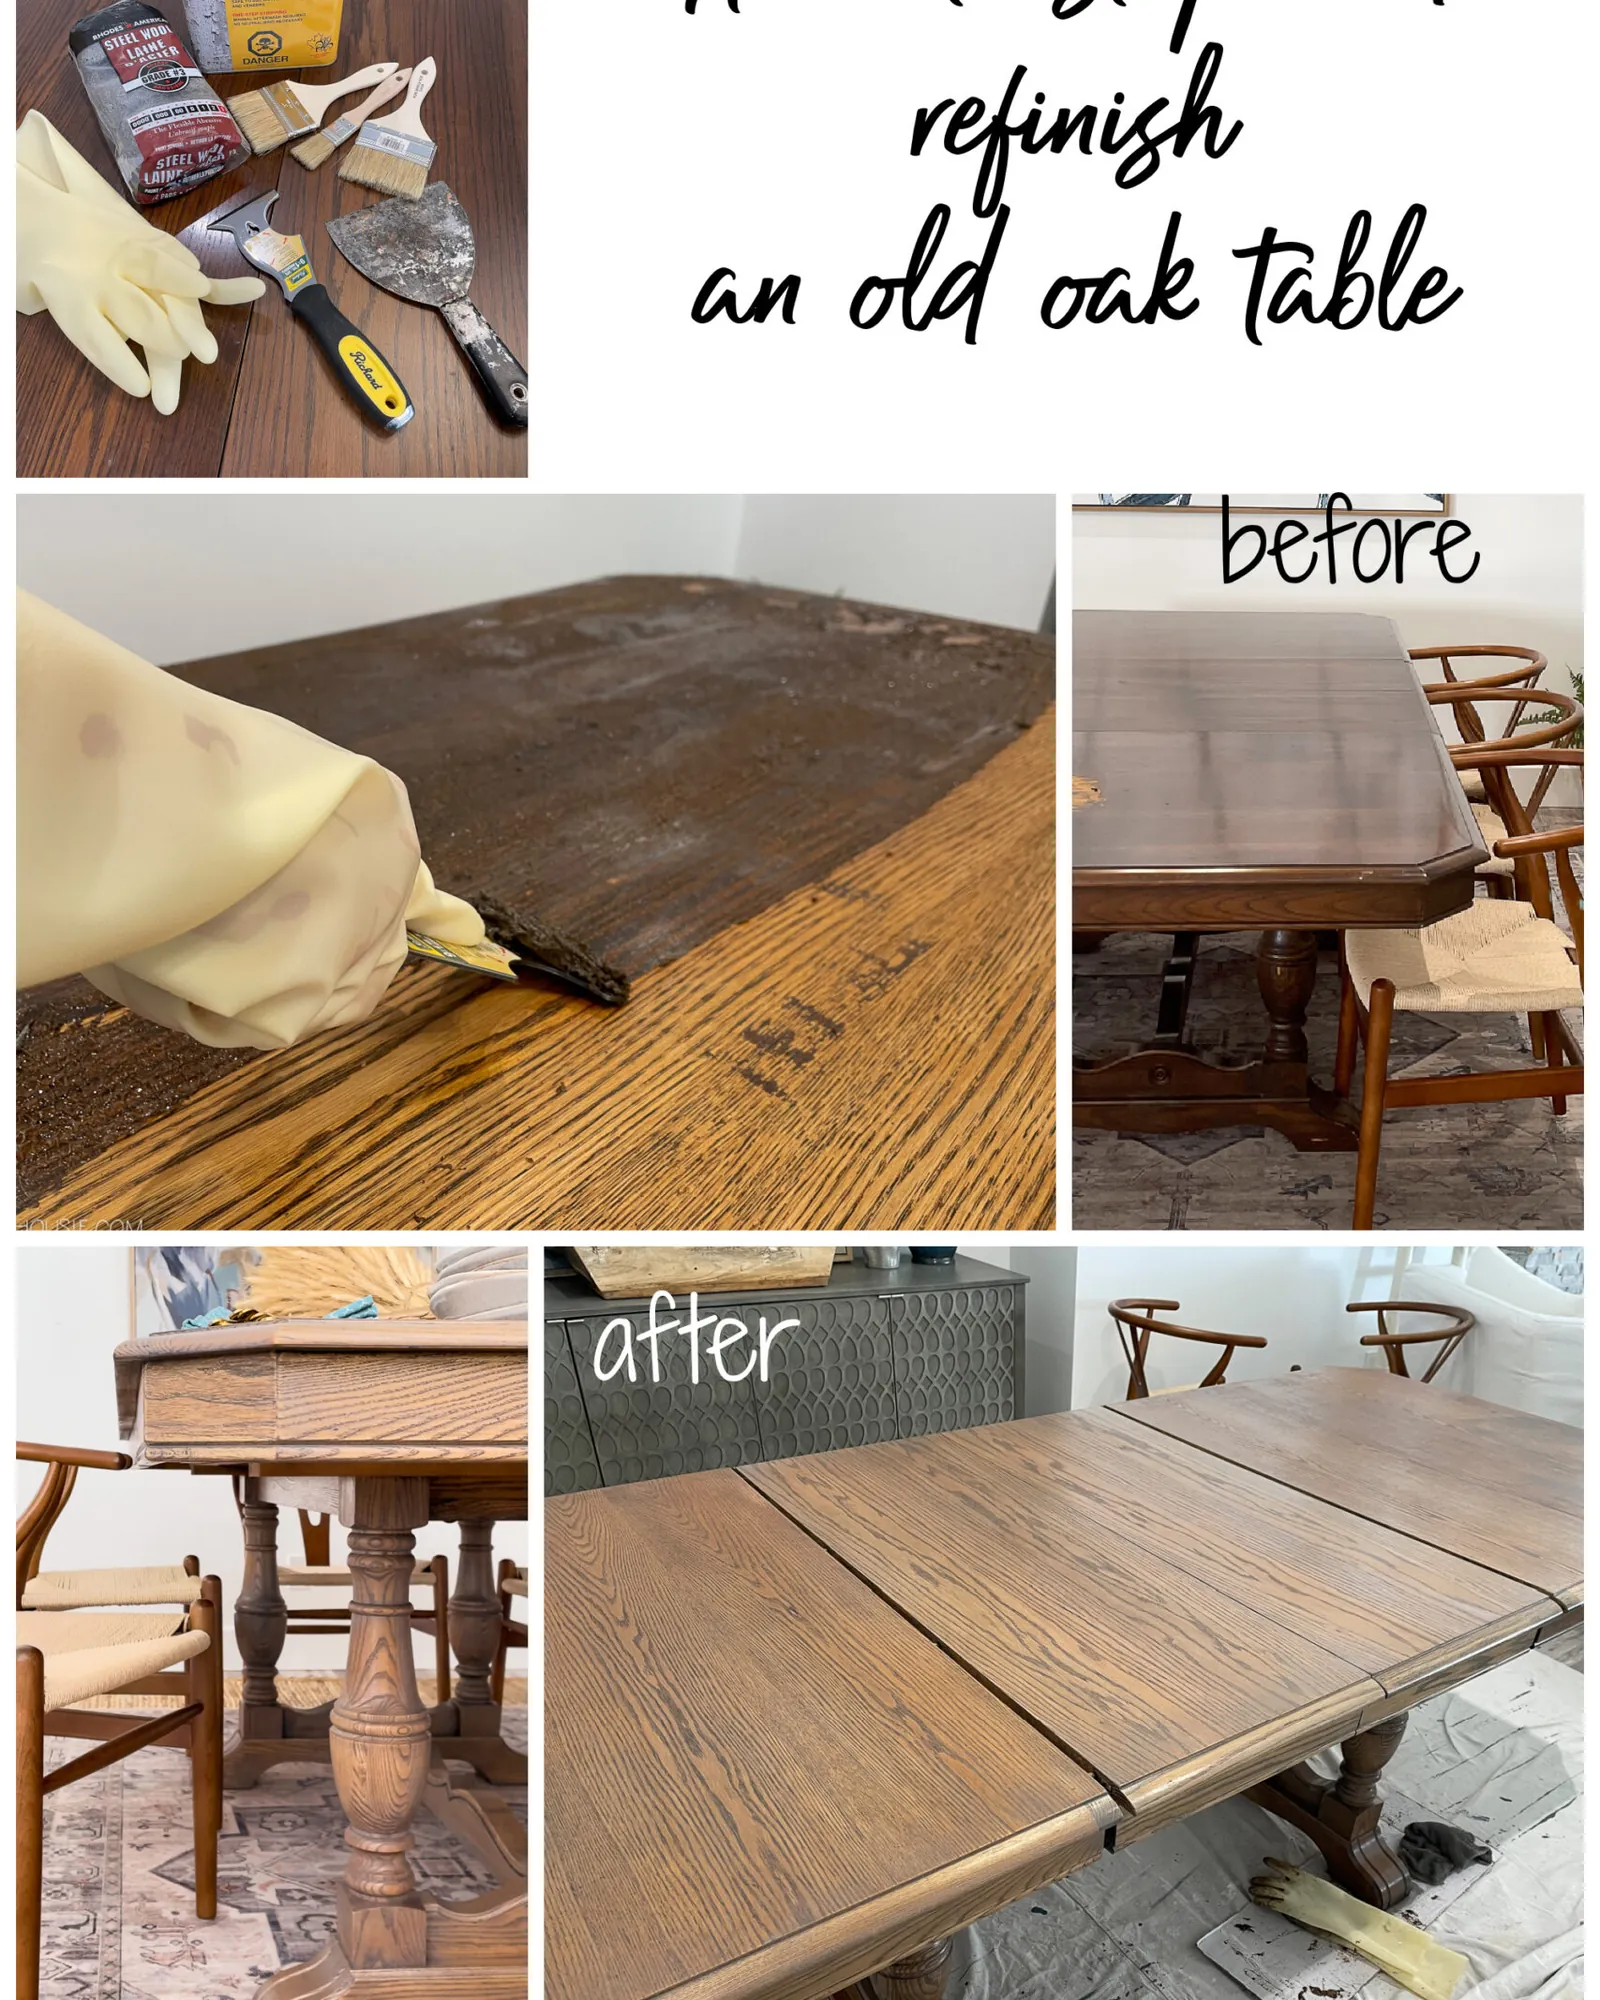
Start by testing the existing finish. Rub a hidden spot with denatured alcohol; if it softens, the piece has shellac, and you can remove it with alcohol alone. If nothing happens, use a chemical stripper painted on in thick, even layers. Wait the time listed on the can, then scrape off the softened finish with a plastic scraper. Use steel wool for carved chair details where a scraper won’t reach.
Wipe the surface with mineral spirits or the stripper’s recommended neutralizer, then let it dry completely. Skipping this step leaves residue that blocks the new finish.
Warning: Chemical strippers and strippers containing methylene chloride produce hazardous fumes. Work outdoors or in a cross-ventilated space, and never use them near a water heater or furnace.
Sand the Wood
Sand with the grain, never against it, to avoid scratches that show through stain. Begin with 80 or 100 grit to level the surface, then move to 120, 150, and finish with 220 grit. Vacuum and tack-cloth between grits. Chair spindles and table edges sand by hand so you don’t round over details. Stop when the wood feels uniformly smooth and looks dull rather than shiny.
Choose a Finish: Stain, Paint, or Oil
The finish you pick changes the look and the upkeep. Stain brings out grain, paint hides it, and oil sits between the two.
| Finish Type | Best For | Typical Dry Time | Maintenance |
|---|---|---|---|
| Oil-based stain | Highlighting wood grain on tables | 8 to 24 hours | Recoat every few years |
| Water-based stain | Faster projects, low odor | 1 to 2 hours | Touch up as needed |
| Latex or chalk paint | Covering old color or damage | 1 to 2 hours | Easy touch-ups |
| Tung or linseed oil | Natural look, low sheen | 24 to 72 hours | Reapply annually |
For dining tables that take daily abuse, polyurethane over stain offers the toughest protection. Chairs can take a softer wax or oil finish since they see less wear.
Apply Stain or Paint
Stir stain thoroughly—don’t shake it, or you’ll create bubbles. Apply with a brush or lint-free cloth, working in sections. Wipe off excess after five to fifteen minutes, depending on the product, always going with the grain. Let it dry, then decide if a second coat deepens the color enough.
Paint needs a primer first if you’re covering dark wood or raw patches. Apply two thin coats rather than one thick one. Sand lightly with 220 grit between coats and wipe away dust with a tack cloth.
Seal and Protect
Once the stain or paint is fully dry, apply a clear topcoat. Polyurethane comes in water-based and oil-based formulas. Water-based dries faster and stays clear; oil-based adds warmth and stands up to heat and moisture better. Use a natural-bristle brush for oil-based products and a synthetic brush for water-based.
Apply thin coats. Two to three coats are standard for a dining table; chairs usually need one or two. Sand lightly with 220 or 320 grit between coats and remove all dust. The final coat should cure for at least 48 to 72 hours before you set plates or drinks on the surface.
Refinish Table and Chairs Together or Separately
You can refinish the whole set at once or tackle pieces individually. Doing everything together guarantees a matching color, but it ties up your workspace for days. Refinishing the table first lets you use the chairs while the table cures, though slight batch differences in stain can show.
| Approach | Pros | Cons |
|---|---|---|
| All at once | Guaranteed color match, one setup | Workspace occupied longer |
| Table first | Chairs stay usable, table gets priority | Possible shade mismatch |
| Chairs first | Smaller pieces dry faster, easier to handle | Table sits unfinished longer |
Veneer and Laminate Considerations
Not every table and chair set is solid wood. Veneer is a thin layer of real wood over a core, and aggressive sanding can sand right through it. Laminate is a printed surface with no real grain. For veneer, use a liquid deglosser or very light sanding with 220 grit, then apply a bonding primer before paint. Stain rarely looks right on laminate; paint is the safer choice.
Troubleshooting Common Problems
Blotchy stain usually means the wood wasn’t pre-conditioned or the wipe-off was uneven. Apply a pre-stain wood conditioner on softwoods like pine before staining. Bubbles in polyurethane come from shaking the can or brushing too vigorously; stir gently and tip off the brush lightly. Peeling paint signals that the surface wasn’t cleaned or sanded enough. If the finish feels tacky after days, the room may be too cold or humid, or you applied coats too thick.
Related guides
- Top 10 Best Modern Coffee Tables for Small Spaces in 2026
- Best Weather Resistant Patio Chairs for Lasting Comfort and Style in 2026
- 10 Best Patio Chairs for Outdoor Lounging: Expert Picks and Verdict in 2026
Frequently Asked Questions
Can I refinish a table without stripping it?
Yes, if the existing finish is sound and you only want a similar or darker color. Clean and lightly scuff-sand with 220 grit, then apply a new coat. A dramatic color change usually requires stripping first.
How long does the whole project take?
Expect two to four days of active work spread over one to two weeks, mostly because each coat of stain, paint, or polyurethane needs time to dry before the next step.
What grit sandpaper should I start with?
Start with 80 or 100 grit to remove finish remnants and level the wood, then progress to 120, 150, and finish with 220 grit before staining or painting.
Do chairs need the same topcoat as the table?
No. Tables benefit from two to three coats of polyurethane for daily use; chairs usually do well with one or two coats, or even wax, since they see less abrasion.
Can I refinish veneer without ruining it?
Only with care. Avoid aggressive sanding that can wear through the thin wood layer. Use a deglosser or very light 220-grit sanding, then prime and paint rather than stain.
How soon can I use the table after refinishing?
Wait at least 48 to 72 hours after the final coat before regular use, and avoid placing heavy or hot objects on it for a full week while the finish cures completely.
Conclusion
Take your time with sanding and drying, because those two steps determine whether the finished set looks professional or rushed. Your next move is to pick a weekend, clear the room, and start with the tabletop so you can see results right away.