
Is your Xbox One controller’s right trigger not working properly? It can be frustrating when your game controls don’t respond the way you want, especially during intense moments.
But don’t worry—you don’t have to buy a new controller just yet. You’ll discover simple and effective ways to fix the right trigger on your Xbox One controller. By the time you finish reading, you’ll know exactly what to do to get back to gaming without any delays.
Ready to take control again? Let’s dive in!
Common Right Trigger Issues
The right trigger on an Xbox One controller plays a key role in many games. It controls actions like shooting, accelerating, or aiming. Problems with this trigger can stop gameplay and cause frustration. Understanding common right trigger issues helps fix the controller quickly and easily.
These issues often happen from daily wear or dirt buildup. Knowing what each problem feels like makes troubleshooting faster. Here are three frequent problems users face with the right trigger.
Trigger Not Responding
The most common issue is the trigger not responding at all. Pressing the trigger may feel normal, but the game does not react. This problem can happen due to a loose connection inside the controller or worn-out parts. Sometimes, dirt or dust blocks the sensor, stopping it from working.
Sticky Or Jammed Trigger
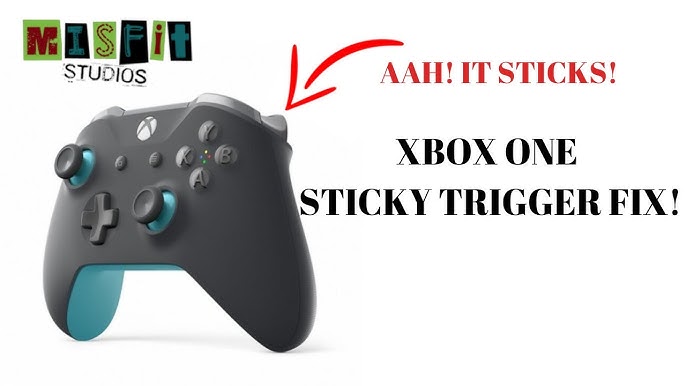
A sticky or jammed trigger moves slowly or gets stuck. This happens if dirt or debris collects around the trigger mechanism. Spills or sweat can also cause the trigger to stick. A jammed trigger makes it hard to play smoothly and may cause repeated actions without control.
Trigger Sensitivity Problems
Sensitivity issues mean the trigger reacts too early or too late. It may cause the action to start before pressing fully or delay the response. This happens due to worn sensors or software glitches. Adjusting the sensitivity or cleaning the trigger can often fix this problem.
Basic Troubleshooting Steps
Basic troubleshooting helps fix many issues with your Xbox One controller. Start with simple steps before trying complex solutions. These steps often solve the right trigger problem quickly.
Restarting The Controller
Turn off your Xbox One controller by pressing and holding the Xbox button. Wait for about 10 seconds. Press the Xbox button again to turn it back on. This can reset the controller and clear minor glitches.
Checking For Firmware Updates
Connect your controller to the Xbox One console with a USB cable. Go to the settings menu and select “Devices & connections.” Choose “Accessories” and then select your controller. Check for available firmware updates and install them. Updated firmware can fix trigger issues.
Reconnecting The Controller
Press the small sync button on the top of the controller. Press the sync button on the Xbox One console. Wait for the controller light to flash and then stay solid. This reconnects the controller to the console and can fix connection problems causing trigger issues.
Cleaning The Right Trigger
Cleaning the right trigger on your Xbox One controller can fix many common problems. Dirt and dust build up inside the trigger can cause it to stick or stop working. Regular cleaning keeps the trigger smooth and responsive. This guide shows simple steps to clean the right trigger safely.
Gathering Cleaning Supplies
Start by collecting all the supplies you need. Use a soft cloth to wipe the outside. Get a small brush or a toothpick to remove dirt from tight spaces. Have a can of compressed air ready to blow out dust. Use isopropyl alcohol for deeper cleaning. Gather cotton swabs or small cloth pieces for applying alcohol.
Removing Dirt And Debris
Hold the controller firmly. Use the brush or toothpick gently around the right trigger. Remove any visible dirt or dust. Blow compressed air into the trigger area to push out hidden debris. Make sure not to press too hard to avoid damage. Repeat these steps until the trigger looks clean.
Using Isopropyl Alcohol Safely
Dip a cotton swab lightly in isopropyl alcohol. Avoid soaking it too much to prevent liquid damage. Gently rub the right trigger and its edges. The alcohol helps dissolve grime and dries quickly. Let the controller sit for a few minutes to fully dry before use. Do not use water or other cleaners that can harm the electronics.

Credit: www.ifixit.com
Resetting The Controller
Resetting your Xbox One controller can fix many trigger issues. It clears minor glitches that stop the right trigger from working properly. There are two types of resets: soft reset and hard reset. Both are easy to do and do not need special tools.
Soft Reset Process
Turn off your Xbox One controller by holding the Xbox button. Keep it pressed for about 10 seconds until the light goes off. Wait for 10 seconds before turning the controller back on. Press the Xbox button again to power it up. This simple reset refreshes the controller’s connection and can fix trigger problems.
Hard Reset Instructions
Remove the batteries from the controller. Press and hold the Xbox button for 20 seconds. This drains any leftover power and resets the controller deeply. Put the batteries back in and turn the controller on. The hard reset can solve more serious trigger issues by clearing stored errors.
Replacing The Right Trigger
Replacing the right trigger on an Xbox One controller can fix many common issues. A worn-out trigger can cause problems like sticking or unresponsiveness. Swapping the old trigger with a new one restores smooth gameplay. This guide helps you replace the trigger safely and easily.
Tools Needed For Replacement
Gather these tools before starting the replacement process:
- Small Phillips screwdriver
- T6 Torx screwdriver
- Plastic opening tool or guitar pick
- Tweezers for small parts
- Replacement right trigger
- Clean workspace with good lighting
Step-by-step Disassembly
First, remove the screws on the back of the controller. Use the T6 Torx screwdriver for the screws near the battery compartment. Next, gently pry open the controller shell with the plastic tool. Avoid forcing it to prevent damage.
Separate the two halves carefully. Take note of the ribbon cables inside. Disconnect the battery and the trigger ribbon cable using tweezers. Set aside the front shell with buttons attached.
Installing A New Trigger
Remove the old right trigger from the back shell. It should lift out easily after removing any clips. Place the new trigger in the exact spot of the old one. Reconnect the ribbon cable securely to the circuit board.
Align both halves of the controller. Press them together until they click into place. Replace all screws tightly but do not overtighten. Test the new trigger before full assembly to ensure proper function.
Credit: www.ifixit.com
Preventive Tips For Trigger Longevity
Taking care of your Xbox One controller’s right trigger helps it last longer. Simple habits can stop damage before it starts. Follow these easy tips to keep your controller working well.
Regular Maintenance
Clean your controller often. Dust and dirt can build up around the trigger. Use a soft cloth or a small brush to remove grime. Avoid using too much liquid near the buttons. Check for sticky spots and clean them gently. This keeps the trigger smooth and responsive.
Avoiding Excessive Force
Press the trigger softly. Pushing too hard can wear out the parts inside. Treat the trigger like a delicate button, not a switch. Avoid banging or slamming it during gameplay. This reduces the risk of breaking or sticking.
Proper Storage Practices
Store your controller in a dry, cool place. Avoid leaving it in hot or humid areas. Keep it away from direct sunlight. Use a protective case or pouch if possible. This prevents dust and moisture from damaging the trigger and other parts.
Credit: www.youtube.com
Frequently Asked Questions
How Do I Fix A Sticky Right Trigger On Xbox One Controller?
Clean the trigger area gently using a cotton swab with rubbing alcohol. Press the trigger repeatedly to loosen dirt and grime. Avoid using too much liquid to prevent damage.
Why Is My Xbox One Right Trigger Not Responding?
The trigger may be dirty, damaged, or have a loose connection. Try resetting the controller or cleaning the trigger first. If it still fails, internal parts might need repair.
Can I Repair The Right Trigger Myself?
Yes, simple fixes like cleaning or resetting are easy to do at home. For internal repairs, use caution and follow online guides carefully. If unsure, professional repair is safer.
How To Reset An Xbox One Controller?
Hold the Xbox button for 10 seconds to turn off the controller. Then press the Xbox button again to turn it on. This can fix minor trigger issues.
Does Firmware Update Fix Right Trigger Issues?
Sometimes, yes. Updating your controller’s firmware can improve performance and fix bugs. Connect to Xbox or PC and check for updates in settings.
What Tools Do I Need To Open Xbox One Controller?
You need a T8 or T9 Torx screwdriver and a plastic prying tool. These help safely open the controller without damage. Avoid using sharp metal tools.
How To Test The Right Trigger After Fixing It?
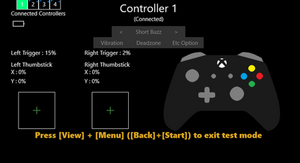
Open the Xbox Accessories app on your console or PC. Press the right trigger and watch for input response. This confirms the trigger works properly.
Why Does The Right Trigger Feel Loose Or Wobbly?
Loose screws or worn-out internal parts cause this issue. Tighten screws or replace damaged components to fix it. Avoid forcing the trigger to prevent damage.
Can Dust Cause Right Trigger Problems?
Yes, dust and dirt can block the trigger mechanism. Regular cleaning helps keep it smooth and responsive. Use compressed air or rubbing alcohol for cleaning.
When Should I Replace My Xbox One Controller?
Replace it if the right trigger is broken beyond repair or worn out. Also, consider a new controller if multiple buttons fail. Repair costs may exceed replacement price.
Conclusion
Fixing the right trigger on your Xbox One controller can be simple. Start by cleaning the trigger area carefully. Check for any stuck parts or dirt that block movement. Testing the trigger after cleaning helps to see if it works smoothly.
If problems continue, replacing the trigger or the whole controller might be needed. Taking small steps saves time and money. Play your games without interruption again. Keep your controller clean and handle it gently. This will help your trigger last longer and work better.