
Drawer Front Essentials
Drawer front essentials are key. They make attaching a false front easy. Good preparation ensures a great finish. Let’s get started.
Choosing The Right Front
Select your false drawer front. It should match your cabinets. Consider the style. Think about the size. Measure carefully. A good fit is important. Wood or laminate works well. Choose a durable material.
Gathering Your Tools
Get your tools ready. You will need a drill. Screws are necessary. Wood glue is helpful. A tape measure is vital. A pencil marks locations. Safety glasses protect eyes. A screwdriver helps too.
Preparing The Drawer Box
Clean the drawer box. Remove any old hardware. Make sure the surface is smooth. Sand down rough spots. This ensures good adhesion. The box should be sturdy. Reinforce if needed. A clean box is best.
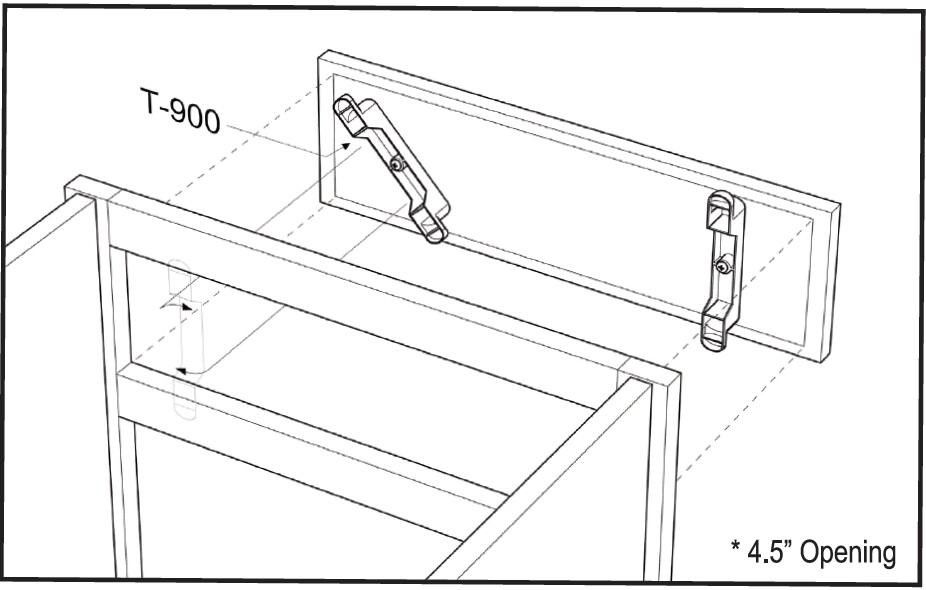
Credit: quikdrawers.com
Attachment Methods
Attaching a false drawer front requires secure methods. These methods ensure the front looks seamless. They also keep it firmly in place. We will explore several popular techniques. Each offers different benefits. Choosing the right one is important.
Screwing From The Inside
This is a strong method. It hides the screws. You drill pilot holes first. Use screws that are not too long. Drive them through the drawer box. They go into the back of the false front. Make sure screws are flush. This prevents them from showing.
Using Dowels And Glue
Dowels add alignment. They also add strength. Drill holes in both pieces. Insert wooden dowels. Apply wood glue to the dowels. Push the false front onto the drawer box. Wipe away excess glue. Clamps can hold it tight. Let the glue dry completely.
Magnetic Attachment
Magnets offer a clean look. They are good for lighter fronts. Attach magnetic strips to the drawer box. Use strong adhesive. Attach matching metal plates. These go on the back of the false front. The magnets will then hold it. This method is easy to remove. It is also simple to adjust.
Alignment And Securing
Proper alignment is key. Ensure the false front is perfectly straight. Secure it firmly with screws for a lasting fit.
Getting your new drawer front perfectly straight is key. This step makes everything look professional. We will focus on getting it just right. Then, we will make sure it stays put.Measuring For Precision
Accurate measurements prevent problems. Measure the cabinet opening carefully. Note the height and width. Transfer these measurements to your false drawer front. Double-check your marks. Precision matters here. This ensures a snug fit.Temporary Fastening
Hold the false front in place. Use painter’s tape to secure it. Tape it lightly at first. Check alignment from all angles. Is it level? Is it centered? Adjust as needed. Once happy, add more tape. This holds it firmly for now. It lets you see the final look.Permanent Fixation
Now, make it last. Remove the temporary tape. Use wood glue on the cabinet back. Position the false front again. Use screws for a strong hold. Drill pilot holes first. Drive screws from inside the cabinet. This hides the screw heads. Your new drawer front is secure.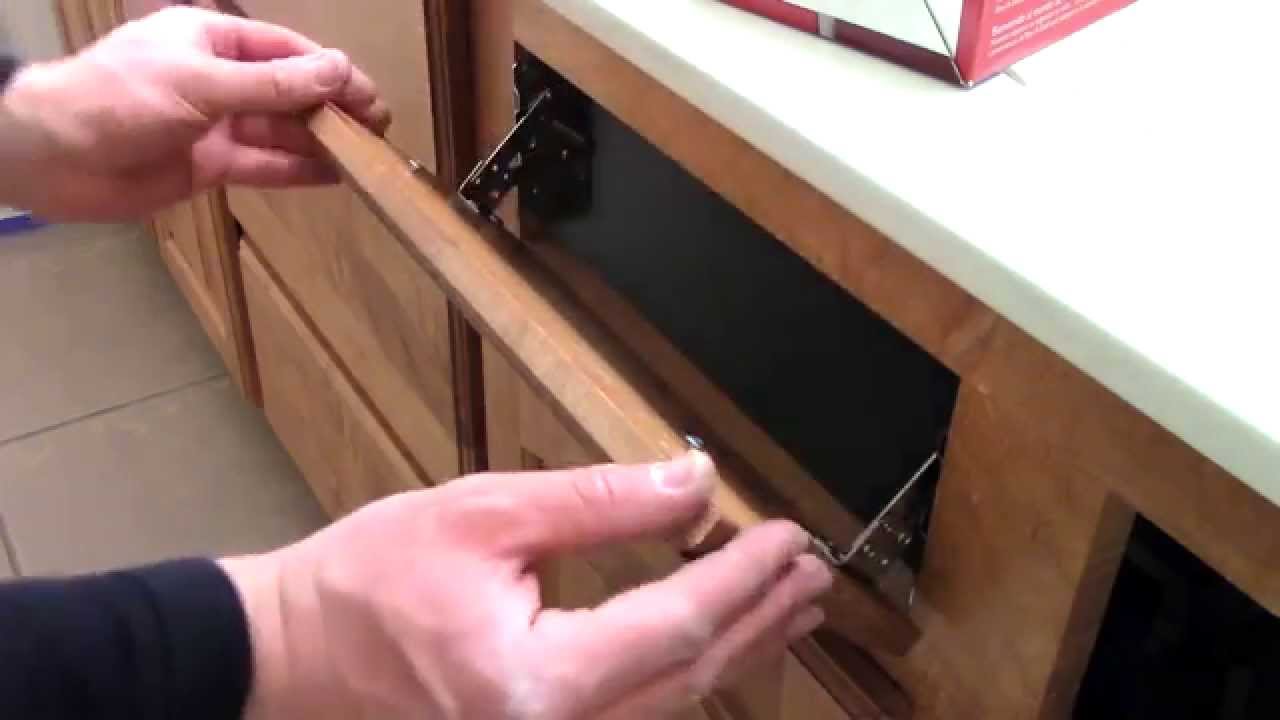
Credit: www.youtube.com
Finishing Touches
The final steps transform your work. These finishing touches make the difference. Your new drawer front looks professional. It blends perfectly.Filling Screw Holes
You see the screw holes. Fill them now. Use wood filler. Choose a color match. A putty knife works well. Smooth the filler flat. Let it dry completely.Sanding And Painting/staining
Sand the filler smooth. Use fine-grit sandpaper. This prepares the surface. Wipe away all dust. Now paint or stain. Apply thin, even coats. Let each coat dry. Add a second coat. This gives a rich look.Hardware Installation
Attach your drawer pull. Or use a cabinet knob. Line up the holes. Screw the hardware securely. This completes the project. Enjoy your updated drawer.Troubleshooting Common Issues
Attaching a false drawer front seems simple. Sometimes, things go wrong. Don’t worry. These common problems have easy fixes. We will help you solve them.
Uneven Gaps
Your false drawer front looks crooked. Gaps are not the same. This is a common problem. Check your alignment marks first. Did you measure twice? Adjust the front slightly. Use shims for tiny gaps. Shims are thin pieces of wood. They fill small spaces. Make sure the front is straight. A level helps here. Re-measure everything carefully. Small adjustments make a big difference.
Warping Or Shifting
The drawer front bends. It moves out of place. This happens for a few reasons. Wood can expand or contract. Humidity affects wood. Make sure you used the right screws. Screws that are too long cause this. They can push the wood. Use shorter screws if needed. Secure the front evenly. Don’t overtighten screws. This can also warp the wood. Re-attach the front firmly. Ensure it lies flat. Consistent pressure is key.
Loose Attachment
The false drawer front feels wobbly. It is not secure. This is frustrating. Check your adhesive. Did you use enough glue? Was the glue fresh? Apply a good amount of wood glue. Ensure it covers the back. Press the front firmly. Use clamps to hold it. Clamps apply steady pressure. Leave them on for the glue to dry. If using screws, check their tightness. They should be snug, not loose. Re-secure any loose screws. A solid attachment is important.
:max_bytes(150000):strip_icc()/IMAGE01-02-2bbb0ebad49845fe9608d58038acccec.jpg)
Credit: www.woodmagazine.com
Frequently Asked Questions
What Tools Do I Need For This Project?
Gather essential tools like a drill, screws, and a measuring tape. You’ll also want a level and some wood glue. A screwdriver is a must.
How Do I Align The False Drawer Front?
Position the front carefully before attaching. Use a level to ensure it’s straight. Measure twice for accuracy.
What Kind Of Screws Work Best?
Use wood screws that are not too long. They should not go through the cabinet. Short, sturdy screws are ideal.
Can I Attach It Without Drilling Holes?
Attaching without drilling is tricky. Adhesives might work for light fronts. However, screws offer the best hold.
How Do I Make It Look Professional?
Ensure perfect alignment and a snug fit. Clean up any excess glue promptly. A smooth finish makes it look great.
What If My Drawer Front Is Heavy?
Heavier fronts need strong support. Use longer screws or additional brackets. Reinforce the attachment for safety.
How Do I Remove A False Drawer Front?
Carefully unscrew it from the cabinet. Gently pry it away if needed. Be mindful not to damage the cabinet.
Conclusion
Attaching a false drawer front is achievable. You can do it yourself. Follow these steps carefully. Measure twice, then drill. Secure the front piece firmly. Your cabinets will look new. Enjoy your updated kitchen.