
Want to share your amazing presentation or favorite movie on the big screen? Connecting your MacBook to a projector with HDMI is simpler than you think.
You’ve got this! This guide will walk you through every step, so you can get your display up and running in no time. No complicated tech jargon, just clear instructions to make your screen sharing a breeze. Let’s get started!
What You’ll Need
Gather your necessary items. You will need your MacBook and an HDMI cable. Ensure your projector has an HDMI port.
Connecting your MacBook to a projector is simple. You just need a few key items. Gather these before you start. This makes the process smooth.Your Macbook
Ensure your MacBook is charged. A full battery is best. You do not want it dying.A Projector With Hdmi Input
Your projector needs an HDMI port. Most modern projectors have this. Check your projector’s back. Find the HDMI input.An Hdmi Cable
You need a standard HDMI cable. Make sure it is long enough. It must reach your MacBook. And the projector.A Usb-c To Hdmi Adapter (if Needed)
Newer MacBooks use USB-C ports. Older ones have HDMI ports. Check your MacBook’s ports. If it has USB-C, you need an adapter. This adapter converts USB-C to HDMI. Get a reliable adapter. It is a small but vital piece.Optional: An Audio Cable
Projectors often have speakers. Sometimes, you want better sound. You might need an audio cable. This connects your MacBook’s headphone jack. It goes to the projector’s audio input. This is not always necessary. Many projectors handle audio via HDMI.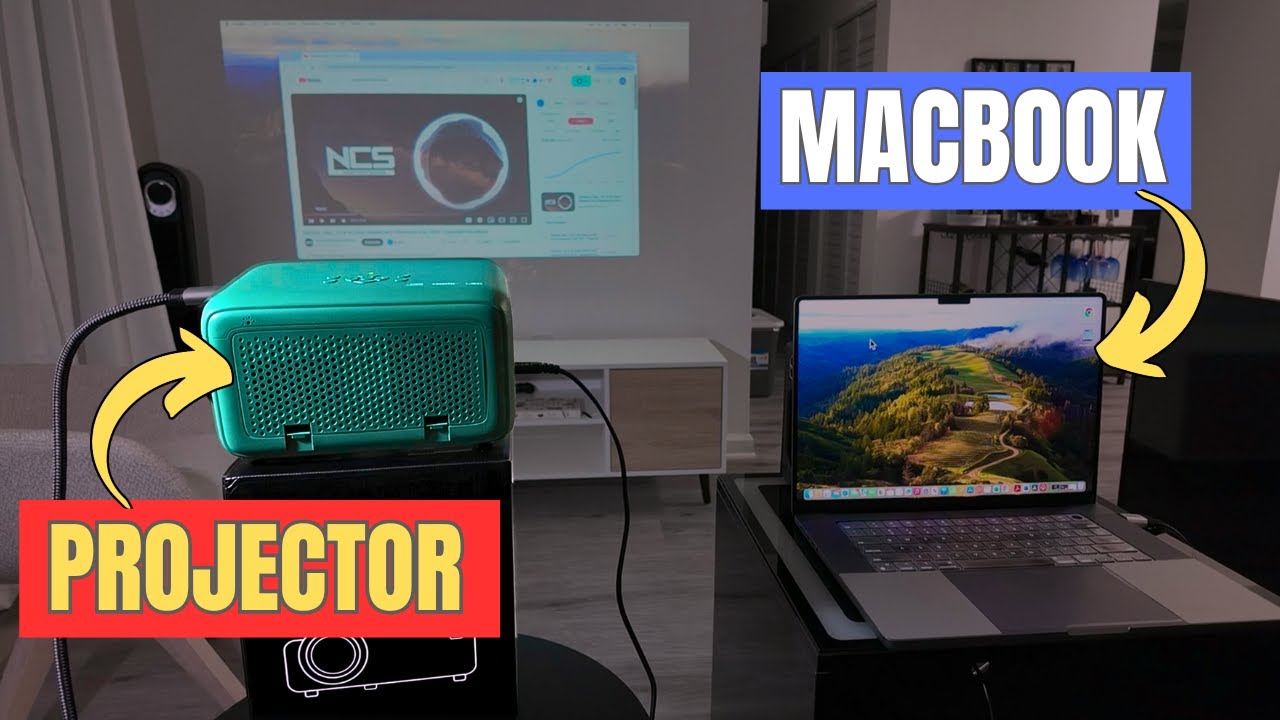
Credit: www.youtube.com
Checking Your Macbook Ports
Before you connect your MacBook to a projector with HDMI, take a moment. You need to know what ports your MacBook has. This step is simple. It sets you up for success. Let’s find the right connection.
Understanding Macbook Ports
MacBooks have different ports. Some are older. Some are newer. You need to identify them. This helps you choose the right adapter. Look at the sides of your MacBook. You will see small openings. These are your ports.
Identifying Thunderbolt And Usb-c Ports
Many modern MacBooks use USB-C. Some also have Thunderbolt 3 or 4. These ports look similar. They are oval-shaped. They often have a lightning bolt symbol. This is a key port for video output. It carries data and power. It also handles video signals.
Recognizing Older Macbook Ports
Older MacBooks might have different ports. You might see a mini-DisplayPort. This port is also common for video. It is smaller than a standard USB port. Some very old models have HDMI directly. Check your specific MacBook model. This ensures compatibility.
Checking Your Projector Ports
Before you plug anything in, a quick check is vital. You need to know what your projector offers. This step prevents confusion later. It sets you up for success.
Identify Available Ports
Look at the back of your projector. Find the input ports. Most projectors have several options. You need to locate the right one.
The Hdmi Port
HDMI is your goal. It carries both video and audio. It is the most common connection. Search for a port labeled “HDMI.” It might have a small HDMI logo.
Other Common Ports
You might see other ports. VGA is older. It only carries video. Some projectors have USB ports. These are usually for media files. Focus on finding HDMI first.
No Hdmi? What Then?
Some older projectors lack HDMI. This is a problem. You might need an adapter. An adapter converts signals. It lets you connect different cables. We will discuss adapters later.
Gathering The Right Cable
Choose the correct HDMI cable. Ensure it fits both your MacBook and the projector ports. This ensures a smooth connection for your presentation.
The correct cable is crucial. It bridges your MacBook and the projector. Without it, the connection fails. This step is simple. Get the right one.Your Macbook’s Port
Check your MacBook’s ports. Most newer MacBooks use USB-C. Some older models have HDMI ports. Identify your specific port. This guides your cable choice.The Projector’s Input
Now, look at the projector. What input does it accept? Most projectors use HDMI. Some might have older VGA ports. Confirm the projector’s input. This ensures compatibility.Choosing The Hdmi Cable
You likely need an HDMI cable. Ensure it fits both devices. A USB-C to HDMI adapter might be necessary. This adapter connects USB-C to HDMI. It’s a common solution.Cable Quality Matters
Do not pick the cheapest cable. A good quality cable works best. It prevents signal loss. Shorter cables are often better. They maintain signal strength.Adapter Considerations
If using an adapter, check its type. Thunderbolt 3 or USB 4 adapters are good. They support high resolutions. They offer reliable performance. Get a reputable brand.Making The Physical Connection
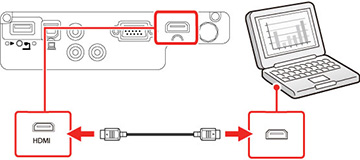
Connect your MacBook to a projector easily. Grab an HDMI cable. Plug one end into your MacBook and the other into the projector. Your presentation will appear on the big screen.
The Physical Connection Essentials
Making the physical connection is your first step. It is simple. You need the right cables. Your MacBook and projector must be ready.Gather Your Cables
You need an HDMI cable. Most modern projectors use HDMI. Check your projector’s ports. Ensure it has an HDMI input. Your MacBook also needs an HDMI port. Some newer MacBooks do not have HDMI. They use USB-C or Thunderbolt. You may need an adapter. Get a USB-C to HDMI adapter. Or a Thunderbolt to HDMI adapter. The right cable makes it easy.Connect Your Macbook
Find the HDMI port on your MacBook. Or the USB-C/Thunderbolt port. Plug one end of the HDMI cable in. If using an adapter, connect it first. Then plug the HDMI cable into the adapter. Make sure the connection is secure. Do not force the cable. It should slide in easily.Connect The Projector
Locate the HDMI input port on your projector. It is usually labeled “HDMI IN.” Plug the other end of the HDMI cable there. Again, ensure a firm connection. A loose cable causes problems. Double-check both ends. They must be fully inserted. This completes the physical setup.
Credit: aquasafe.pl
Macbook Display Settings
Connect your MacBook to a projector with HDMI. Adjust your MacBook display settings for the best picture. Enjoy your presentation on a bigger screen.
Your MacBook’s display settings are crucial. They control how your content appears. You need to adjust them for projectors. This ensures a clear presentation. You want your audience to see everything well.Mirror Or Extend Display
You have two main options. Mirroring shows the same image. It duplicates your MacBook screen. Extending uses the projector as a second screen. This gives you more space. You can drag windows to the projector. Choose the mode that fits your needs. Mirroring is simple for presentations. Extending is better for multitasking.
Adjusting Resolution
Resolution affects picture sharpness. Projectors have native resolutions. Your MacBook should match this. Go to System Settings. Find the Displays section. Select your projector. Look for the Resolution option. Choose the recommended setting. A higher resolution means a clearer picture. A lower resolution can look blurry. Get the best picture quality possible.
Arranging Displays
This setting is for extended mode. It shows how your screens are placed. You can drag the display icons. Position them like your actual screens. This helps when moving your mouse. Your cursor moves between screens naturally. Make sure the arrangement is correct. This prevents confusion. It makes using both screens easy.
Projector Input Selection
Selecting the correct input source is key. Your projector needs to see your MacBook. Choose the HDMI input. This lets your MacBook screen appear.
The projector needs to know where to look. It needs the right signal. This signal comes from your MacBook. You must tell the projector which port to use. This is projector input selection. It is a simple step. It makes the connection work.
Finding The Right Input
Look at your projector. You will see many ports. HDMI is the one you need. It is usually labeled. Look for “HDMI.” Some projectors have multiple HDMI ports. They might be labeled HDMI 1, HDMI 2, and so on.
Using The Remote Control
Your projector likely has a remote. This remote controls settings. Find the “Input” button. It might also say “Source.” Press this button. A menu will appear on the screen. This menu shows available inputs.
Navigating The Projector Menu
Use the arrow keys on your remote. Navigate the input menu. Select the HDMI port you used. This is where your MacBook connects. Press the “Enter” or “OK” button. The projector will now search for your MacBook.
Confirming The Connection
Your MacBook screen should appear. It will show on the projector. This means you are connected. If not, try another HDMI port. Double-check your cable. The input selection is crucial. It ensures a clear picture.
Troubleshooting Common Issues
Connecting your MacBook to a projector is usually straightforward. Sometimes, things do not work perfectly. This section helps fix common problems. You can get your presentation back on track quickly.
No Signal
Your projector shows no image. Check the HDMI cable. Ensure it is plugged in firmly. Try a different HDMI port. Test the cable with another device. Restart your MacBook. Restart the projector too. Select the correct input source. The projector needs the right HDMI input.
Incorrect Resolution
The image looks blurry or stretched. Your MacBook resolution might be wrong. Go to System Settings. Click Displays. Choose your projector. Select a supported resolution. Projectors have specific resolution limits. Match your MacBook to those limits. A clear picture is important.
Audio Problems
You have video but no sound. Your MacBook might send audio elsewhere. Go to System Settings. Click Sound. Choose the Output tab. Select your projector. Make sure the volume is up. Check the projector’s volume control. Sometimes, audio needs separate setup. Ensure the HDMI cable supports audio. Most do, but check specifications.
Wireless Display Options (brief Mention)
Sometimes, cables are not your friend. Wireless options offer freedom. They let you connect your MacBook to a projector. This section briefly explores these choices.
Wireless Display Options
You have wireless choices. These avoid HDMI cables. They offer convenience.
Apple Tv And Airplay
Apple TV is a great option. Use AirPlay. It mirrors your screen. Your MacBook talks to Apple TV. Apple TV connects to the projector. It is simple.
Other Wireless Adapters
Other adapters exist. They support wireless display. Some use Miracast. Others have proprietary tech. Check compatibility. Ensure they work with macOS.
Chromecast And Similar Devices
Chromecast is popular. It works with many devices. You can cast your screen. Your MacBook sends content. The Chromecast receives it. Then it shows on the projector.
Credit: files.support.epson.com
Frequently Asked Questions
What Cable Do I Need?
You need an HDMI cable. This cable connects your MacBook to the projector. It carries both video and audio signals.
How To Connect Macbook To Projector?
Plug one end of the HDMI cable into your MacBook. Connect the other end to the projector’s HDMI port. Turn on both devices.
Does My Macbook Have Hdmi?
Many MacBooks have HDMI ports. Check the sides of your MacBook. Look for a rectangular port labeled “HDMI”.
What If My Macbook Lacks Hdmi?
Use an adapter. A USB-C to HDMI adapter works well. Connect the adapter to your MacBook. Then plug in your HDMI cable.
How To Mirror Macbook Screen?
Open System Settings. Go to Displays. Click “Add Display”. Choose your projector. Select “Mirror Display”.
How To Extend Macbook Screen?
Go to System Settings. Select Displays. Click “Add Display”. Choose your projector. Select “Use As Separate Display”.
Why Is Projector Not Showing?
Check cable connections. Ensure both devices are on. Restart your MacBook and projector. Select the correct input on the projector.