
Your new office chair is sitting in its box, and you’re ready to get comfortable. But how do you actually put it together?
Don’t worry, assembling an office chair is usually much simpler than you think. This guide will walk you through each step, making sure you can get your new seat ready for work in no time. You’ll be surprised how quickly you can go from box to comfortable productivity.
Let’s get started!

Credit: www.takeaseat.sg
Unboxing And Inventory
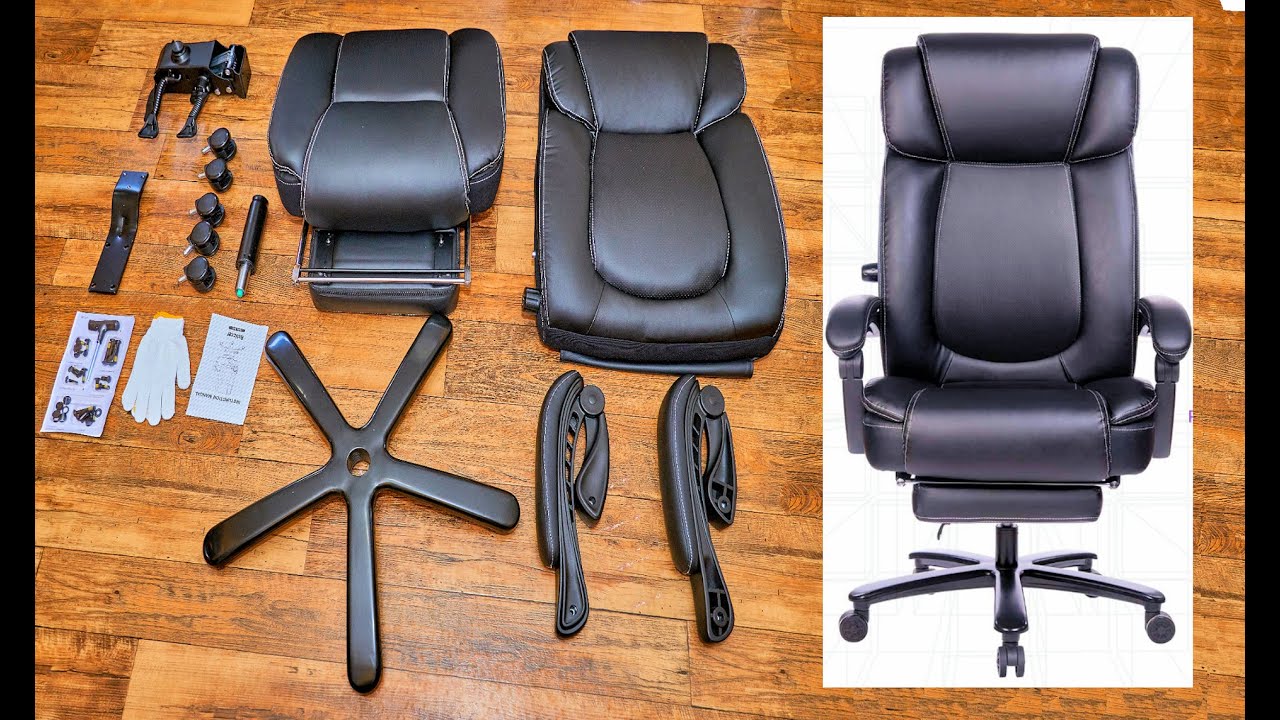
First, open the box. Check all parts are there. This is your inventory.
The first step is exciting. You get your new office chair. Unboxing is key. Careful unpacking prevents damage. It also helps you check everything. This ensures a smooth assembly.What’s In The Box?
Open the box gently. Remove all parts. Find the instruction manual. Lay out all the pieces. Check the parts list. Match each item. Make sure nothing is missing. You should have a seat. There is a backrest too. Wheels are usually included. A gas lift cylinder is there. The base is a separate part. All screws and bolts are in a bag.Tools You’ll Need
Most chairs need few tools. An Allen wrench is often provided. This is your main tool. You might need a screwdriver. A Phillips head is common. Sometimes a small wrench is useful. Check the manual first. It lists required tools. Gather them before starting. This saves time later. It makes assembly easier.Base Assembly
First, connect the chair’s base pieces. Attach the casters to the star base. This forms the stable foundation for your chair.
The chair base is your foundation. It supports everything. Proper assembly ensures stability. It provides smooth movement. Let’s build this part first.Attaching Casters
Turn the chair base upside down. Find the five holes. These holes are for wheels. Take one caster. Push its stem firmly into a hole. You will hear a click. Repeat for all five casters. Make sure they are secure. They should not wiggle. Your base now has wheels.Inserting The Gas Lift
Flip the base right side up. Locate the center hole. This hole is large. Take the gas lift cylinder. It is usually silver. Insert the wider end. Push it into the center hole. It fits snugly. No tools are needed here. The gas lift is now in place. It allows height adjustment.Seat And Armrest Connection
The seat and armrest connection forms the core. It provides stability and comfort. This step is crucial for a good chair. It ensures everything fits together well. You are almost done. Pay close attention now.
Securing Armrests To The Seat
Unpack the armrests carefully. Find the correct screws. These are usually labeled. Match each armrest to its side. Left and right are important. Align the holes on the armrest. Line them up with the seat. Insert the screws. Tighten them by hand first. This prevents cross-threading. Use the provided Allen wrench. Turn it clockwise. Make sure screws are snug. Do not overtighten them. This can strip the threads. Repeat for the other armrest. Both sides should feel firm.
Mounting The Seat Mechanism
Locate the seat mechanism. It has levers and a base. The mechanism attaches to the seat. Flip the seat upside down. Find the mounting holes. They are usually in a square pattern. Position the mechanism correctly. The front of the mechanism should face forward. Align its holes with the seat. Insert the bolts or screws. Hand-tighten them initially. This ensures proper alignment. Use your wrench to tighten. Turn clockwise until secure. Ensure the mechanism is stable. It should not wobble at all. This part controls chair functions.
Credit: www.youtube.com
Backrest Attachment
First, attach the backrest. Slide it onto the chair base. Secure it firmly.
The backrest is crucial for comfort. It supports your back. Attaching it correctly is important. This step ensures good posture. It also adds stability. Let’s get this done.Connecting Backrest To Seat
Find the backrest. Locate the seat base. There are usually holes. Align the backrest holes. Match them with seat holes. Insert the bolts. Use the provided hardware. Do not tighten them yet. Just get them started. This allows for adjustment.Tightening Backrest Bolts
Now, secure the backrest. Use your tool. A hex wrench works well. Tighten each bolt firmly. Work in a crisscross pattern. This ensures even pressure. The backrest should feel solid. No wobbling should occur. Check all bolts are snug. Your backrest is now attached.Final Checks And Adjustments
Tighten all screws securely. Test the chair’s height adjustment. Ensure the backrest reclines smoothly. Your office chair is now ready.
You’ve built your chair. Now, make it perfect. This final stage ensures comfort and support. It makes your new chair truly yours. Take a few minutes here. Your back will thank you.Testing All Parts
Sit in your chair. Feel its stability. Does it feel sturdy? Move around a bit. Check every part. Make sure nothing wobbles. Test the armrests. They should feel secure.Setting Chair Height
Find the height lever. It is usually under the seat. Lift the lever. Gently push down. Your chair lowers. Lift the lever again. Your chair rises. Find a comfortable height. Your feet should rest flat. Your knees should be at a right angle.Adjusting Lumbar Support
Locate the lumbar support. It is the lower back curve. Many chairs have adjustable support. Slide it up or down. Find the sweet spot. It should fit your spine’s curve. Feel the gentle pressure. It supports your lower back.
Credit: www.amazon.com
Troubleshooting Common Issues
Even experienced assemblers face chair problems. Don’t worry. Most issues have simple fixes. This section helps you solve them. Get your chair working perfectly. Your comfortable workday awaits.
Wobbly Parts?
Check all screws. Tighten them firmly. Loose screws cause wobbling. Ensure the base is secure. The casters must lock in place. Re-seat any loose components. A stable chair is a safe chair.
Stiff Levers?
Lubrication often helps. Use a silicone spray. Apply it to the lever mechanism. Work the lever back and forth. Sometimes debris causes stiffness. Clean the lever area carefully. Gentle force is best. Avoid forcing the lever.
Noisy Chair?
Squeaks mean friction. Find the noisy parts. Apply a lubricant there. Spray hinges and joints. Tighten any loose connections. Sometimes the gas lift needs oil. A quiet chair means focus. Enjoy the peace and quiet.
Frequently Asked Questions
What Tools Do I Need For Assembly?
You’ll likely need a screwdriver and the Allen wrench provided. Check the chair’s manual for specifics. Most tools are included in the box.
How Long Does Chair Assembly Take?
Assembly usually takes about 30 to 60 minutes. It depends on the chair’s complexity. Take your time for a good result.
Can I Assemble An Office Chair Alone?
Yes, most chairs can be assembled by one person. Some larger chairs might be easier with a helper. Plan your space before starting.
What If A Part Is Missing Or Damaged?
Contact the manufacturer’s customer service immediately. They will help you get replacement parts. Keep your receipt handy.
Where Is The Best Place To Assemble My Chair?
Assemble your chair in a clear, open space. This gives you room to move around. A soft surface can prevent scratches.
How Do I Attach The Wheels To The Base?
Simply push the wheels firmly into the leg sockets. They usually click into place. Give each wheel a good tug to ensure it’s secure.
What If My Chair Is Wobbly After Assembly?
Check that all screws and bolts are tight. Sometimes wheels or the gas lift aren’t fully seated. Re-tighten everything carefully.
Conclusion
Your new office chair is ready. Assembly was simple, right? Enjoy your comfortable workspace. Proper setup boosts productivity. Take pride in your work. You did it yourself. It feels good. Work smarter now. Your back will thank you. Get back to business.