
The American Standard Champion 4 toilet has long been a popular choice for homeowners seeking a reliable and powerful flushing system. Its reputation for effectively clearing clogs and its water-saving capabilities have made it a staple in many bathrooms. However, like any complex mechanical device, the Champion 4 isn’t immune to occasional issues.
Understanding these common problems and their potential solutions can save you time, money, and the frustration of a malfunctioning toilet.
This comprehensive guide will explore the most frequent American Standard Champion 4 toilet problems, offering detailed explanations and practical troubleshooting steps. We’ll cover everything from flushing inconsistencies and leaks to more specific component failures, equipping you with the knowledge to diagnose and address these issues effectively.
Whether you’re a seasoned DIYer or simply looking to understand your plumbing better, this resource aims to provide clear, actionable advice.
Key Takeaways
- Flushing Power Issues: The Champion 4’s signature flushing power can diminish due to a clogged trapway, a partially closed flapper, or low water levels in the tank.
- Leaking Problems: Common leaks stem from a worn flapper seal, a faulty fill valve, or a loose tank-to-bowl connection.
- Running Toilet: A continuously running toilet is often caused by a fill valve that won’t shut off or a flapper that isn’t sealing correctly.
- Slow Refill: A slow tank refill can indicate a problem with the fill valve or a partially closed water supply valve.
- Component Wear: Over time, parts like the flapper, fill valve, and flush valve seat can degrade and require replacement.
- Water Spotting/Stains: Mineral deposits or dye from certain cleaning products can cause unsightly spots or stains in the bowl.
- Troubleshooting Approach: A systematic approach, starting with simple checks and progressing to component replacement, is key to resolving most Champion 4 issues.

Credit: www.youtube.com
Understanding The Champion 4 Flushing System
The American Standard Champion 4 is renowned for its siphon jet action and 4-inch flush valve, which contribute to its powerful flush. Unlike older toilets that rely solely on gravity and a smaller flush valve, the Champion 4 utilizes a larger valve opening and a strategically placed jet to create a siphoning effect that quickly clears the bowl. This design is key to its “clog-free” reputation.
The system comprises several key components working in concert:
- Flush Lever and Chain/Linkage: Initiates the flush by lifting the flapper.
- Flapper: A rubber seal at the bottom of the tank that holds back water until lifted, releasing it into the bowl.
- Flush Valve Seat: The surface the flapper seals against.
- Flush Valve Body: Houses the flush valve seat and guides the water flow.
- Fill Valve: Replaces water in the tank after a flush and maintains the correct water level.
- Overflow Tube: Prevents the tank from overflowing if the fill valve malfunctions.
- Trapway: The S-shaped channel within the toilet bowl that leads to the drainpipe.
When the flush lever is activated, it lifts the flapper. This allows the water stored in the tank to rush through the larger flush valve opening and into the bowl. The water then flows into the trapway, creating a siphon that pulls waste and water out of the bowl and into the drainpipe.
Once the tank is empty, the flapper drops back into place, and the fill valve opens to replenish the tank.
Credit: www.homedepot.com
Common American Standard Champion 4 Toilet Problems And Solutions
While the Champion 4 is built for durability, several issues can arise. Understanding these problems and their underlying causes is the first step toward effective resolution.
Flushing Inconsistencies: Weak Or Incomplete Flush
One of the most perplexing issues is when the Champion 4 doesn’t perform its signature powerful flush. This can manifest as a weak flush that doesn’t clear the bowl, or a flush that stops midway.
H3: Clogged Trapway Or Bowl Passages
The most common culprit for a weak flush is a partial or complete blockage in the trapway or the small passages at the rim of the bowl that direct water into the trapway. Over time, mineral deposits, debris, or even excessive toilet paper can accumulate.
- Diagnosis: A consistently weak flush, especially after multiple attempts, points towards a blockage. You might also notice water backing up slightly in the bowl.
- Solution:
- Plunger: Start with a flanged plunger designed for toilets. Ensure a good seal around the drain hole and plunge vigorously several times.
- Toilet Auger (Closet Auger): If plunging fails, a toilet auger is the next step. This tool is specifically designed to navigate the curves of the trapway without scratching the porcelain. Carefully feed the auger into the bowl and crank the handle to break up or retrieve the obstruction.
- Enzyme Cleaners: For slow-developing clogs due to organic waste, enzyme-based drain cleaners can be effective over time. Avoid harsh chemical drain cleaners, as they can damage pipes and seals.
- Professional Plumber: If the blockage is severe or persistent, a plumber may need to use specialized equipment.
H3: Partially Closed Flapper
The flapper is designed to lift fully to allow the entire tank’s contents to empty into the bowl. If it’s not opening completely, the flush will be significantly weakened.
- Diagnosis: The flapper might be sticking, or the chain/linkage might be too short or tangled. You might hear a “thud” as the flapper tries to seat itself, but not a full rush of water.
- Solution:
- Inspect Flapper: Lift the tank lid and observe the flush. Does the flapper lift high enough?
- Check Chain/Linkage: Ensure the chain connecting the flush lever to the flapper has just the right amount of slack, enough to allow the flapper to lift fully, but not so much that it gets caught. Remove any kinks or twists in the chain. Some models use a linkage rod, which should also be free to move.
- Clean Flapper and Seat: Mineral buildup on the flapper or the flush valve seat can prevent a proper seal or cause the flapper to stick. Clean both with a mild abrasive pad and vinegar or a toilet bowl cleaner.
- Replace Flapper: Flappers are inexpensive and wear out over time. If the rubber is cracked, brittle, or warped, replace it. American Standard offers specific flappers for the Champion 4.
H3: Low Water Level In The Tank
The Champion 4 relies on a specific water level in the tank to generate sufficient flushing power. If the water level is too low, the siphon effect will be weak.
- Diagnosis: Visually inspect the water level in the tank. It should typically be about 1/2 to 1 inch below the top of the overflow tube. If it’s significantly lower, the fill valve is likely not set correctly or is malfunctioning.
- Solution:
- Adjust Fill Valve Float: Most fill valves have an adjustable float. This can be a screw mechanism or a clip that slides along a rod. Consult your Champion 4 manual for specific instructions on adjusting the float to raise the water level.
- Check for Leaks: A constantly leaking flapper can slowly drain the tank, leading to a low water level even after a flush. Address any flapper leaks first.
- Inspect Fill Valve: If the float mechanism appears damaged or isn’t responding, the fill valve itself may need replacement.
Leaking Toilets: Water On The Floor Or Constant Drips
Leaks are a common toilet problem and can stem from various points. Identifying the source is crucial for an effective repair.
H3: Leaking Flapper Seal
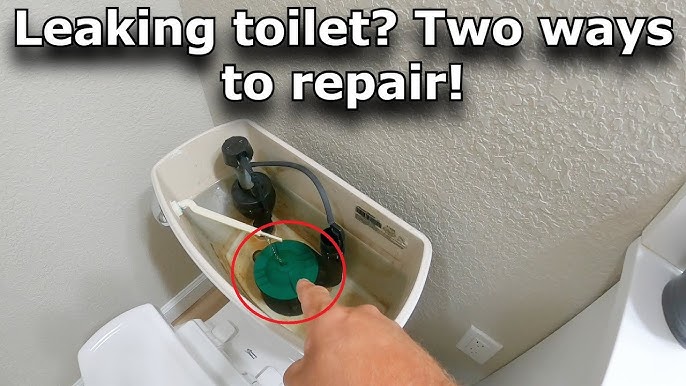
A worn or improperly seated flapper is one of the most frequent causes of a toilet that constantly runs or leaks water from the tank into the bowl.
- Diagnosis: Listen for a faint hissing sound from the tank after the flush has completed. You may also notice the water level in the tank slowly dropping, or the fill valve intermittently turning on to replenish lost water. Sometimes, you can add a few drops of food coloring to the tank; if color appears in the bowl without flushing, the flapper is leaking.
- Solution:
- Clean Flapper and Seat: As mentioned earlier, mineral deposits can interfere with the seal. Thoroughly clean the flapper and the flush valve seat.
- Check Flapper Condition: Inspect the flapper for cracks, stiffness, or warping. If it’s damaged, it needs replacement.
- Replace Flapper: This is a relatively simple DIY task. Turn off the water supply, flush the toilet to empty the tank, unhook the old flapper, and attach the new one. Ensure it’s the correct type for your Champion 4 model.
H3: Faulty Fill Valve
The fill valve is responsible for refilling the tank after each flush and shutting off the water supply when the correct level is reached. If it fails to seal properly, it can cause a running toilet or leaks.
- Diagnosis: If the water level in the tank is consistently too high and running into the overflow tube, the fill valve is likely the issue. You might also hear a continuous trickle of water even when the toilet isn’t in use.
- Solution:
- Clean Fill Valve: Sometimes, debris can get caught in the fill valve mechanism, preventing it from shutting off completely. Follow the manufacturer’s instructions to disassemble and clean the valve components.
- Adjust Float: Ensure the float mechanism is correctly positioned and not obstructed. Adjusting the float height can sometimes resolve minor leaks.
- Replace Fill Valve: If cleaning and adjustment don’t work, the fill valve likely needs replacement. This is a common repair that involves turning off the water, disconnecting the supply line, removing the old valve, and installing the new one. American Standard offers replacement parts for the Champion 4 series.
H3: Tank-to-bowl Gasket Leak
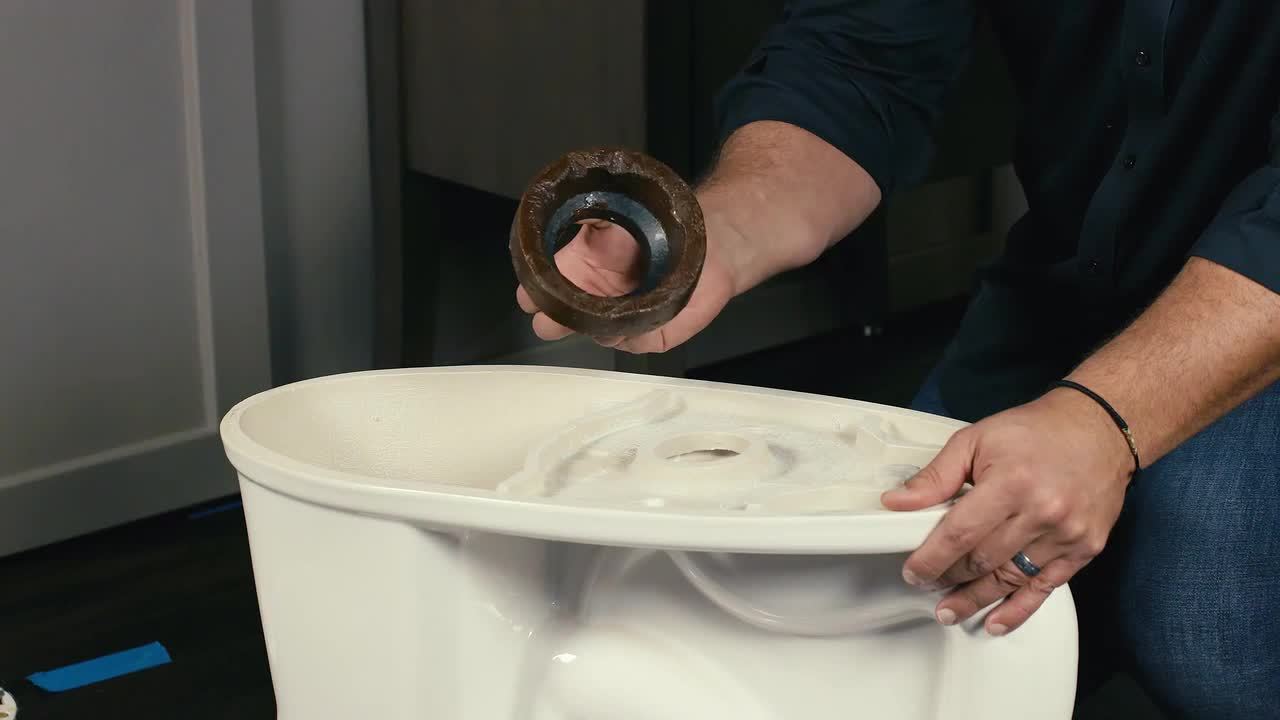
The large rubber gasket (spud washer) between the toilet tank and the bowl can degrade over time, leading to leaks.
- Diagnosis: Water will typically be seen leaking from the base of the tank, often running down the back of the bowl or pooling on the floor directly behind the tank.
- Solution:
- Tighten Tank Bolts: Occasionally, the bolts that secure the tank to the bowl can loosen. Try gently tightening them, but be careful not to overtighten, which can crack the porcelain.
- Replace Tank-to-Bowl Gasket: If tightening doesn’t help, the gasket likely needs replacement. This is a more involved repair that requires removing the tank from the bowl. Turn off the water, disconnect the supply line, unbolt and lift off the tank, remove the old gasket, clean the surfaces, install the new gasket, and reassemble. Ensure you purchase the correct gasket for your Champion 4 model.
H3: Cracked Porcelain
While less common, the toilet tank or bowl itself can develop cracks, leading to leaks.
- Diagnosis: Visible cracks on the porcelain surface, especially around bolt holes or seams, are the primary indicators. Leaks may be slow drips or more significant streams of water.
- Solution:
- Temporary Repair: For very minor cracks, some specialized epoxy sealants can provide a temporary fix. However, this is rarely a long-term solution for a pressurized water fixture.
- Replacement: A cracked tank or bowl usually necessitates replacement of the entire component or the entire toilet. This is a job best left to a professional plumber.
Running Toilet: Continuous Water Flow
A toilet that constantly runs is not only annoying but also a significant waste of water. This issue is closely related to leaks but specifically refers to the continuous flow of water.
H3: Fill Valve Not Shutting Off
As discussed in the leaking section, a fill valve that fails to shut off is a primary cause of a running toilet. The water level rises too high and flows into the overflow tube.
- Diagnosis: Water constantly flows into the overflow tube, and the fill valve continues to supply water even after the tank is full.
- Solution:
- Clean and Adjust Fill Valve: Attempt to clean the valve mechanism and adjust the float.
- Replace Fill Valve: If the above steps fail, replacing the fill valve is the most effective solution. This is a standard repair that can significantly reduce water bills and eliminate the noise.
H3: Flapper Not Sealing
If the flapper doesn’t create a tight seal against the flush valve seat, water will continuously leak from the tank into the bowl, triggering the fill valve to run intermittently or continuously.
- Diagnosis: Water can be seen flowing from the tank into the bowl, or the fill valve cycles on and off frequently.
- Solution:
- Clean Flapper and Seat: Remove any debris or mineral buildup.
- Check Flapper Condition: Replace a worn or damaged flapper.
- Adjust Flapper Chain: Ensure the chain has the correct tension.
Slow Tank Refill
After flushing, the toilet tank should refill relatively quickly. If the refill process is sluggish, it can be inconvenient and sometimes indicate a problem.
H3: Partially Closed Water Supply Valve
The valve that controls water flow to the toilet, located on the wall behind the tank, might not be fully open.
- Diagnosis: The water supply line feels restricted, and the tank takes an unusually long time to fill.
- Solution:
- Open Supply Valve Fully: Locate the shut-off valve and turn it counter-clockwise until it stops. Ensure it’s fully open.
H3: Clogged Fill Valve Inlet
The small inlet screen on the fill valve can become clogged with sediment or mineral deposits, restricting water flow.
- Diagnosis: The tank fills slowly, and the water flow into the tank appears weak.
- Solution:
- Clean Fill Valve Inlet: Turn off the water supply. Disconnect the water supply line from the fill valve. Inside the valve, you’ll find a small mesh screen. Carefully remove any debris from this screen using a soft brush or by rinsing it. Reconnect the supply line and turn the water back on.
H3: Issues With The Fill Valve Itself
The fill valve mechanism might be worn or damaged, leading to reduced water flow.
- Diagnosis: Even with the supply valve fully open and the inlet screen clean, the refill is slow.
- Solution:
- Replace Fill Valve: A worn-out fill valve will need to be replaced. This is a common maintenance task for toilets.
Water Spotting And Stains
The pristine white of the toilet bowl can be marred by unsightly water spots or stains.
H3: Hard Water Deposits
If your home has hard water, mineral deposits (calcium and magnesium) can accumulate, leaving white or chalky residue.
- Diagnosis: Stains are typically white, crusty, or chalky, often appearing around the waterline.
- Solution:
- Vinegar Soak: Pour a generous amount of white vinegar into the bowl, ensuring it covers the stained areas. Let it sit for several hours or overnight. Scrub with a toilet brush. For tougher stains, you might need to repeat the process or use a pumice stone (use with caution to avoid scratching).
- Commercial Cleaners: Use cleaners specifically designed for hard water stains. Always follow product instructions and ensure good ventilation.
- Water Softener: For persistent hard water issues throughout the house, consider installing a water softener.
H3: Rust Stains
Iron in the water supply can cause reddish-brown rust stains.
- Diagnosis: Stains are typically reddish-brown and may appear in streaks or patches.
- Solution:
- Clorox Toilet Bowl Cleaner (with Bleach): Cleaners containing bleach can be effective against rust stains. Apply, let sit, and scrub.
- Commercial Rust Removers: Products specifically formulated to remove rust can also be used.
- Well Water Concerns: If you have well water, consider testing it for iron content and exploring filtration options.
H3: Dye From Cleaning Products
Some harsh toilet bowl cleaners or colored cleaning tablets can leave behind stubborn dye stains.
- Diagnosis: Stains match the color of a recently used cleaning product.
- Solution:
- Bleach-Based Cleaners: A cleaner with bleach can often remove dye stains. Ensure good ventilation and avoid mixing bleach with other cleaners.
- Baking Soda Paste: A paste of baking soda and water can act as a mild abrasive to scrub away stains.
Credit: www.youtube.com
Maintenance Tips For Your Champion 4
Preventative maintenance is key to minimizing problems with your American Standard Champion 4.
- Regular Cleaning: Clean the toilet bowl and tank regularly with a toilet brush and appropriate cleaner to prevent mineral buildup and stains.
- Check Water Level: Periodically check the water level in the tank to ensure it’s at the correct height.
- Inspect Flapper: Examine the flapper for wear and tear every 6-12 months. Replace it if it shows signs of degradation.
- Listen for Leaks: Pay attention to the sounds your toilet makes. A constantly running or frequently cycling fill valve is a sign of a leak.
- Avoid Harsh Chemicals: Refrain from using abrasive cleaners or harsh chemicals that can damage the seals and internal components of the toilet. Enzyme-based cleaners are a gentler option for clogs.
- Use Toilet Paper Wisely: Avoid flushing excessive amounts of toilet paper or non-flushable items, as this is a primary cause of clogs.
When To Call A Professional
While many Champion 4 toilet problems are DIY-friendly, some situations warrant professional assistance:
- Persistent Clogs: If you’ve tried plunging and augering without success.
- Major Leaks: Significant leaks from the tank-to-bowl connection or cracked porcelain.
- Complex Repairs: If you’re uncomfortable with disassembling toilet components or dealing with water supply lines.
- Recurring Issues: If you find yourself constantly troubleshooting the same problem, there might be an underlying issue requiring expert diagnosis.
A qualified plumber has the tools and expertise to diagnose and fix complex issues efficiently, saving you potential water damage and further frustration. You can find resources for finding a local plumber through organizations like the Plumbing-Heating-Cooling Contractors Association (PHCC).
Champion 4 Vs. Competitors: A Brief Comparison
While focusing on problems, it’s worth noting how the Champion 4 stacks up against other popular toilet models regarding common issues.
| Feature | American Standard Champion 4 | Kohler Highline | Toto Drake |
|---|---|---|---|
| Flush System | Siphon Jet, 4″ Flush Valve | Class Five Vortex | Tornado Flush |
| Clog Resistance | Excellent | Very Good | Excellent |
| Water Usage (GPF) | 1.6 or 1.28 | 1.6 or 1.28 | 1.6 or 1.0 |
| Common Issues | Flapper wear, fill valve issues | Flapper wear, fill valve issues | Fill valve issues, potential for rim jet clogs |
| Repair Difficulty | Moderate | Moderate | Moderate |
Note: Specific issues can vary greatly depending on the exact model year and individual installation. However, the Champion 4’s robust design generally leads to fewer severe clogging problems compared to toilets with smaller flush valves. The most common issues across all brands often relate to the wear and tear of internal components like flappers and fill valves.
The American Standard Champion 4 toilet is a workhorse designed for powerful performance. While it’s built to last, understanding the potential problems, from flushing inconsistencies and leaks to running water and slow refills, empowers you to tackle maintenance and repairs effectively.
By performing regular checks, addressing issues promptly, and knowing when to call a professional, you can ensure your Champion 4 continues to function reliably for years to come. Most common problems are related to standard wear-and-tear components that are relatively easy to replace, making home maintenance a viable option for many owners.
Frequently Asked Questions
Why Is My American Standard Champion 4 Toilet Not Flushing Completely?
This is often due to a partially clogged trapway or bowl passage, a flapper that isn’t opening fully, or a low water level in the tank. Inspect the trapway with an auger if necessary, check the flapper chain for proper slack and ensure the flapper lifts high, and verify the tank’s water level is adequate.
How Do I Fix A Running American Standard Champion 4 Toilet?
A running toilet typically means either the flapper isn’t sealing properly or the fill valve isn’t shutting off. Clean the flapper and flush valve seat, check the flapper’s condition, or inspect and potentially replace the fill valve. Adding food coloring to the tank can help determine if the flapper is the culprit (if color appears in the bowl without flushing).