
Installing a saris bike rack takes about 15 minutes by adjusting the central hub, resting the rubber feet on the trunk bumper, and tightening six straps until the frame can’t shift. This setup suits sedan and hatchback owners who want to carry one to three standard bicycles without permanently mounting a hitch.
Tools to install your Saris bike rack
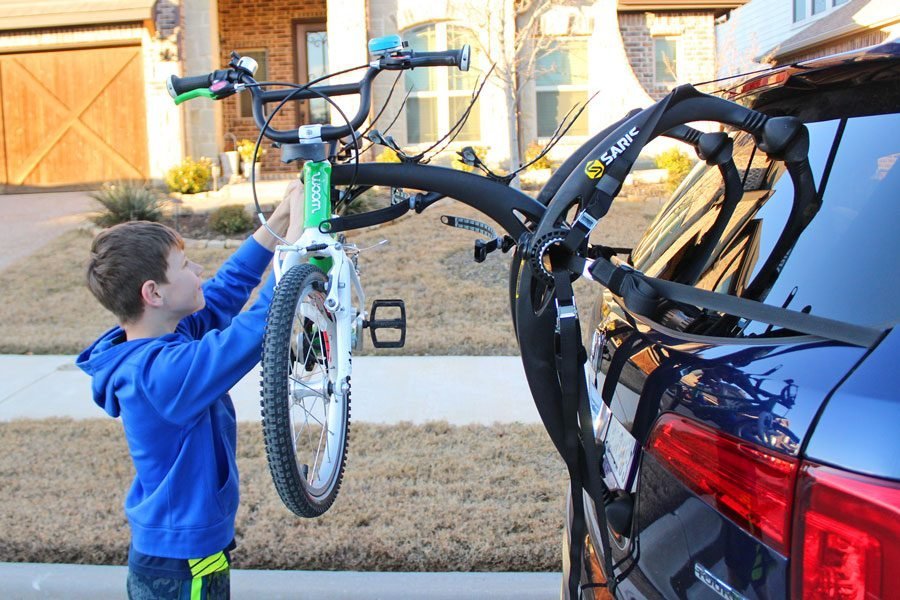
- Saris trunk rack (such as the Bones 2-Bike or 3-Bike model)
- Clean microfiber towel
- Mild car wash spray or warm water
- 6 strap hooks labeled for top, side, and bottom placement
- Saris Hatch Huggers (required if your car has glass edges or narrow metal trunk seams)
- Bike frame adapter bar (needed only for step-through, women’s, or full-suspension frames)
A soft cloth works well instead of a microfiber towel to wipe down the paint, but paper towels don’t work because they trap abrasive dust against your clear coat. If your vehicle has an aftermarket plastic spoiler that feels thin or loose, a certified auto body technician should evaluate whether it can bear structural strap pressure.
Step-by-step
- Clean your car trunk, rear bumper, and the rubber feet of the rack with water and a microfiber cloth to wipe away grit.
- Loosen the rack’s center hub knobs by turning them counterclockwise until the arms spin freely.
- Position the lower feet centered on your bumper, and set the upper feet flat against the top face of the trunk lid.
- Tighten the central hub knobs firmly by hand until the internal teeth lock together completely.
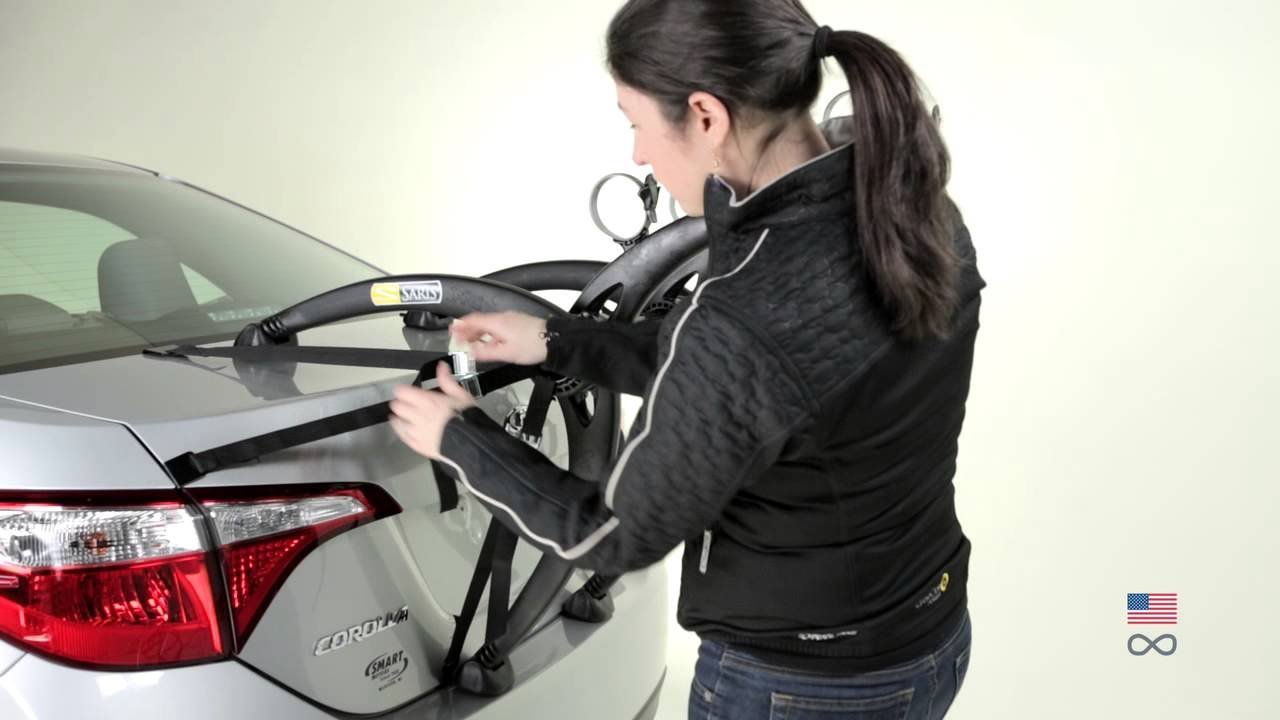
- Attach the two top hooks into the gap at the front edge of the trunk lid, pulling both straps snug.
- Clip the two side hooks directly to the left and right metal edges of the trunk lid, just above your taillights.
- Hook the bottom two straps under the lower bumper seam or bottom trunk lip, pulling upward to remove slack.
- Tighten all straps in pairs—top first, sides second, bottom third—until the rack frame doesn’t wobble when shaken firmly.
- Fasten the rubber cradle straps over your bike’s top tube and seat tube at a snug tension.
Careful: Never hook side or top straps onto thin plastic trim or glass edges, or the panels will crack under load.
Tip: Tie up the loose tails of each nylon strap so they don’t flap against your vehicle’s paint at highway speeds.
If you drive an electric bike weighing over 35 pounds, stop here; trunk mounts can’t safely carry heavy batteries, so visit a professional trailer hitch installer for a heavy-duty platform mount.
Trunk Rack Setup Across Different Cars
Different vehicles change how you route straps, place feet, and distribute the frame’s weight.
| Vehicle Style | Setup Time | What Changes | What to Watch During Travel |
|---|---|---|---|
| Standard Sedan | 10–15 mins | Lower feet rest directly on flat bumper shelf | Bottom strap hook tension under trunk lid |
| Glass Hatchback | 20–25 mins | Requires fabric anchor straps inside the glass hatch | Upper straps resting against window seals |
| Compact SUV | 15–20 mins | Upper rack arms need an angled vertical reach | Wiper blade clearance on the back window |
| Car with Spoiler | 20–30 mins | Upper feet must sit forward, clearing the wing | Strap pressure depressing the plastic spoiler |
It’s safer to tighten the straps a little bit at a time in even pairs than to yank one side down hard on your first attempt.
How to tell you did it right
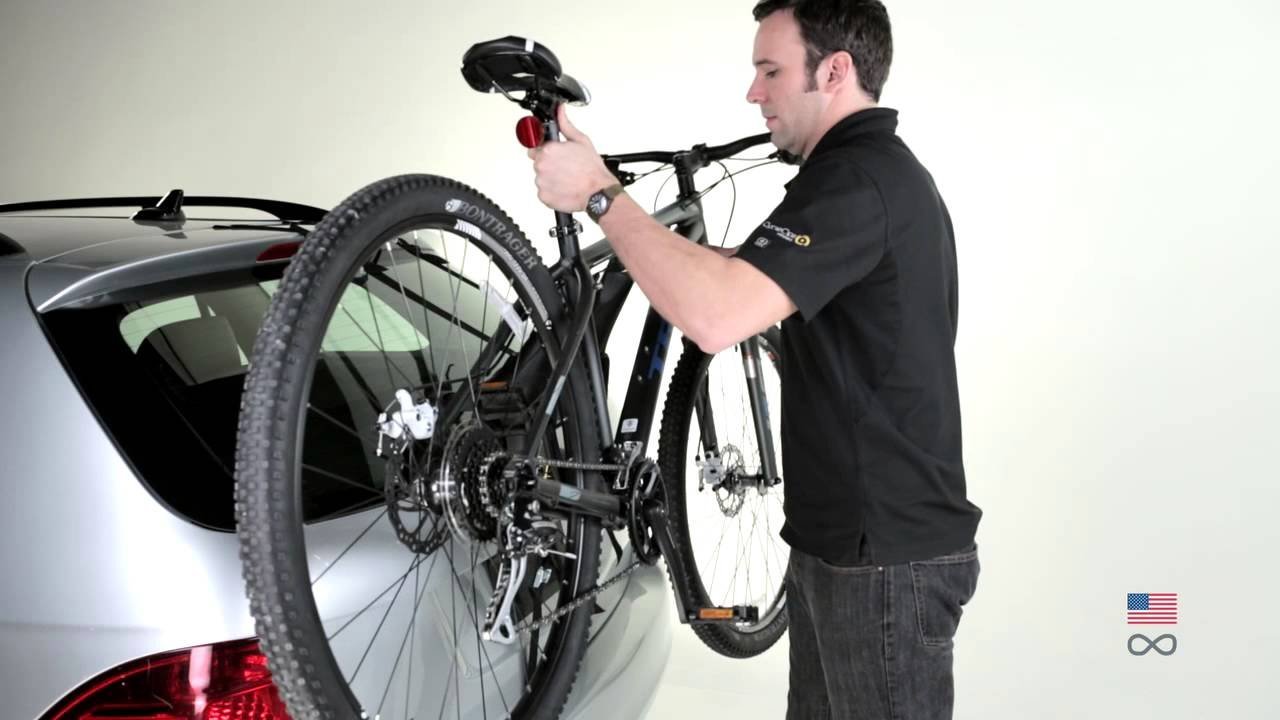
A proper install holds the rack completely rigid against the car; when you grab the carrier arms and shake them, the entire vehicle should sway slightly on its tires instead of the rack rattling. A poor install shows loose strap webbing, sagging bike cradles, or rubber feet sliding across clear-coat paint. Slipping occurs when the top straps don’t carry the primary vehicle weight, which allows road vibrations to loosen the side hooks. You can prevent this failure by pulling the top straps tight first, tying off excess strap webbing, and leaving at least 12 inches of ground clearance under your bike’s lowest wheel.
Highway Safety and Storing the Rack
Under state traffic laws compiled by the Federal Highway Administration, you can’t cover your vehicle’s license plate or brake lights with cargo; you must move your plate to an outer bike cradle if the frame blocks your numbers. When your trip ends, unhook the six clips, wipe the rubber feet dry, collapse the arms flat, and stow the unit inside your trunk. A good installation stays tight for one continuous drive, but you must stop and inspect strap tension after your first 5 miles on rough pavement. If you notice severe metal fatigue or broken strap buckles, contact a local bike shop mechanic for replacement parts rather than using regular cargo ties.
Alternative Bike Mounting Options
Hitch-Mounted Tray Rack
A receiver hitch supports 2-inch steel frames that hold heavy downhill or electric bicycles securely. This route eliminates strap contact with your car’s paint, but buying a hitch receiver and paying a shop to bolt it on raises overall equipment costs.
Roof-Mounted Crossbar Carrier
Roof systems use locking fork clamps or wheel trays mounted across crossbars to free up trunk access. This method keeps your rear license plate visible, but lifting bikes overhead takes extra physical strength and increases drag.
Interior Cargo Area Storage
Folding down the back seats lets you slide the bike right inside your trunk or hatchback. It costs zero extra dollars and protects gear from highway rain, but it takes away passenger space and leaves grease on interior upholstery.
Frequently asked questions
Can you open your trunk with a bike rack on?
No, you shouldn’t open your trunk while bikes are mounted on the rack. The combined weight puts severe stress on your trunk hinges and hydraulic lift struts. If you need inside the cargo area, unload the bicycles first and support the trunk lid manually before unhooking straps.
How tight should the bike rack straps be?
If you can slide your fingers underneath the webbing with ease, they’re too loose. Pull the nylon through the spring buckles until the carrier’s rubber pads compress slightly against your vehicle.
Is a trunk bike rack safe on the highway?
Yes, it’s safe at highway speeds if you follow the 35-pound-per-bike limit. You should pull over at a safe location after your first 5 to 10 miles of driving to recheck strap tension. Gusting crosswinds and road bumps can settle the straps, requiring you to pull them snug again.
What happens if the rack blocks my backup camera?
Your backup camera display will show the carrier arms and bike tires instead of a clear view. You won’t break the camera, but your car’s parking sensors might beep continuously in reverse. Turn off automated rear braking sensors temporarily in your dashboard menu and check your mirrors manually.
Why do the rubber straps leave marks on car paint?
Marks happen because road dust acts like sandpaper when loose rubber pads vibrate against your paint finish. This friction scuffs the clear coat over long trips. You can prevent finish haze by washing the contact patches thoroughly and keeping strap tension rigid so the rubber feet never slide.
Final Thoughts
Before you head out, give each strap a firm tug to ensure everything feels solid. It’s a good idea to double-check the tension after your first few miles on the road. Once you’re confident the rack won’t budge, you’re ready to load your gear and enjoy a great ride.
Related guides