
Constructing your own outdoor seating requires a combination of precise measurements, weather-resistant materials, and patience, resulting in a durable piece of furniture that can last for decades. Creating these iconic chairs involves cutting multiple slats, assembling a sturdy frame, and ensuring the ergonomic backrest is angled correctly for maximum comfort. While the process demands attention to detail, it’s a manageable project for anyone with basic carpentry skills and a dedicated workspace. By following a structured plan, you can transform raw lumber into a beautiful centerpiece for your patio or garden.
Key Takeaways
- Use rot-resistant woods like cedar or teak to ensure your furniture withstands outdoor elements.
- Always pre-drill pilot holes to prevent the wood from splitting during the assembly process.
- Maintain a consistent seat angle of approximately 15 to 20 degrees for optimal user comfort.
- Apply high-quality exterior-grade finishes to protect the wood from moisture and ultraviolet radiation.
- Double-check all measurements before making cuts to minimize material waste and ensure structural integrity.
How to Make Muskoka Chairs
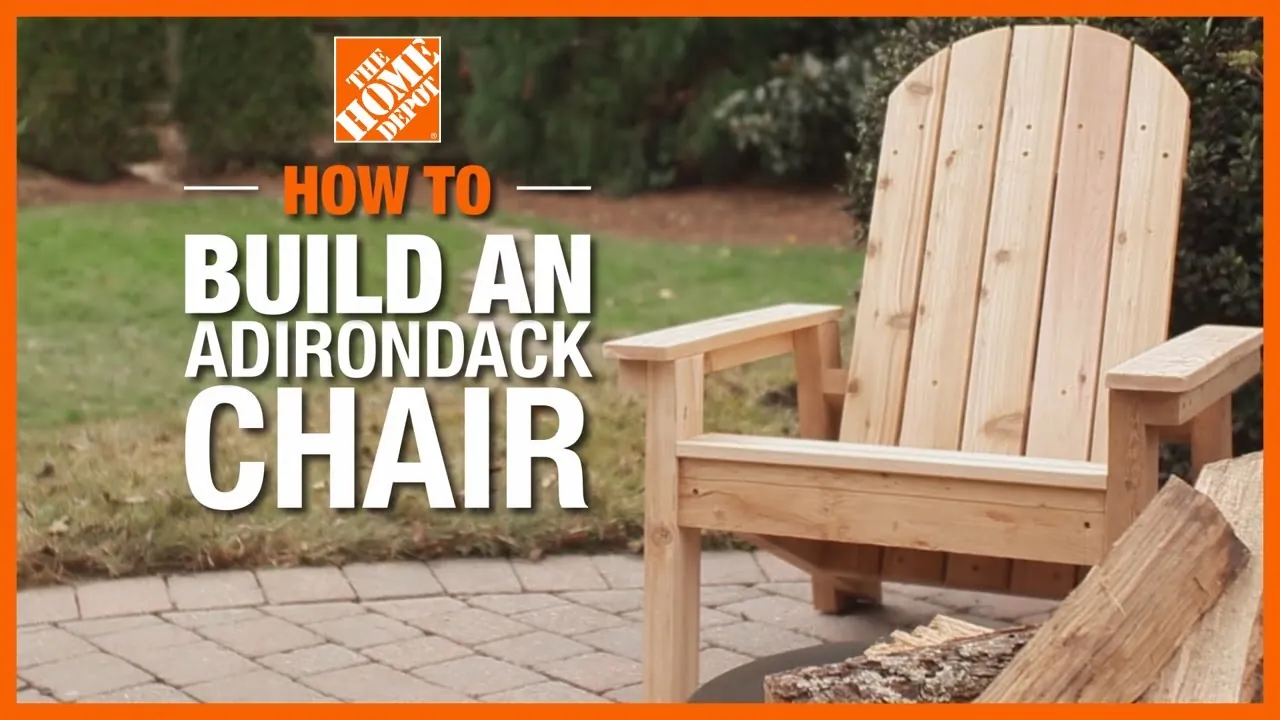
Building these chairs, often referred to as Adirondack chairs, centers on the unique geometry of the backrest and the sloped seat. You’ll need a circular saw, a jigsaw for the curved back slats, a power drill, and a sander. The foundational structure relies on two heavy-duty side frames, which serve as the anchor for the legs, arms, and seat support.
Once the frame is square, the remaining components are attached in a specific sequence to maintain stability. Always prioritize structural integrity and ergonomic design throughout the build to ensure the final product is both safe and comfortable for daily use.
Required Materials and Tools
Before beginning, gather your supplies to avoid mid-project interruptions. Cedar is widely considered the best choice for this project due to its natural resistance to decay and insects. If cedar is unavailable, pressure-treated pine or composite lumber can serve as viable alternatives. Ensure you purchase enough hardware, specifically stainless steel or galvanized fasteners, to prevent rust from bleeding into the wood over time.
| Category | Recommended Items |
|---|---|
| Lumber | 1×6 cedar boards (for slats), 2×4 cedar (for frame) |
| Fasteners | 2.5-inch deck screws, 2-inch finish nails |
| Tools | Circular saw, jigsaw, drill, orbital sander |
| Finishes | Exterior-grade wood stain, water-based sealer |
Preparing Your Workspace
Safety is the most critical aspect of any woodworking project. Choose a flat, stable surface for assembly, such as a workbench or a level concrete floor. Ensure your workspace has adequate lighting and ventilation, especially when working with treated lumber or applying finishes. Use safety goggles and ear protection whenever operating power tools. Organize your fasteners and components into labeled bins to streamline the workflow and prevent losing small but essential parts during the construction phase.
Cutting the Frame Components
The frame provides the backbone of the chair. You’ll need to cut two side supports that dictate the slope of the seat. Use a template to ensure both sides are identical. The legs should be cut at slightly different lengths to account for the seat rake.
When cutting, keep your saw blade sharp to ensure clean edges, which reduces the amount of sanding required later. Focus on achieving precise angles during this phase, as even a minor deviation can lead to a wobbly or uneven final structure.
Shaping the Backrest Slats
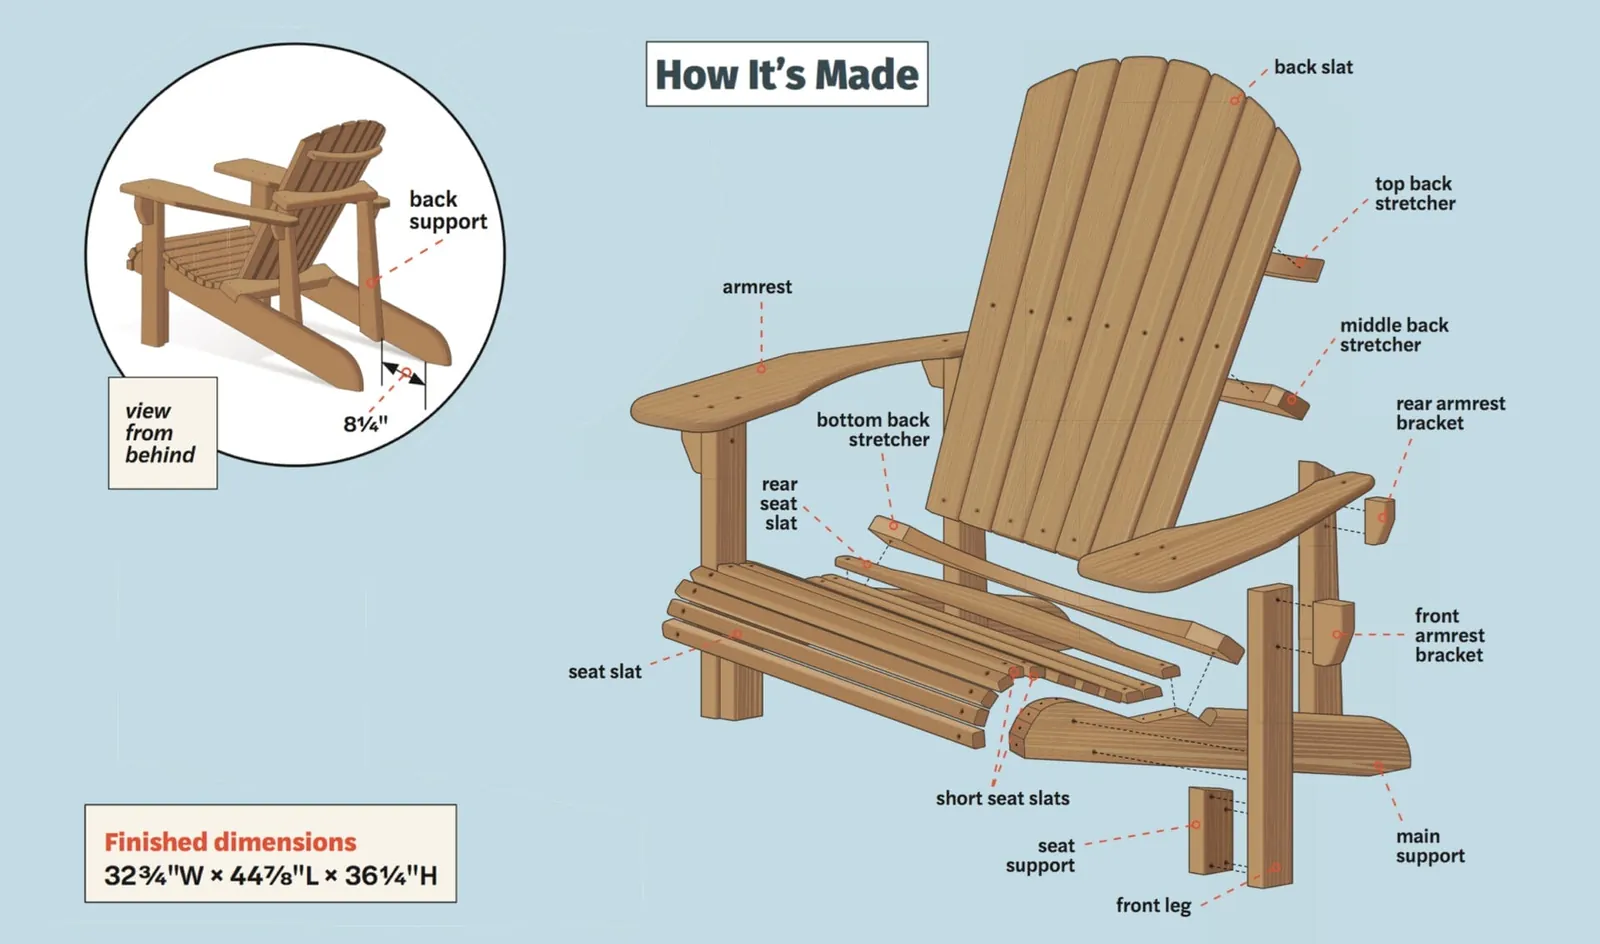
The backrest is the defining feature of this classic design. You can choose to cut the tops of the slats in a rounded, fan-like shape or keep them flat for a more modern aesthetic. Use a jigsaw to cut the curves, then smooth them out with an orbital sander.
Ensure each slat is uniform in width; even slight variations will become apparent once the backrest is fully assembled. Sanding the edges until they’re rounded will prevent splinters and provide a polished, professional look that’s comfortable to touch.
Assembling the Main Frame
Begin by attaching the front and back legs to the side seat supports. Use a level to ensure the structure is perfectly square before tightening the screws. If the frame isn’t square, the seat and backrest won’t align correctly, which can compromise the structural integrity of the finished chair.
Apply a bead of waterproof wood glue to each joint before fastening for added strength. Wipe away any excess glue immediately, as it can interfere with the absorption of wood stains or sealants later.
Attaching the Seat Slats
The seat slats should be spaced approximately one-quarter inch apart to allow for drainage and wood expansion. Using a simple spacer block while installing the slats ensures consistent gaps across the entire seat. Start from the back of the seat and work your way toward the front. Ensure the front-most slat is slightly rounded or beveled to prevent it from digging into the back of the user’s legs. This small detail significantly enhances the comfort of the chair.
Installing Armrests and Braces
The armrests are the most visible part of the chair and should be wide enough to hold a beverage or a book. Secure them firmly to the side frames and the backrest support. Because the armrests bear significant weight, use sturdy screws and consider adding a small support brace underneath each side.
If you’re using wood that’s prone to splitting, always drill pilot holes before inserting screws. This prevents the wood from cracking under the pressure of the fastener, ensuring a durable connection.
Applying a Protective Finish
Once the chair is fully assembled, inspect every surface for rough spots or sharp corners. Sand the entire chair with medium-grit sandpaper, followed by a fine-grit finish. Clean off all dust with a tack cloth before applying your chosen finish.
A high-quality exterior stain or paint will protect the wood from the harsh effects of the sun and rain. Use a high-quality brush to work the finish into all crevices and end-grain, as these areas are most susceptible to moisture absorption.
Troubleshooting Common Issues
Even with careful planning, issues can arise during assembly. If you find your chair is rocking, identify which leg is too long and carefully trim it until the unit sits flat. If the backrest feels too upright, you may need to adjust the mounting angle of the support rails at the rear. Don’t rush these adjustments; taking the time to fix structural errors now will result in a much better experience during the years you spend using the chair.
| Issue | Potential Cause | Recommended Fix |
|---|---|---|
| Wobbly base | Uneven leg lengths | Level the legs on a flat surface |
| Splitting wood | No pilot hole used | Remove screw, fill hole, drill new pilot |
| Uncomfortable back | Incorrect angle | Adjust the rear support brace |
Pro Tip: If you’re working with cedar, be mindful that the wood is soft and dents easily. Use a piece of scrap wood between the jaws of your clamps and the chair frame to prevent marring the surface of your project.
Frequently Asked Questions
What is the ideal wood for this project?
Cedar is the preferred choice due to its natural oils that resist rot and insects, though redwood and teak are also excellent, albeit more expensive. If you’re on a budget, pressure-treated pine is a functional, weather-resistant alternative. Avoid using untreated softwoods like spruce or fir, as they will degrade rapidly when exposed to outdoor moisture and fluctuating temperatures.
How do I prevent the wood from splitting?
Splitting occurs when screws are driven directly into wood without a guide. Always drill pilot holes with a bit slightly smaller than the shank of your screw. This relieves pressure on the wood fibers, allowing the fastener to grip without forcing the wood apart. Additionally, avoid placing screws too close to the edge of a board, as this is where the material is most vulnerable.
Can I paint my chair instead of staining?
You can certainly paint your chair, but keep in mind that paint forms a film on the surface that can trap moisture if not applied correctly. For the best results, use a high-quality exterior primer followed by two coats of outdoor-rated acrylic latex paint. If you prefer the natural look of wood, a penetrating oil-based stain is easier to maintain and reapply over time.
How much space do I need to store them?
These chairs are relatively large and have a deep footprint. When not in use, they’re best kept on a covered patio or in a shed. If space is limited, look for plans that allow for a folding design. A standard non-folding chair typically requires a footprint of roughly 30 inches by 36 inches, so plan your storage area accordingly to keep them dry during the winter.
What is the standard seat height?
The front of the seat is typically positioned between 14 and 16 inches from the ground. This height is designed to be low enough for relaxation while still allowing an adult to stand up without excessive effort. If you’re building the chair for someone with mobility issues, you might consider raising the seat height by an inch or two to make getting in and out easier.
Conclusion
Ensure all fasteners are tightened securely before using your new furniture for the first time. Periodically check the screws at the start of every spring season to account for any natural wood movement or thermal expansion. Now that you have the basic steps and techniques, gather your lumber and begin your first cut to enjoy a custom-made seat in your backyard.