
Have you ever peeled off tape from your wall, only to find the paint or drywall damaged underneath? It’s frustrating, isn’t it?
You want your space to look clean and fresh, not scarred by sticky residue or ripped paint. But don’t worry—you’re not alone, and fixing those wall imperfections is easier than you think. You’ll discover simple, step-by-step methods to repair your wall quickly and get it looking smooth and flawless again.
Keep reading, and you’ll have your walls looking perfect in no time.
Assessing Wall Damage
After removing tape from a wall, it is important to check for any damage. Assessing the wall damage helps you decide the best way to fix it. It also prevents small problems from becoming bigger ones. Take your time to look closely at the wall.
Careful inspection shows where repairs are needed. This step saves effort and money in the long run. Start by identifying common wall issues, then check for paint or drywall damage.
Identifying Common Wall Issues
Common problems include peeling paint, scratches, and small holes. The tape may pull off paint or leave sticky residue. Sometimes the wall surface may tear or dent slightly. Look for any rough spots or discoloration. Use your hand to feel for bumps or cracks. Note any areas that seem weak or damaged.
Checking For Paint Or Drywall Damage
Paint may peel or chip after tape removal. Drywall can crack or have small holes. Look closely at edges where tape was stuck. If paint is missing, the wall looks uneven. Cracks or holes need filling before painting. Test the wall by gently pressing with your finger. Soft or crumbly spots show drywall damage. Mark these spots to fix them later.
Gathering Repair Materials
Fixing a damaged wall after tape removal needs the right materials. Having these ready makes the job smoother. It saves time and avoids frustration. Prepare before starting the repair for the best results.
Essential Tools For Wall Repair
Start with a putty knife. It helps spread spackle evenly. A sanding block smooths the surface after drying. Use a damp cloth to clean dust and debris. A small bucket or tray holds the spackle. Also, keep a utility knife handy to cut loose edges. These simple tools make the repair neat and easy.
Choosing The Right Spackle Or Filler
Select spackle based on the size of the damage. For small holes and cracks, lightweight spackle works well. Larger holes may need a stronger filler or patch. Consider quick-dry spackle to save time. Check if the spackle is paintable to match your wall color. The right product ensures a smooth and lasting repair.
Preparing The Wall Surface
Preparing the wall surface is an important step before fixing damage from tape removal. This step helps create a smooth and clean area for repair. Without proper preparation, the wall repair might not last long or look good. Spend time cleaning and smoothing the wall to get the best results.
Cleaning Residue And Debris
Remove all sticky tape residue using a gentle cleaner. Use a soft cloth or sponge to wipe the area. Avoid harsh chemicals that can damage the paint or drywall. Check the wall carefully for any leftover glue or dirt. Clean the surface until it feels smooth and dry.
Dust and small debris can stop repair materials from sticking well. Use a vacuum or brush to clear loose particles. Make sure the wall is fully dry before moving to the next step. Clean walls help patching compounds bond better.
Sanding Rough Areas
Use fine-grit sandpaper to smooth out rough spots on the wall. Sand gently around the damaged area to blend it with the rest of the wall. This helps hide the repair after painting. Be careful not to sand too much and damage the wall further.
Sanding also removes small bumps and leftover paint flakes. After sanding, wipe the dust off with a damp cloth. A smooth surface makes the repair patch less visible and stronger.
Credit: www.reddit.com
Filling Holes And Cracks
After removing tape from a wall, small holes and cracks often appear. Filling these imperfections is important for a smooth, clean surface. Proper filling restores the wall’s look and prepares it for painting or wallpaper.
Applying Spackle Correctly
Start by cleaning the holes and cracks. Remove any loose debris or dust. Use a putty knife to scoop a small amount of spackle. Press it firmly into the holes, filling them completely. Spread the spackle evenly, covering the damaged area. Avoid applying too much at once. Let the spackle dry according to the instructions on the package.
Smoothing And Shaping The Repair
Once dry, use sandpaper to smooth the surface. Sand gently until the wall feels even. Shape the edges to blend with the wall. Wipe away dust with a damp cloth. Check for bumps or rough spots. Repeat spackling and sanding if needed. This process ensures a seamless finish ready for painting.
Sanding And Smoothing Repairs
After removing tape from a wall, sanding and smoothing repairs is crucial. It helps fix rough spots and uneven surfaces. This step makes the wall ready for painting or finishing. Proper sanding improves the look of the repaired area. It also helps the paint stick better. Take time to do this carefully for the best results.
Using The Right Sandpaper Grit
Select sandpaper grit based on the repair size. Coarse grit, like 80 or 100, removes big bumps. Use it gently to avoid more damage. Medium grit, such as 120 or 150, smooths out rough patches. Fine grit, around 220, finishes the surface for painting. Change sandpaper if it wears out. Sand in a circular motion for even smoothing.
Blending Repairs With Surrounding Wall
Blend the repaired area with the rest of the wall. Lightly sand beyond the repair edges. This softens the transition between old and new surfaces. Feather the edges to avoid sharp lines. Check your work by running your hand over the wall. The surface should feel smooth and even. Proper blending hides the repair after painting. It creates a seamless, natural look.
Credit: romandecoratingproducts.com
Priming The Repaired Area
Priming the repaired area is a vital step after fixing a damaged wall from tape removal. It prepares the surface for painting and helps the finish look smooth. Without primer, paint may not stick well, causing uneven color or peeling over time.
Applying primer seals the patched spots. It also evens out the texture between repaired and original wall parts. This makes your wall look uniform and fresh after painting.
Selecting Primer Types
Choose a primer that matches the wall material. For drywall repairs, a water-based primer works well. It dries fast and cleans up easily with water. For walls with stains or heavy damage, use a stain-blocking primer. It prevents marks from showing through the paint.
Use a bonding primer if the wall surface is rough or chalky. It helps paint stick better. For large repairs, consider an all-purpose primer. It covers most surfaces and saves time.
Applying Primer For Best Results
Start with a clean, dry wall. Remove dust and loose particles before priming. Use a brush or roller to apply the primer evenly. Cover the entire repaired area plus a little beyond to blend edges.
Apply one or two coats depending on the primer type. Let each coat dry fully before adding the next. Avoid thick layers to prevent drips and uneven texture. Sand lightly after drying for a smooth finish ready for paint.
Painting To Match Wall Color
Painting to match the wall color is key after fixing damage from tape removal. It helps hide repairs and restores a clean look. Matching paint color well blends the patched area with the rest of the wall. This step finishes the repair process and makes the wall look new again.
Color Matching Tips
Start by checking the paint can if available. It often has the exact color name or code. Use a small paint sample on a hidden wall spot. Let it dry fully to see the true color. Test under natural light for the best view.
If the original paint can is missing, bring a chip of the wall paint to a store. Many stores use machines to match colors closely. Choose paint with the same finish, like matte or satin. This helps the new paint blend well.
Painting Techniques For A Seamless Finish
Use a small brush for touch-ups to control paint application. Paint in thin layers to avoid lumps or streaks. Let each layer dry before applying the next one.
Feather the edges by lightly brushing outward from the patch. This softens the border between old and new paint. Avoid overloading the brush to keep the finish smooth.
After painting, wait for the wall to dry completely. Check the area in different lighting. Add more layers if needed to fully blend the repaired spot.
Preventing Future Damage
Preventing future damage to your walls after removing tape is important. Taking simple steps can save you time and effort later. Using the right tape and removing it carefully helps keep walls in good shape.
Choosing The Right Tape For Walls
Select tape designed for walls or delicate surfaces. Painter’s tape works well because it sticks firmly but peels off cleanly. Avoid duct tape or heavy-duty tapes that can pull paint or drywall. Look for tapes labeled “low-tack” or “removable.” These types cause less damage and are easy to remove.
Safe Removal Techniques
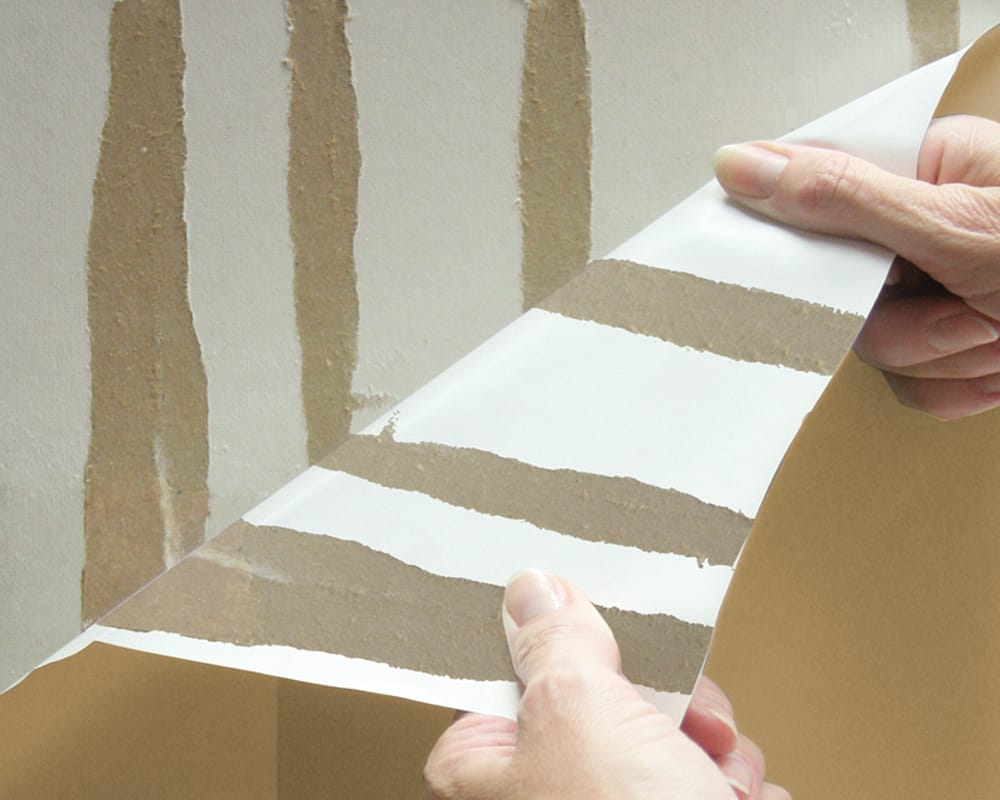
Remove tape slowly and at an angle close to the wall. Pulling tape straight off can tear paint or drywall. Heat the tape slightly with a hairdryer to soften the adhesive. This step makes peeling easier and reduces damage. Always pull tape back over itself, not away from the wall. Take your time to avoid ripping the surface.
Credit: www.reddit.com
Frequently Asked Questions
How Do I Repair Wall Damage After Removing Tape?
Start by cleaning the area to remove residue. Use spackle to fill holes or peeling paint. Sand smooth once dry and repaint.
What Materials Are Needed To Fix Tape Damage On Walls?
You’ll need spackle or wall filler, sandpaper, a putty knife, and paint. Clean cloth and primer can help too.
How Long Does It Take To Fix Wall Damage From Tape?
It usually takes a few hours for spackle to dry. Total repair, including sanding and painting, may take a day.
Can I Remove Tape Without Damaging The Wall?
Peel tape slowly at a 45-degree angle while pulling back on itself. Use heat from a hairdryer to soften adhesive.
What Type Of Spackle Works Best For Wall Repairs?
Use lightweight spackle for small holes or dents. It dries fast and sands easily for smooth finishes.
Should I Prime The Wall After Filling Tape Damage?
Priming is recommended for best paint adhesion. It seals the repaired area and prevents uneven paint spots.
How Do I Prevent Wall Damage From Tape In The Future?
Use painter’s tape designed for walls. Remove tape slowly and at an angle, ideally within 24 hours.
Can I Fix Wall Damage Without Repainting?
Small repairs may look fine with spackle alone. But repainting usually gives the best, clean finish.
Is Sanding Necessary After Applying Spackle?
Yes, sanding smooths the surface for a seamless look. Use fine-grit sandpaper to avoid scratching the wall.
What Paint Should I Use After Fixing Wall Damage?
Use the same type and finish as the existing wall paint. This ensures a consistent color and texture.
Conclusion
Fixing a damaged wall after tape removal takes care and patience. Start by cleaning the area and sanding rough spots. Use filler or putty to cover holes or tears. Once dry, sand again for a smooth surface. Finally, repaint to match the wall color.
These simple steps restore your wall’s look. Small damage doesn’t need to stay visible. With some effort, your wall will look good as new. Keep tools handy and work carefully for best results. You can fix the damage and enjoy a neat space.