
Dream Booth Seating
Build your own booth seating. Create comfortable, custom seating for any room. Follow simple steps for a dream kitchen or dining space.
Imagine a cozy nook. Picture a perfect dining spot. This is your dream booth seating. It adds charm to any room. It makes your home feel special. Building it yourself is rewarding. You create a custom space.Why Build Your Own Booth?
You save money. You get exactly what you want. Your booth fits your space. It matches your style. You control the design. You choose the materials. Building is a fun project. You learn new skills. You feel proud of your work.Design Ideas For Your Booth
Think about your room. What is the style? Modern or rustic? Consider the shape. A corner booth is classic. A straight bench works well. Add storage underneath. Drawers are very useful. Shelves are also good. Choose comfortable cushions. Pick a fun fabric. Bright colors add cheer. Neutral tones are calming.Essential Tools And Materials
Gather your supplies first. You need wood for the frame. Plywood is a good choice. Get screws and wood glue. You need a saw for cutting. A drill makes assembly easy. Sandpaper smooths the wood. You need fabric for upholstery. Foam provides cushioning. A staple gun attaches the fabric. Measuring tape is important. A pencil marks your cuts. Safety glasses protect your eyes. Work gloves prevent splinters.Planning Your Booth
Planning is key. It makes building booth seating easier. Good planning prevents mistakes. It saves time and money. Let’s start planning your booth.
Measuring Your Space
Measure your room carefully. Note the length and width. Record the height too. Measure windows and doors. Note any obstacles. Accurate measurements are vital. They ensure a perfect fit.
Sketching Your Design
Draw a simple sketch. Show the booth shape. Include dimensions on the sketch. Think about the table size. Consider the seat depth. Where will the cushions go? A sketch helps visualize. It guides your build.
Choosing The Right Materials
Select strong, durable wood. Plywood works well for frames. Consider upholstery fabric. It should be easy to clean. Foam makes comfortable seats. Choose colors that match your room. Material choice affects the look. It impacts the feel too.
Building The Base
First, create a sturdy frame. This forms the seating’s foundation. Secure all parts firmly.
This is where your booth seating takes shape. You create the foundation. A strong base is crucial. It supports everything. This part requires careful work. Precision matters here. Let’s get started.Constructing The Frame
First, gather your lumber. You need sturdy wood. Pine or plywood works well. Cut pieces to size. You need a solid rectangle. This forms the outer edge. Then, add internal supports. These run front to back. They also go side to side. This creates a grid. It makes the frame strong. Use screws for assembly. Make sure joints are tight. This frame is your blueprint.Adding Support And Stability
Now, reinforce the structure. Add more cross braces. Place them strategically. This prevents any wobbling. Legs are also important. You can use pre-made legs. Or, build your own. Attach them securely. Ensure the base sits flat. Check for levelness. Shim if needed. This adds crucial stability. Your base must not move.Creating Storage Options
Think about hidden space. You can add drawers. Install them under the seat. Hinges allow lifting the top. This creates a large compartment. Perfect for cushions. Or blankets. Consider built-in shelves. These fit into the frame. Use the sides of the base. This maximizes your space. Storage makes it functional.
Credit: southhousedesigns.com
Crafting The Seat
Build your own booth seating. This guide shows you how. Create comfortable, stylish seating for any room.
This is where your booth seating truly comes alive. You transform raw materials into a comfortable resting place. A well-crafted seat makes all the difference. It invites people to relax and stay a while. Attention to detail is key here.Cutting And Assembling Cushions
You need the right size cushions. Measure your base precisely. Cut your foam to these dimensions. You might use a sharp knife. Get two pieces of foam. Stack them for extra comfort. This creates a plush feel.Adding Padding And Fabric
Now for the soft touch. Wrap the foam in batting. This smooths out any bumps. Choose your upholstery fabric. Select a durable, attractive material. Lay the fabric over the batting. Pull it taut and smooth. Avoid wrinkles and puckers.Securing The Seat
It is time to attach the fabric. Use a staple gun. Start on one side. Pull the fabric tight. Staple it to the foam. Work your way around the cushion. Ensure the fabric is secure. Flip the cushion over. Admire your handiwork. Your seat is ready.The Backrest Details
Proper backrest support is key. Ensure it angles slightly back. This adds comfort for long meals.
The backrest is crucial. It adds comfort and style. Proper backrest construction makes seating inviting. Let’s explore its details.Building The Backrest Structure
You need sturdy materials. Plywood works well. Cut pieces to size. Frame the backrest shape. Use screws for strong joints. Ensure it is level and square. This forms the core support.Upholstering The Backrest
Choose your fabric. Foam adds softness. Cut foam to fit the frame. Wrap foam with batting. This creates a smooth surface. Then, cover with your chosen fabric. Pull the fabric taut. Staple it securely on the back. Hide all staples. This creates a clean look.Attaching The Backrest
Position the backrest carefully. It must align with the seat. Use strong brackets. Attach brackets to the wall. Then, secure the backrest to brackets. Ensure it is very stable. Test its strength. Your booth seating is almost done.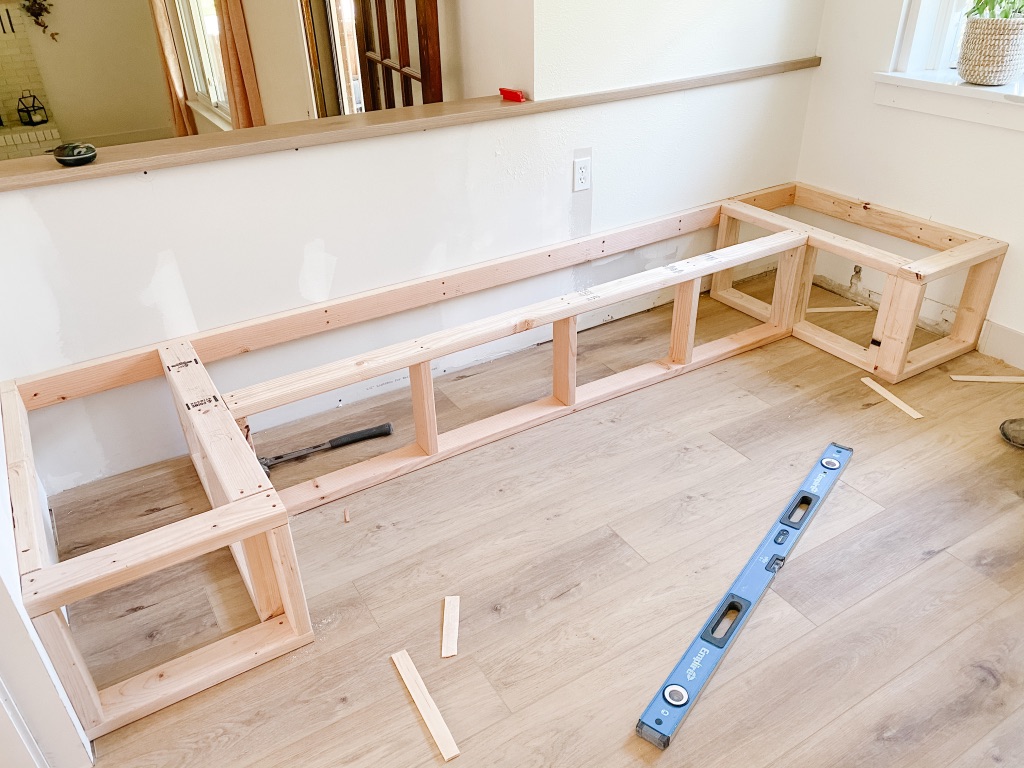
Credit: www.llearn.gr
Finishing Touches
The final details elevate your booth. Finishing touches make it special. They transform raw wood. Your booth looks professional. It feels complete.
Painting Or Staining
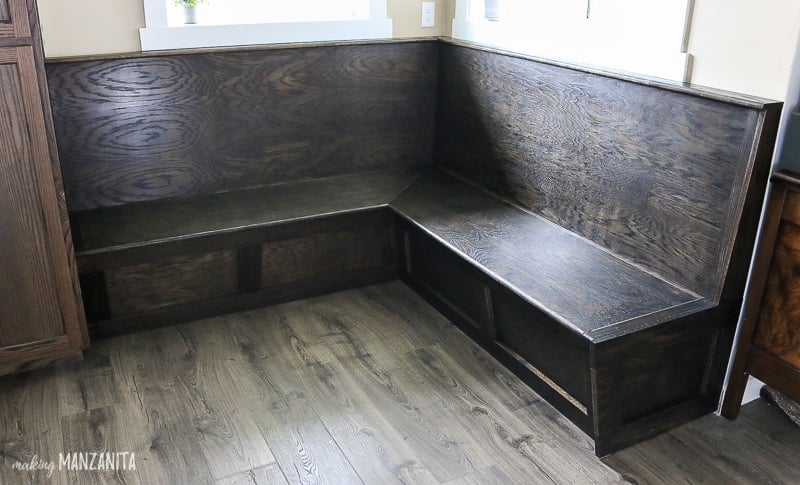
Choose your color. Paint offers many shades. Stains highlight wood grain. Both protect the wood. Apply thin coats. Let each coat dry. Sand lightly between coats. This creates a smooth finish. Pick a durable paint. A satin or semi-gloss works well. For stains, pick a complementary hue. Consider your room’s decor. Match existing furniture. Or create a bold contrast.
Adding Trim And Details
Trim adds visual interest. It defines the booth edges. Use simple molding. Or try decorative trim. Cut pieces precisely. Attach them with finish nails. Fill nail holes. Sand the filled areas smooth. This hides the fasteners. You can add paneling. Beadboard looks classic. Shiplap offers a modern feel. These details add depth. They make the booth stand out.
Accessorizing Your Booth
Comfort is key. Add cushions for seating. Use firm foam. Upholster them in durable fabric. Choose a color you love. Throw pillows add style. They offer extra comfort. A small side table fits well. Place it at the end. It holds drinks or books. Consider a reading lamp. It creates a cozy atmosphere. Personalize the space. Display favorite photos. Your booth is now perfect.
Maintenance Tips
Your booth seating needs care. Good maintenance keeps it looking great. It also makes it last longer. Simple steps ensure durability. Protect your investment. Enjoy your seating for years.
Cleaning Your Booth
Wipe surfaces regularly. Use a soft, damp cloth. Avoid harsh chemicals. They can damage the finish. For fabric, vacuum often. This removes dust and crumbs. Spot clean spills immediately. Use mild soap and water. Test cleaners on a small area. Always dry thoroughly.
Repairing Minor Damage
Small scratches happen. Fill them with matching putty. Sand gently after it dries. For loose screws, tighten them. Use the correct screwdriver. If upholstery tears slightly, mend it. Small tears grow larger. Consider a professional for big repairs. Keep your booth looking new.
Credit: www.makingmanzanita.com