
Yes, you can paint vinyl patio chairs, but only if you use paint formulated to grip flexible plastic and you prep the surface so the finish won’t peel. Ordinary house paint or exterior latex will flake off within weeks because vinyl expands, contracts, and flexes with temperature changes. The job works best when you clean the chairs thoroughly, sand them just enough to create tooth, apply a plastic-specific bonding primer, and finish with a flexible spray paint made for vinyl and plastics.
Key Takeaways
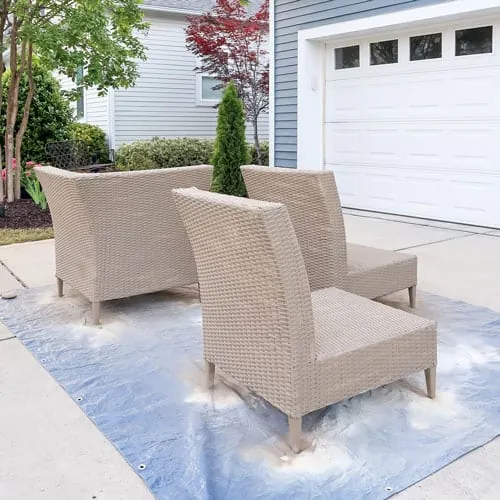
- Use spray paint labeled for plastic or vinyl; standard exterior house paint will crack and peel.
- Clean with trisodium phosphate (TSP) or a degreasing cleaner, then rinse and let dry completely.
- Lightly sand with 220-grit sandpaper to give the primer something to grip.
- Apply a bonding primer made for plastics before the color coat.
- Spray in thin coats, waiting the full flash time between coats rather than laying on heavy paint.
- Cure the chairs for at least 72 hours before setting them back outside or sitting on them.
What Kind of Paint Works on Vinyl
Vinyl is a flexible plastic, so it needs paint that can stretch without splitting. Look for spray paint specifically labeled “for plastic,” “for vinyl,” or “fusion for plastic.” These formulas contain adhesion promoters that bond to low-surface-energy plastics. Rust-Oleum Painter’s Touch Ultra Cover and Krylon Fusion All-In-One are two widely available lines that include plastic-specific formulas. Avoid standard acrylic latex, oil-based enamel, or chalk paint unless the label explicitly says it’s safe for vinyl.
Spray Paint vs. Brush-On Paint
Spray paint is the better choice for patio chairs because it reaches into crevices, slats, and curved edges without brush marks. Brush-on paints made for plastic exist, but they leave visible strokes and are harder to apply evenly on woven or slatted vinyl. If you must brush on paint, use a high-quality synthetic brush and apply extremely thin coats, but expect a less durable finish than spray.
Supplies You Will Need
Gather everything before you start so you don’t have to stop mid-project.
- Vinyl-safe spray paint in your chosen color
- Plastic bonding primer in spray form
- Trisodium phosphate (TSP) substitute or liquid degreaser
- Bucket, sponge, and clean rags
- 220-grit sandpaper or a sanding sponge
- Painter’s tape and plastic sheeting or drop cloths
- Respirator rated for organic vapors
- Safety goggles and disposable gloves
- Painter’s pyramid stands or sawhorses to elevate the chairs
How to Paint Vinyl Patio Chairs
Follow these steps in order. Skipping prep is the most common reason the paint peels within a season.
Step 1: Clean the Chairs Thoroughly
Mix TSP substitute or a liquid degreaser with warm water according to the package directions. Scrub every surface of each chair with a sponge, paying attention to armrests, leg joints, and the underside of the seat where sunscreen, body oils, and pollen collect. Rinse with clean water and let the chairs dry completely—ideally overnight in the sun. Any remaining oil will prevent the primer from bonding.
Step 2: Remove or Mask Hardware
Take off cushions, glides, and any metal or plastic hardware you can. If a piece won’t come off, cover it with painter’s tape. Lay plastic sheeting over the ground and tape off any parts of the chair you want to keep unpainted.
Step 3: Sand the Surface
Lightly scuff the entire chair with 220-grit sandpaper or a sanding sponge. You aren’t trying to remove the old finish; you’re creating microscopic scratches so the primer has something to hold onto. Wipe away all dust with a tack cloth or a slightly damp rag, then let the chairs dry again.
Pro Tip: Sand in a crosshatch pattern—first one direction, then perpendicular—to avoid leaving smooth streaks that the primer can skip over.
Step 4: Apply the Bonding Primer
Shake the primer can for at least one full minute after the mixing ball starts rattling. Hold the can 8 to 12 inches from the surface and spray in light, overlapping passes. Start and stop each pass off the edge of the chair to avoid heavy buildup.
Apply one thin coat, wait the flash time listed on the can (usually 5 to 15 minutes), then apply a second thin coat if the manufacturer recommends it. Let the primer dry fully before painting.
Step 5: Spray the Color Coat
Shake the color spray paint thoroughly. Apply the first coat as a light “tack coat” that barely covers the primer. Wait the full flash time—typically 10 to 15 minutes—then apply a second light coat. A third coat may be needed for full opacity, especially when painting a light color over dark vinyl. Never try to get full coverage in one heavy coat; thick paint runs, sags, and cracks as the vinyl flexes.
Warning: Don’t paint in direct sunlight or when temperatures are below 50 °F or above 90 °F. Heat makes the paint skin over too fast, trapping solvents underneath and causing bubbles.
Step 6: Let It Cure
Touch-dry isn’t the same as cured. Leave the chairs undisturbed in a dry, sheltered spot for at least 24 to 48 hours, and ideally 72 hours, before you put cushions back on or sit in them. Full hardness can take up to two weeks, so treat the chairs gently during that time.
Colors and Finishes to Consider
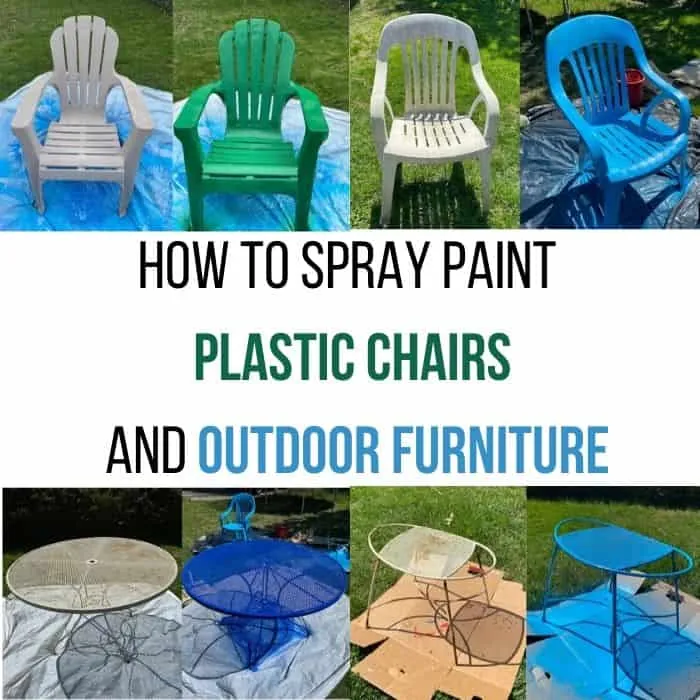
Lighter colors reflect heat and stay cooler in the sun, which matters for chairs you’ll actually sit on. Dark colors absorb heat and can make the vinyl expand more, which stresses the paint film over time. Satin and semi-gloss finishes hide minor imperfections better than high-gloss, while matte finishes show scuffs more easily but give a modern look.
Popular Color Approaches
| Approach | Best For | Visual Effect |
|---|---|---|
| Match original color | Refreshing worn chairs | Subtle renewal |
| Contrasting color | Updating dated patio sets | Bold style change |
| Neutral gray or taupe | Blending with most decor | Timeless, versatile |
| Bright accent color | Single statement chairs | Eye-catching focal point |
When Not to Paint Vinyl Chairs
Some chairs aren’t worth the effort. If the vinyl is brittle, cracked, or chalky from years of sun exposure, paint won’t restore structural integrity and may highlight the damage. Chairs with peeling layers of old paint need aggressive stripping that can destroy the vinyl underneath. In those cases, replacing the chairs is usually cheaper and safer than painting.
Cost Comparison: Paint vs. Replace
Painting costs far less than buying new chairs, but it isn’t free. The table below shows typical ranges for materials only.
| Item | Typical Cost Range |
|---|---|
| Spray primer (1–2 cans) | $10–$20 |
| Spray paint (2–4 cans) | $15–$30 |
| TSP substitute and sandpaper | $8–$15 |
| Drop cloths and tape | $5–$12 |
| Respirator and gloves | $12–$25 |
| Total per chair | $50–$102 |
| New vinyl patio chair | $80–$250 |
These are material costs for a DIY project. Labor is your own time, usually one afternoon plus drying days.
Maintenance After Painting
Painted vinyl chairs need gentle care to make the finish last. Rinse them with a garden hose every few weeks during patio season to remove pollen and salt air. Avoid pressure washers, which can drive water under the paint edges. Wipe spills promptly, especially sunscreen and insect repellent, which can soften some paint films. If you store the chairs for winter, stack them with cardboard between seats to prevent painted surfaces from sticking together.
Troubleshooting Common Problems
| Problem | Likely Cause | Fix |
|---|---|---|
| Paint peels in sheets | Oil or dust left on surface | Strip, clean, sand, and re-prime |
| Bubbles in the finish | Painting in direct sun or high heat | Move to shade; sand smooth and repaint |
| Runs and drips | Too much paint in one coat | Sand dry runs, wipe clean, apply thinner coats |
| Paint feels tacky after days | High humidity or too-thick coats | Allow more drying time; avoid stacking until fully cured |
| Color looks uneven | Insufficient coats or poor shaking | Add another thin coat after full flash time |
Related guides
Frequently Asked Questions
Can I use regular exterior house paint on vinyl chairs?
No. Standard exterior latex or acrylic house paint isn’t formulated to flex with vinyl, so it will crack and peel within weeks. Use a spray paint specifically labeled for plastic or vinyl instead.
How long will the paint last on vinyl patio chairs?
A properly prepped and painted vinyl chair typically holds up for one to three outdoor seasons before showing wear, depending on sun exposure, climate, and how carefully you maintain it.
Do I have to sand vinyl before painting?
Yes. Light sanding with 220-grit paper creates the tooth that primer and paint need to grip. Without it, adhesion is poor and the finish will likely flake off.
What temperature should it be when I paint?
Aim for 50 °F to 90 °F with low humidity. Avoid direct sunlight, wind, and rainy days, all of which can ruin the finish or extend drying time dramatically.
Can I paint vinyl mesh or strap chairs?
You can, but mesh and straps are harder to coat evenly and flex more than solid vinyl, so the paint may wear faster at bend points. Use very thin coats and allow extra curing time.
Should I prime before painting vinyl?
Yes. A bonding primer made for plastics significantly improves adhesion and is the single most important step after cleaning. Don’t skip it.
Conclusion
Your next step is to pick a weekend with mild weather, buy a can of plastic-specific primer and matching spray paint, and start with one chair as a test before committing to the whole set.