
Have you noticed large cracks spreading across your garage floor? These cracks don’t just look bad—they can cause serious damage over time.
Ignoring them could lead to costly repairs down the road. But don’t worry, fixing these cracks is easier than you might think. You’ll learn simple, effective steps to repair those large cracks and protect your garage floor for years to come.
Keep reading to discover how you can restore your floor and save yourself time and money.
Causes Of Large Concrete Cracks
Large cracks in a concrete garage floor often signal deeper problems. Understanding their causes helps prevent further damage. Several factors can stress the concrete, causing it to break or split. Identifying these causes is the first step to fixing the issue properly.
Common Stress Factors
Heavy weight from cars or equipment puts pressure on the floor. Over time, this weight can cause cracks. Constant movement and vibration also stress the concrete. Poor installation or using low-quality materials weakens the floor. Stress from these sources creates cracks that grow larger if not fixed.
Impact Of Weather Changes
Concrete expands in heat and shrinks in cold. These changes cause the floor to move and crack. Water can seep into small cracks and freeze in cold weather. Ice expands, making cracks bigger. Repeated freezing and thawing cycles damage the concrete surface.
Foundation Issues
The ground beneath the garage may shift or settle unevenly. This movement causes the concrete to crack or break. Poor soil compaction or erosion can weaken the foundation. Foundation problems often result in large, visible cracks. Fixing the foundation can stop cracks from worsening.
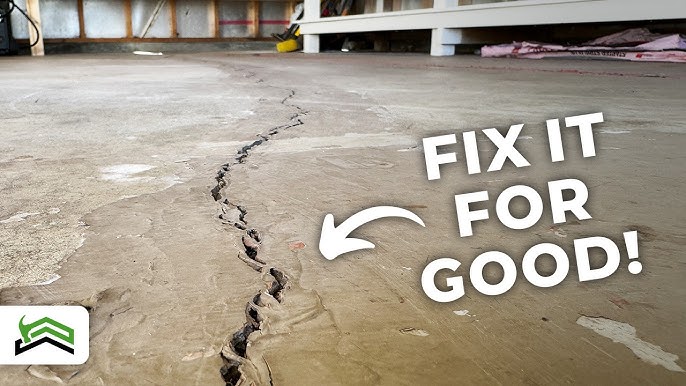
Credit: www.youtube.com
Tools And Materials Needed
Fixing large cracks in your concrete garage floor needs the right tools and materials. Using proper items helps ensure the repair lasts long and looks good. Prepare everything before starting the work for smooth progress.
Essential Repair Tools
- Chisel and hammer to widen and clean cracks
- Wire brush to remove loose debris and dust
- Shop vacuum for thorough cleaning
- Trowel to apply and smooth repair compound
- Putty knife for detailed patching
- Bucket for mixing repair materials
- Protective gloves and safety glasses for safety
- Concrete grinder or sander for surface preparation
Recommended Repair Materials
- Concrete crack filler or epoxy resin for deep cracks
- Polyurethane sealant for flexible crack sealing
- Hydraulic cement for fast-setting repairs
- Concrete bonding adhesive to improve material grip
- Sand or gravel for mixing with cement if needed
- Water for mixing and cleaning tools
- Concrete resurfacer to restore the floor surface
Preparing The Crack For Repair
Preparing the crack is the first step to a strong repair. It helps the patch stick well and last longer. Clean and shape the crack to remove loose parts. This makes the repair smooth and stable.
Cleaning And Clearing Debris
Start by removing all dirt from the crack. Use a wire brush to scrub inside the crack. Sweep away dust and loose pieces with a broom or vacuum. Make sure no small bits remain inside. Clean cracks help the repair material bond tightly.
Widening And Undercutting The Crack
Next, widen the crack slightly using a chisel or angle grinder. Aim for a V-shape, wider at the bottom than the top. This shape holds the repair material better. Undercutting stops the patch from popping out later. Remove any dust created during this step.

Credit: www.reddit.com
Diy Repair Methods
Fixing large cracks in your concrete garage floor can be done without a professional. You need the right tools and materials. These simple DIY repair methods help restore your floor’s strength and appearance. Follow these easy steps to make your garage floor safe and smooth again.
Using Concrete Patch
Concrete patch is a popular option for fixing wide cracks. First, clean the crack thoroughly to remove dirt and loose debris. Next, apply the patch compound with a putty knife. Press it firmly into the crack to fill all gaps. Smooth the surface to match the surrounding floor. Let it dry for the time stated on the package. This method works well for cracks that are wide but not very deep.
Applying Epoxy Injections
Epoxy injections offer a strong fix for deep cracks. Begin by cleaning the crack and removing any loose concrete. Inject the epoxy resin into the crack using a special syringe or injector. The epoxy fills the crack completely and bonds the concrete back together. This method seals cracks and prevents water from entering. It is ideal for structural repairs and long-term durability.
Filling With Polyurethane Foam
Polyurethane foam is useful for filling cracks that allow water leaks. Clean the crack and dampen it slightly. Inject the foam into the crack; it will expand to fill the space. The foam hardens quickly and creates a waterproof seal. It also resists movement and shrinkage. This option works well for cracks that change size due to temperature or ground shifts.
Smoothing And Finishing The Surface
Smoothing and finishing the surface of a repaired concrete garage floor is essential. This step improves the look and strength of the floor. A smooth surface prevents dirt buildup and makes cleaning easier. Proper finishing also helps protect the repair from cracking again. Follow these simple methods to get a clean, durable finish on your concrete floor.
Troweling Techniques
Use a steel trowel to smooth the concrete surface after filling the crack. Hold the trowel at a slight angle, about 30 degrees. Move it in a circular or sweeping motion. Apply gentle pressure to avoid digging into the concrete. For best results, wait until the concrete is firm but still damp before troweling. This timing helps create a smooth, even finish without tearing the surface.
For large cracks, use a float before troweling. A float helps level the surface and remove small bumps. After floating, switch to the steel trowel for a sharper finish. Keep the trowel clean to prevent rough marks on the concrete. Repeat the process lightly if needed to achieve a uniform surface.
Curing Tips For Durability
Proper curing is key to strong, long-lasting concrete. Keep the repaired area moist for at least 3 to 7 days. Use a plastic sheet or damp cloth to cover the surface. This prevents the concrete from drying too fast and cracking again. Water the surface lightly if the cover is removed during this period.
Choose a curing time based on weather conditions. Hot or dry weather needs longer curing times. Avoid heavy foot or vehicle traffic until the concrete fully cures. This care lets the repair set well and resists future damage. Patience pays off with a garage floor that lasts for years.

Credit: archfoundationrepair.com
Preventing Future Cracks
Preventing future cracks in your concrete garage floor is important. Once large cracks appear, they can get worse over time. Taking steps to protect the floor helps keep it strong and smooth. These simple actions reduce the chance of new cracks forming. Focus on sealing, moisture control, and regular upkeep to keep the floor in good shape.
Sealing The Concrete
Apply a concrete sealer to protect the surface. Sealers block water and chemicals from soaking in. This stops damage from freeze-thaw cycles and stains. Choose a high-quality sealer made for garage floors. Reapply it every few years for best results. A sealed floor stays stronger and lasts longer.
Controlling Moisture Levels
Keep moisture away from your garage floor. Water causes concrete to expand and contract. This leads to cracks and damage. Fix any leaks in pipes or walls nearby. Use a dehumidifier if the garage is damp. Proper drainage outside the garage also helps. Dry floors reduce the risk of cracking.
Regular Maintenance Practices
Check your garage floor often for small cracks. Repair them quickly before they grow. Clean the floor regularly to remove dirt and debris. Avoid harsh chemicals that can harm the concrete. Place mats or pads under heavy equipment to prevent stress. Regular care keeps the floor stable and strong.
Frequently Asked Questions
What Causes Large Cracks In Concrete Garage Floors?
Large cracks form due to soil movement, heavy loads, or poor concrete mix. Temperature changes and moisture also cause cracking over time.
How Do I Prepare The Crack Before Repair?
Clean the crack well by removing dirt, debris, and loose concrete. Use a wire brush and vacuum for best results.
What Materials Are Best For Fixing Large Concrete Cracks?
Use epoxy or polyurethane fillers for deep cracks. Cement-based repair compounds also work well for wide gaps.
Can I Repair Large Cracks Myself Or Hire A Professional?
DIY repair is possible for moderate cracks with proper tools. For severe damage, a professional ensures lasting repairs.
How Long Does It Take For Concrete Crack Repair To Dry?
Most repair materials dry within 24 to 48 hours. Full curing may take up to a week depending on the product.
Should I Seal The Garage Floor After Fixing Cracks?
Sealing protects the floor from moisture and stains. It also helps prevent new cracks from forming.
Can Large Cracks Cause Structural Problems In My Garage?
Yes, wide cracks may weaken the floor’s strength. They can also allow water to seep under the slab.
How Often Should I Inspect My Garage Floor For Cracks?
Inspect your garage floor every 6 to 12 months. Early detection helps prevent bigger problems later.
What Tools Do I Need To Fix Large Garage Floor Cracks?
Essential tools include a chisel, wire brush, vacuum, trowel, and mixing bucket. Safety gear like gloves is also important.
Is Temperature Important When Repairing Concrete Cracks?
Yes, repair is best done when temperatures are between 50°F and 85°F. Extreme cold or heat can affect curing and adhesion.
Conclusion
Fixing large cracks in your garage floor protects it from further damage. Use the right materials and follow clear steps for best results. Small efforts now save you money and time later. Keep your garage safe and strong by acting quickly.
Taking care of cracks helps maintain your home’s value. Simple repairs can make a big difference in appearance and safety. Remember, a smooth floor means a safer place for your car and family. Stay patient and careful during the repair process.
You can do this!