
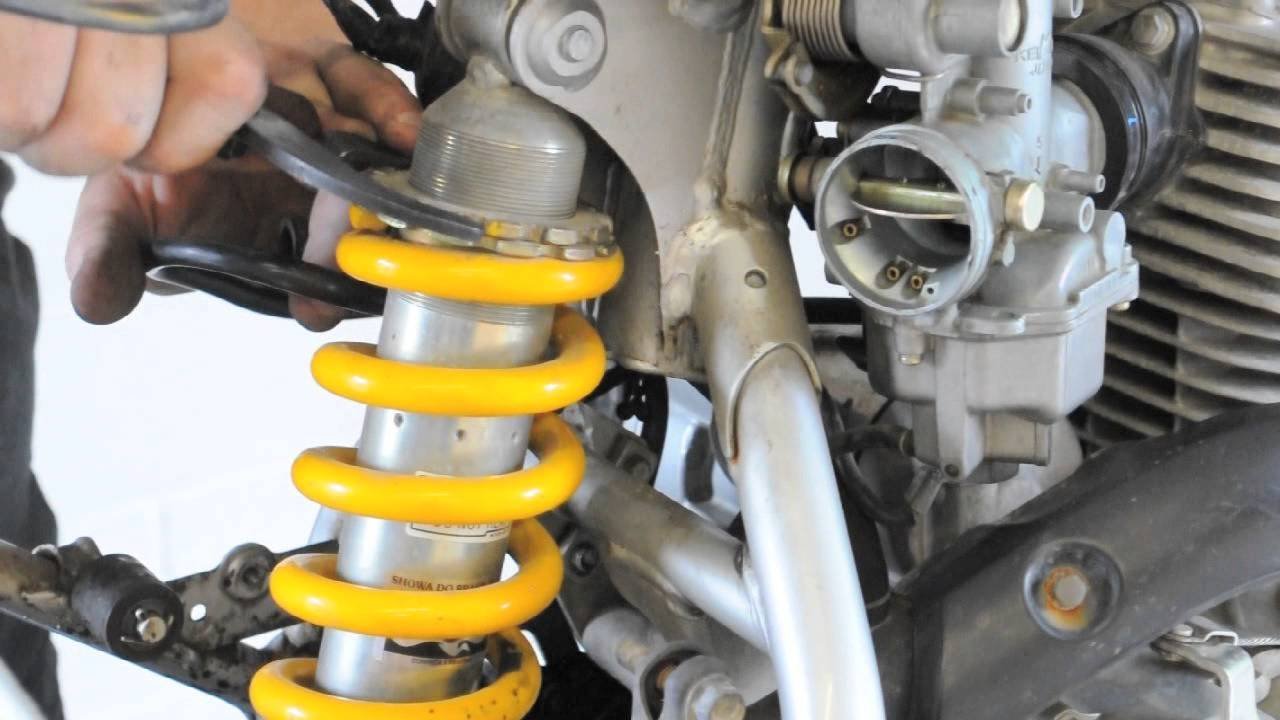
To adjust rear sag, loosen the lock ring and rotate the preload collar to change the spring compression.
Tools to lower your rear shock
- A sturdy center dirt bike stand that lifts both wheels completely off the ground
- A metric tape measure or a dedicated suspension sag scale marked in millimeters
- A brass drift punch or an aluminum punch designed to protect aluminum shock collars
- A hammer or dead-blow mallet weighing 16 to 24 ounces
- A spanner wrench matched to your shock’s collar notch diameter
- A permanent marker or grease pencil to mark thread positions
- A metric wrench set to loosen subframe or airbox bolts if shock access is tight
A brass drift punch works well if you don’t own a spanner, but a flathead steel screwdriver doesn’t work because it chews through soft aluminum collar notches. High-pressure shock rebuilding requires special nitrogen charging gear and training, so leave full internal tear-downs to a dedicated suspension shop.
Step-by-step
- Place the motorcycle on a center stand so the rear wheel hangs completely in the air with zero weight on the suspension.
- Clean the shock body threads with a nylon brush and water to clear away grit before turning any parts. Careful: Debris caught in the aluminum threads can cross-thread the ring and ruin your shock body, which costs hours of labor and expensive replacement parts.
- Measure the baseline distance from the rear axle center to a fixed mark on the rear fender with your tape measure and write it down.
- Loosen the top lock nut by tapping it counterclockwise with your brass punch and mallet until it moves freely.
- Rotate the lower preload spring collar upward (counterclockwise) by 3 to 6 turns to reduce preload; each full turn lowers the spring plate roughly 1.5 millimeters. Tip: If X rider weight is under 150 pounds, back off 5 full turns; if Y rider weight is over 175 pounds, don’t back off more than 2 turns or the spring will rattle loose at full extension.
- Tighten the upper lock ring back against the lower collar with the punch and hammer, snugging it with firm taps to lock it in place.
- Take the bike off the stand and measure race sag with the rider in full gear; race sag should drop by 10 to 15 millimeters from your stock setting.
- Test the free play by lifting the rear fender to ensure the spring still has light tension and doesn’t rattle on the shock body.
Adjusting internal valving or inserting stroke-limiting spacers inside the damper body requires releasing high-pressure nitrogen gas. That carries real injury risk, so take the shock assembly to an authorized motorcycle dealer or suspension specialist if you need a lower drop.
Adjusting for different setups
Bike geometry reacts differently depending on the chassis design, your riding style, and how much clearance you start with.
| Setup Type | Shop Time or Cost | Key Difference | What to Watch |
|---|---|---|---|
| Trail / Enduro Bike | 30 minutes / Free DIY | Softer springs with long wheel travel | Frame bottoming on trail rocks |
| Motocross Race Bike | 40 minutes / Free DIY | Stiff springs with harsh damping rates | High-speed head-shake on tracks |
| Linkage Chassis | 45 minutes / $80–$140 linkage parts | Progressive leverage curve near end of stroke | Rear tire hitting rear inner fender |
| Linkless PDS Shock | 25 minutes / Free DIY | Linear leverage without linkage bearings | Shock angle changes swingarm geometry |
Starting with small collar turns is safer because over-adjusting ruins your bike’s handling balance on the very first jump.
How to tell you did it right
A correct job leaves the rear end settling smoothly under rider weight, giving you a firm footing while keeping the front end planted. A poor result makes the bike wallow mid-corner, feel loose under hard braking, and bottom out over small trail bumps. This loss of stability happens because reducing spring preload changes the frame’s head angle, pushing the fork rake forward and slowing steering response. You prevent this geometry issue by sliding your front fork tubes up 3 to 5 millimeters inside the triple clamps, matching the rear drop. You must also check that your shock retains 25 to 35 millimeters of static sag so the bike doesn’t unload violently over sharp crests.
Chassis standards and final checks
The Motorcycle Safety Foundation’s dirt bike guidelines outline proper control setup and pre-ride inspections on their MSF DirtBike School basic guidelines page, emphasizing that controls must match the rider’s physical dimensions. After finishing your collar adjustments, wipe all grease off the shock shaft, check that all mud flap bolts are torqued, and verify that your chain slack sits between 45 and 55 millimeters. Chain tension is tightest when the countershaft sprocket, swingarm pivot, and rear axle are aligned; check your manual for the correct slack measurement. This garage adjustment holds indefinitely unless the lock nut loosens or the shock spring begins to fatigue over a full season.
Other ways to do it
Install a lowering link
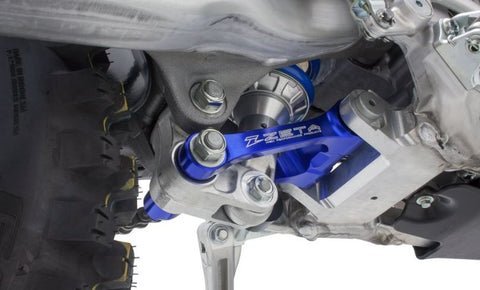
Replace the stock swingarm pull rods with an aftermarket lowering link. This linkage swap changes the mechanical ratio, dropping the rear frame by 1 to 1.5 inches without losing initial spring plushness. The trade-off is softer progression and higher part costs.
Fit a cut seat foam
Shave the stock seat foam down by 1 inch using an electric carving knife or buy a low-profile replacement seat. This method changes zero suspension geometry, avoids bottoming-out risks, and costs very little, but it provides noticeably less cushion on long, rough rides.
Add internal shock spacers
A qualified suspension technician disassembles the shock damper and places an aluminum spacer underneath the seal head. This reduces total shock travel directly and lowers the bike cleanly. It preserves the exact spring rate curve, though it requires professional shop labor and fresh shock oil.
Frequently asked questions

Will lowering the rear shock ruin the bike’s handling?
Yes, dropping only the rear makes the steering sluggish and causes the front wheel to push wide in turns. You must balance the chassis by sliding the front fork tubes up 3 to 5 millimeters in the triple clamps to keep the original frame angle intact.
Can you lower a dirt bike without buying parts?
Yes, loosening the shock preload collar and raising the front forks in the triple clamps lowers the seat up to half an inch for free. This method only requires common hand tools, though it only works well if the rider is light enough for the softer setup.
How much can you safely lower the rear shock using preload?
You can safely lower the collar by 5 to 10 millimeters, which translates to about 15 millimeters of drop at the seat. Backing it off further leaves the spring completely loose when the wheel is off the ground, causing severe clunking and dangerous handling over jumps.
What happens if the rear shock spring has no preload?
The spring rattles around the shock body during jumps when the suspension drops, which damages the collar threads and spring retainers. It also eliminates the necessary static sag, making the rear end kick sideways when braking over small, sharp braking bumps on the trail.
Is this shock adjustment safe for motocross tracks?
No, using reduced preload to lower a bike for motocross tracks causes frequent, violent bottoming on large jumps. Track riders need full travel to absorb hard landings, so short riders should cut the seat foam instead of removing essential suspension travel.
Final Thoughts
Once your bike feels balanced, take it for a short test ride on a familiar trail. You’ll quickly notice how the changes affect your handling and comfort. Don’t be afraid to make small tweaks until the suspension feels just right, as getting it dialed in will make every ride much more enjoyable.
Related guides