
Ready to give your old wood chairs a stunning makeover? Upholstering them yourself is easier than you think, and the results are incredible.
Imagine sinking into a plush, custom-designed seat instead of a hard wooden one. You can transform your dining room, add a cozy touch to your bedroom, or create a statement piece for your living area. This guide will walk you through every step, from choosing the right fabric to securing it perfectly.
Get ready to breathe new life into your furniture and impress your guests with your DIY skills!
Choosing Your Chair
Choosing the right chair is key. It sets the stage for your project. Think about the chair’s shape. Consider its size. A good chair makes a big difference. It impacts the final look. It affects the comfort too.
What Kind Of Chair Works Best?
Sturdy chairs are ideal. Look for solid wood. Avoid wobbly ones. Chairs with simple frames are easier. They have fewer tricky parts. Chairs with removable seats are great. This simplifies the upholstery process. Consider the chair’s style. Does it fit your decor? Modern chairs need modern fabric. Traditional chairs suit classic patterns. Think about the chair’s purpose. Dining chairs need durable fabric. Accent chairs can be more delicate.
Assessing The Chair’s Condition
Inspect the chair closely. Check for loose joints. Are there any cracks? Does the wood need repair? Minor damage is often fixable. Major structural issues are a problem. Upholstery won’t fix a broken chair. Ensure the seat frame is sound. It must support new padding. Clean the chair thoroughly. Remove old dirt and grime. A clean surface is essential. This helps new materials adhere well.
Measuring For Fabric Needs
Measure your chair’s seat. Include the seat’s depth. Note the seat’s width. Measure the backrest if needed. Add extra for seams. Add extra for trimming. This ensures you have enough fabric. It prevents running out mid-project. Good measurements save money. They prevent wasted material. Keep your measurements handy. They are vital for fabric shopping.
Gathering Materials
First, gather your supplies. You will need fabric, batting, and staples. Get your tools ready for the project.
This project requires careful preparation. You need the right supplies. Gathering everything first makes the job easier. It saves time later. Let’s look at what you need.Fabric Selection
Choose your fabric wisely. Consider durability. Think about the chair’s use. A busy dining chair needs tough fabric. A decorative accent chair can use delicate material. Patterns can hide imperfections. Solid colors highlight craftsmanship. Test the fabric. Does it feel good? Is it easy to clean? Many options exist. Cotton, linen, and polyester are popular. Velvet adds luxury. Outdoor fabrics resist fading.Padding & Batting
Padding adds comfort. It softens the seat. Foam is a common choice. Use upholstery foam. It is dense and supportive. Batting adds a smooth finish. It goes over the foam. It prevents wrinkles in the fabric. Poly-fill batting works well. Cotton batting is another option. Measure carefully. You need enough to cover the seat. Add a little extra.Fasteners & Tools
You need a staple gun. This is essential. Use heavy-duty staples. Ensure they are the right size. Scissors are necessary. You need them for fabric. A measuring tape is important. Measure twice, cut once. A screwdriver might be needed. Some chairs have removable seats. A pry bar helps remove old staples. A utility knife can trim excess material. Gloves protect your hands. Safety glasses are a good idea.Preparing The Chair
First, ready your wood chair. Clean its surfaces well. Ensure it is smooth for new fabric.
This step is crucial. A well-prepared chair makes reupholstering easier. It ensures a professional finish. Let’s get your chair ready.Disassembly
First, take your chair apart. Remove all old fabric. Use a screwdriver. Take off staples too. Keep all screws safe. You will need them later.Cleaning & Repair
Clean the wood thoroughly. Use a damp cloth. Remove dust and grime. Check the chair for damage. Tighten any loose screws. Repair any wobbly parts. Sand down rough spots. This makes the wood smooth. A solid base is important.Cutting The Fabric
Cutting the fabric is a crucial step. Precise cuts ensure a neat finish. This part requires careful measurement. Accuracy here prevents waste. A well-cut fabric makes upholstery easier. It leads to a professional look.
Seat Cushion Pattern
Measure your foam seat cushion. Add two inches all around. This extra fabric is for wrapping. Draw this shape on your fabric. Use a fabric marker. This is your cutting line. Cut smoothly along the marked line. You need one piece for the seat.
Back Cushion Pattern (if Applicable)
Measure your back cushion foam. Add two inches to all sides. This allows for a tight fit. Mark this expanded shape on fabric. Cut out this fabric piece. This is for the chair back. Ensure the fabric is smooth. This prevents wrinkles later.
Padding And Cushioning
Padding and cushioning add comfort. They make hard wood chairs soft. This is a key step for your DIY project.
The padding and cushioning transform a plain wood chair. It adds comfort and style. This step makes your chair inviting. It creates a soft place to sit.Adding Foam
Choose the right foam. High-density foam works best. It offers good support. It lasts a long time. Cut the foam to size. It should fit your seat snugly. Use a sharp knife or electric carving tool. Make sure the edges are smooth. Attach the foam to the chair seat. Use spray adhesive. Apply it evenly. Press the foam down firmly. Let it dry completely.Applying Batting
Batting adds a soft layer. It smooths out the foam’s surface. It creates a rounded edge. Use polyester quilt batting. It is easy to work with. Drape the batting over the foam. Pull it taut. Wrap the excess batting around the seat’s sides. Staple the batting to the underside. Use a staple gun. Space staples about two inches apart. Trim any extra batting. Ensure a neat finish. This prepares the seat for fabric.Attaching The Fabric
Attaching the fabric is a crucial step. It transforms your plain wood chair. This makes it comfortable and stylish. Proper attachment ensures a neat look. It also guarantees durability.
Securing The Seat
Start with the seat cushion. Drape your fabric over it. Ensure it is centered. Pull the fabric taut. You want no wrinkles. Start stapling the fabric. Work from the center outward. Staple on the underside of the seat. Overlap each staple slightly. This creates a strong hold. Trim excess fabric as you go. Leave a small amount for tension.
Finishing The Edges
Neatly finish the fabric edges. Fold the raw edge under. This creates a clean seam. Staple this folded edge down. Continue stapling around the seat. Keep the fabric tight. Smooth out any puckers. You can add decorative trim. This hides staples. It also adds a nice touch. Consider piping for a polished look. Attach it before stapling the final edge.
Adding Decorative Touches
Now for the fun part. Adding decorative touches elevates your new upholstered chairs. These details make a big difference. They give your chairs a polished look. Think of them as the jewelry for your furniture.
Nailhead Trim
Nailhead trim adds classic style. It looks very professional. You can buy it in strips. Simply hammer it into place. Space the nails evenly. This creates a neat border. It frames your upholstery beautifully. Many finishes are available. Choose brass, silver, or antique. Consider the chair’s overall style. Nailheads work well on traditional chairs. They also suit modern designs.
Piping
Piping adds a crisp edge. It defines the chair’s shape. Piping is a fabric-covered cord. You can buy it pre-made. You can also make your own. Attach it along the seams. Use a zipper foot on your machine. This helps you sew close to the cord. Piping creates a tailored appearance. It looks very smart. It highlights the chair’s silhouette. Choose a contrasting color. This makes the piping pop. Or select a matching color. This creates a subtle effect.
Reassembly
Transform plain wood chairs into plush, upholstered seating. Learn simple steps for adding comfortable cushions. Give your old chairs a cozy new look.
Reassembly: Bringing Your Chairs Back Together
Reassembly is the final step. You bring your transformed wood chairs back to life. This part feels rewarding. You see your hard work pay off. Prepare for the grand finale.Attaching The Upholstered Seat
Place the upholstered seat onto the chair frame. Align it carefully. Ensure it sits flat. The fabric should look smooth. No wrinkles allowed.Securing The Seat
Use your screws or staples. Secure the seat firmly. Check for any wobbling. The seat must feel solid. This makes the chair safe.Reattaching Other Chair Parts
Now, reassemble other parts. This might include the backrest. Or perhaps armrests. Follow your original disassembly. Put everything back as it was. Use your screws and glue. Make sure all joints are tight.Final Checks And Touches
Inspect the entire chair. Look for loose pieces. Tighten any screws. Ensure the upholstery is neat. Admire your new chair. It is a beautiful transformation. Your DIY project is complete. Enjoy your custom seating.Care And Maintenance
Give your wooden chairs new life. Proper care keeps them looking great. Regular dusting and gentle cleaning protect the fabric.
Keep your newly upholstered chairs looking great. Proper care ensures longevity. Protect your investment.Cleaning Upholstery Fabric
Regular dusting prevents soil buildup. Use a soft brush attachment. Vacuum weekly for best results. Spot clean spills immediately. Use a mild soap solution. Test in an inconspicuous area first. Blot, do not rub. Avoid harsh chemicals. They can damage fabric fibers.Caring For Wooden Parts
Wipe wooden frames with a damp cloth. Dry thoroughly afterward. Use a wood polish occasionally. This restores shine. Protect wood from direct sunlight. Sunlight can fade wood color. Avoid extreme temperatures. They can cause wood to warp.Preventing Wear And Tear
Rotate cushions regularly. This promotes even wear. Avoid placing heavy objects. This can stress the frame. Use furniture coasters. They protect floors. Keep pets away from chairs. Pet claws can snag fabric.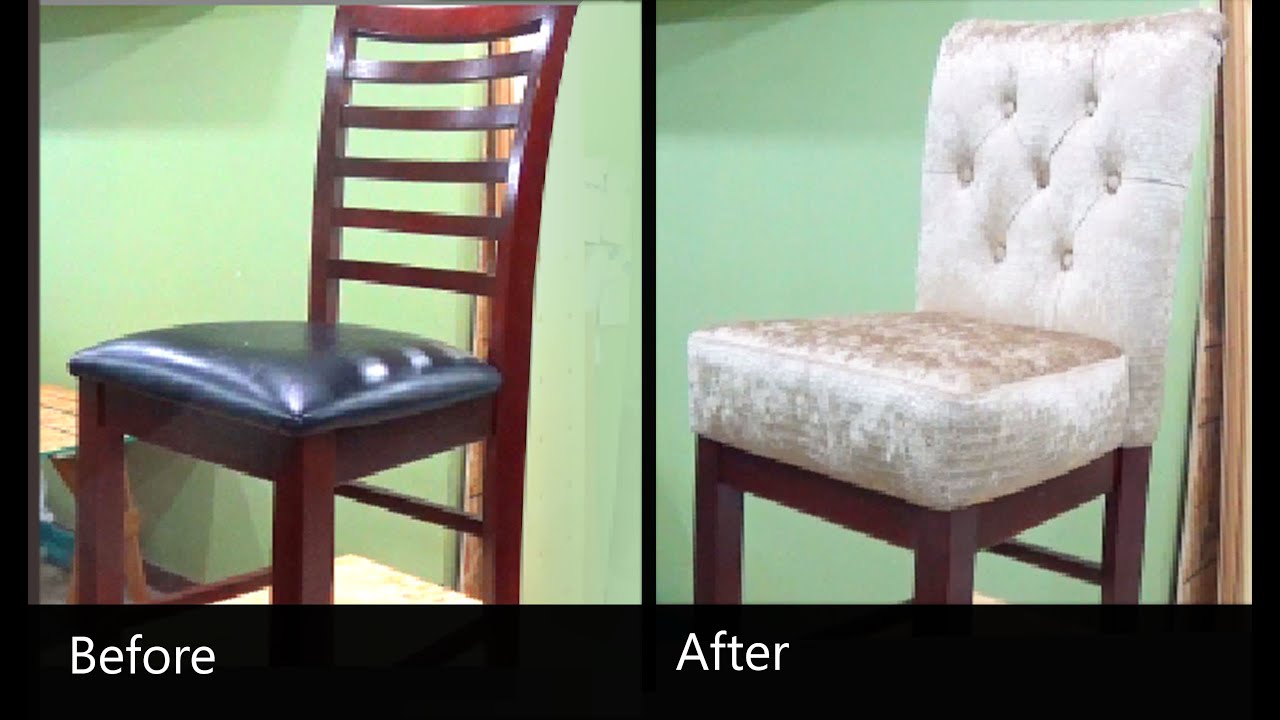
Credit: www.youtube.com
Frequently Asked Questions
Can I Reupholster Any Wood Chair?
Most wood chairs can be reupholstered. Check for sturdy frames and good structure. Avoid chairs with loose joints or damaged wood.
What Materials Do I Need For This Project?
You’ll need fabric, foam or batting, and upholstery tools. A staple gun and remover are essential. Sharp scissors and a measuring tape are also important.
How Do I Choose The Right Fabric?
Select durable fabrics like cotton or linen blends. Consider patterns and colors that match your decor. Test the fabric for wear and tear.
How Do I Remove Old Upholstery?
Carefully pry off staples with a staple remover. Work slowly to avoid damaging the wood. Keep track of the old fabric for reference.
How Do I Attach The New Fabric?
Start by centering the fabric on the seat. Pull it taut and staple along the edges. Smooth out any wrinkles as you go.
How Long Does This Project Usually Take?
This project can take a few hours. It depends on the chair’s complexity. Take your time for best results.
Is It Cheaper To Reupholster Or Buy New?
Reupholstering is often more cost-effective. It saves money compared to buying new chairs. Plus, you get a custom look.
Conclusion
Transforming wood chairs is simple. Add comfort with fabric. You can do this project. Gather your materials. Follow the steps carefully. Enjoy your new look. Your chairs will feel great. A beautiful upgrade. Your home will thank you. Try it today.