
When your Liftmaster garage door opener suddenly stops working, it can be a significant inconvenience, leaving you stranded or unable to secure your home. This common household issue can stem from a variety of sources, ranging from simple power problems to more complex mechanical failures. Understanding the potential culprits behind a non-functional Liftmaster opener is the first step toward a swift resolution, saving you time, money, and unnecessary frustration.
The complexity of modern garage door openers means that troubleshooting can sometimes feel daunting. However, many of the most frequent issues have straightforward fixes that a homeowner can address without needing to call a professional. This guide will walk you through the most common reasons why your Liftmaster garage door opener might not be working, providing a systematic approach to diagnose and resolve the problem.
From checking the power supply and remote controls to inspecting safety sensors and internal components, we’ll cover the essential steps to get your opener back in action.
Key Takeaways
- Power Issues: The most common cause of a non-working Liftmaster opener is a lack of power, so check the circuit breaker, outlet, and GFCI reset.
- Remote Control Problems: Ensure batteries are fresh, the remote is programmed correctly, and there are no obstructions between the remote and the opener.
- Safety Sensor Alignment: Misaligned or obstructed safety sensors are a frequent reason for the door not closing properly.
- Mechanical Issues: Worn gears, broken springs, or a disengaged trolley can prevent the opener from functioning.
- Limit Settings: Incorrectly set travel limits can cause the opener to stop prematurely or reverse unexpectedly.
- Lockout Mode: Accidental engagement of the vacation or lock mode can disable the opener.
- Professional Help: For complex mechanical failures or if basic troubleshooting fails, consult a qualified garage door technician.
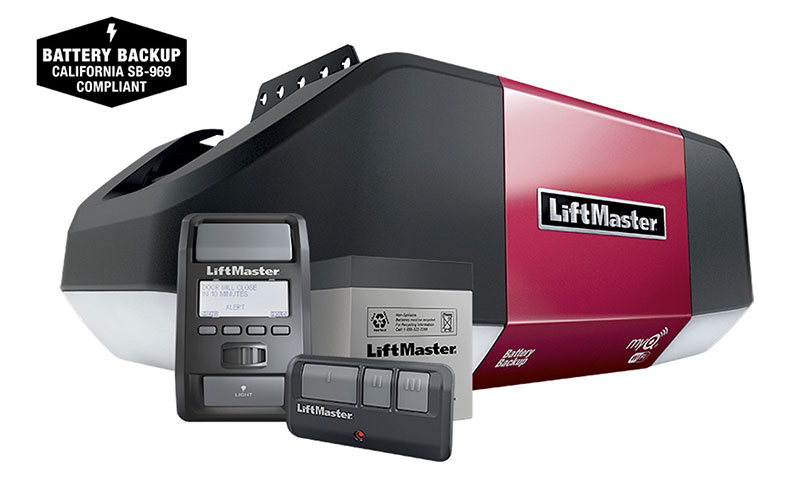
Credit: www.liftmaster.com
Power Supply And Electrical Connections
A lack of power is the most fundamental reason why any electronic device, including your Liftmaster garage door opener, will not function. Before diving into more complex diagnostics, it’s crucial to systematically check all potential power-related issues. This involves looking at the main power source, the outlet the opener is plugged into, and any safety mechanisms that might interrupt the electrical flow.
Circuit Breaker Or Fuse
Your garage door opener is connected to your home’s electrical system, which is protected by either a circuit breaker or fuses. If an electrical surge or overload occurred, the breaker might have tripped, or a fuse might have blown, cutting off power to the opener.
- Locate your home’s electrical panel. This is typically found in a basement, garage, utility room, or hallway.
- Identify the breaker or fuse controlling the garage. It might be labeled “Garage,” “Garage Door Opener,” or a specific circuit number.
- For circuit breakers: If the switch is in the “OFF” position or halfway between “ON” and “OFF,” it has tripped. Push it firmly to the “OFF” position and then back to the “ON” position to reset it. If it trips again immediately, there may be a short circuit or an overloaded circuit, and you should consult an electrician.
- For fuses: If your system uses fuses, visually inspect the fuse for the garage circuit. If the metal filament inside is broken, the fuse has blown and needs to be replaced with one of the exact same amperage. If you don’t have fuses, you likely have breakers.
Outlet Functionality
Even if the circuit breaker is on, the outlet supplying power to your Liftmaster opener might be the issue.
- Check the outlet: Ensure the opener is securely plugged in. Sometimes, a slight jostle can loosen the connection.
- Test the outlet: Plug in a different small appliance, like a lamp or a phone charger, into the same outlet. If the other appliance doesn’t work, the outlet itself may be faulty, or the circuit is still interrupted.
- GFCI Outlet: Many garages have Ground Fault Circuit Interrupter (GFCI) outlets, which are designed to prevent electrical shock. These outlets have “Test” and “Reset” buttons. If the outlet is GFCI-protected and has tripped, the opener won’t receive power. Press the “Reset” button firmly. If it trips again, there might be a ground fault issue, and you should contact an electrician.
Power Cord And Connections
The power cord connecting the opener to the outlet can also be a point of failure.
- Inspect the cord: Look for any visible signs of damage, such as cuts, fraying, or kinks. A damaged cord can prevent power from reaching the unit or create a safety hazard.
- Check connections: Ensure the cord is not damaged where it enters the opener unit.

Credit: www.youtube.com
Remote Control And Wall Button Issues
If your Liftmaster opener isn’t responding to commands, the problem might lie with the devices you use to activate it, the remote control or the hardwired wall button. These components communicate with the opener’s motor unit, and any interruption in this communication can lead to a non-functional system.
Remote Control Malfunctions
Remote controls are often the most used interface for garage door openers, and they are susceptible to various issues.
- Dead Batteries: This is the most common culprit for a non-responsive remote. Replace the batteries in your remote with fresh ones. Ensure you are using the correct battery type specified by Liftmaster for your model.
- Range and Obstructions: The signal from your remote needs to reach the opener’s antenna.
- Proximity: Try standing closer to the garage door opener unit when pressing the remote button.
- Interference: Other electronic devices, such as LED lights, wireless doorbells, or even nearby radio transmitters, can sometimes interfere with the remote’s signal. Try to identify and temporarily disable potential sources of interference.
- Antenna: Check if the antenna wire hanging from the motor unit is intact and not damaged.
- Remote Programming: Over time, or after a power outage, the remote might lose its programming with the opener. You will need to reprogram the remote to the opener. Consult your Liftmaster manual for specific instructions based on your model number, as the programming sequence varies. Generally, this involves pressing a “Learn” or “Program” button on the motor unit and then pressing the button on the remote you wish to use.
- Damaged Remote: If the remote has been dropped or exposed to moisture, it might be physically damaged. Try using a different remote if you have one, or the wall button, to see if the opener itself is functional.
Wall Button (push Button) Problems
The wired wall button is a direct link to the opener and can also fail.
- Loose Wires: The wires connecting the wall button to the motor unit can become loose over time, especially if the opener is old or has experienced vibrations.
- Inspect connections: Carefully examine the terminals where the wires connect to the back of the wall button and where they enter the motor unit. Ensure they are secure and free from corrosion.
- Shorting Wires: Sometimes, the two wires from the wall button can accidentally touch each other. This can cause the opener to activate or, in some cases, prevent it from working. Ensure the wires are properly insulated and separated.
- Faulty Button: The button mechanism itself can wear out or become stuck.
- Test the button: Press the wall button firmly. If it feels stuck, loose, or unresponsive, the button itself might be defective and need replacement.
- Bypass the button (advanced): For diagnostic purposes, you can temporarily bypass the wall button by carefully touching the two wires that connect to it to the terminals on the motor unit. If the opener activates this way, the issue is with the wall button or its wiring. Warning: Ensure the opener is unplugged before attempting this, and only proceed if you are comfortable with basic electrical connections.
Safety Sensors: The Silent Guardians
Safety sensors are a critical component of any modern garage door opener system, designed to prevent the door from closing on an obstruction. These sensors are typically located near the bottom of the garage door tracks, one on each side. If these sensors are misaligned, obstructed, or malfunctioning, the opener will often refuse to close the door, or it might reverse immediately after starting to descend.
Understanding Safety Sensor Operation
The safety sensors work by emitting an invisible infrared beam from one sensor to the other. When the beam is unbroken, it signals to the opener that the path is clear for the door to close. If something breaks the beam (like a car, person, pet, or even accumulated dust), the opener will stop the closing process or prevent it from starting.
Common Safety Sensor Issues
- Misalignment: This is the most frequent cause of safety sensor problems. Even a slight nudge can knock the sensors out of alignment, breaking the beam.
- Visual Check: Look at the two sensors. The indicator lights on each sensor should be steadily illuminated (usually green or amber, depending on the model). If one light is off or blinking, it indicates a problem.
- Alignment Adjustment: Gently adjust the position of the sensors. On many models, the sensor housing can be rotated slightly. Try to align them so that both indicator lights are solid. You may need to adjust one or both until the lights indicate a solid connection.
- Obstructions: Anything blocking the path of the infrared beam will cause the sensors to trigger.
- Clean the lenses: Dust, dirt, cobwebs, or even spiderwebs can accumulate on the sensor lenses. Wipe the lenses on both sensors with a soft, dry cloth.
- Physical Blockages: Ensure that nothing is physically in the path between the two sensors, such as a lawnmower, bicycle, storage bins, or even tall grass if the sensors are mounted low.
- Damaged Sensors or Wiring: The sensors themselves or the wires connecting them to the motor unit can be damaged.
- Inspect for damage: Look for cracks in the sensor housing, bent mounting brackets, or damaged wiring.
- Check wire connections: Ensure the wires are securely connected to the sensors and the motor unit. Loose or corroded connections can disrupt the signal.
- Power Interruption to Sensors: If the opener itself is not receiving power, the safety sensors will not function, and the door will not close. Refer back to the Power Supply section.
Testing Safety Sensors
After attempting to realign or clean the sensors, test their functionality:
- Clear the path: Ensure nothing is between the sensors.
- Attempt to close the door: Use the remote or wall button to initiate the closing cycle.
- Simulate obstruction: Once the door begins to close, wave an object (like a broom handle or your foot) through the path of the safety beam. The door should immediately stop and reverse to the fully open position. If it doesn’t, the sensors are still not functioning correctly.
If you’ve tried these steps and the safety sensors still appear to be the issue, you may need to replace one or both sensors, or investigate further into the wiring.

Credit: garagedoorchamp.com
Mechanical Failures And Trolley Issues
Beyond electrical and sensor problems, your Liftmaster garage door opener can suffer from mechanical failures within the unit itself or the connected door mechanism. These issues often require a closer inspection of the moving parts and the trolley assembly that connects the opener to the door.
The Trolley And Drive Chain/belt/screw
The trolley is a crucial component that moves along a drive chain, belt, or screw (depending on your opener model). It is attached to the garage door via an arm. When the opener motor runs, it moves the trolley along the drive mechanism, which in turn opens or closes the door.
- Disengaged Trolley: It’s possible for the trolley to become disengaged from the drive mechanism. This often happens if the emergency release cord is pulled accidentally.
- Locate the emergency release cord: This is usually a red cord hanging from the trolley.
- Re-engage the trolley: To re-engage, you typically need to move the lever on the trolley back into its operating position. This often involves pulling the release cord again and then manually moving the trolley along the drive mechanism until it clicks back into place. Refer to your Liftmaster manual for the exact procedure for your model. Once re-engaged, test the opener.
- Broken Drive Chain/Belt/Screw: The drive mechanism itself can fail.
- Chain: If the chain is broken or has snapped, the motor will spin, but the trolley won’t move.
- Belt: A snapped belt will have the same effect, the motor runs, but the trolley remains stationary.
- Screw Drive: If you have a screw drive opener, the screw itself could be damaged or stripped.
- Repair: These are significant mechanical failures that typically require replacing the entire drive mechanism. This is often a job best left to a professional technician.
Motor Unit Gear Issues
Inside the motor unit, a system of gears translates the motor’s rotation into the movement of the drive mechanism. These gears can become worn, stripped, or broken over time, especially in older or heavily used openers.
- Symptoms: You might hear the motor running, but the drive mechanism doesn’t move, or it moves with grinding or clicking noises.
- Diagnosis: This requires opening the motor unit housing, which is generally not recommended for DIY repair due to the complexity and potential safety hazards.
- Solution: Gear replacement is possible but often costly. In many cases, especially with older units, it’s more economical to replace the entire opener unit.
Garage Door Itself
Sometimes, the problem isn’t with the opener but with the garage door’s balance and mechanics. A heavy or sticking door can put too much strain on the opener, causing it to overheat, trip its internal overload protection, or even fail to move.
- Balance Test: Disengage the trolley (using the red release cord) so the door is detached from the opener. Try to lift the door manually. It should move smoothly and stay open about halfway up without assistance. If it’s very heavy, slams shut, or won’t stay open, the garage door springs are likely failing or broken.
- Sticking Tracks: Check the tracks for any dents, debris, or obstructions that might be preventing the door from moving freely.
- Broken Springs: Garage door springs are under immense tension and are extremely dangerous if they break or if you attempt to replace them without proper training and equipment. If you suspect broken springs, do not operate the opener and call a professional garage door service immediately.
Limit Settings And Travel Adjustments
Liftmaster garage door openers have limit settings that control how far the door opens and closes. These settings tell the opener when to stop at the fully open and fully closed positions. If these limits are set incorrectly, the door might stop prematurely, reverse unexpectedly, or fail to move at all.
Understanding Travel Limits
- Close Limit: Determines how far down the door travels before stopping.
- Open Limit: Determines how far up the door travels before stopping.
Modern Liftmaster openers often have electronic limit settings that can be adjusted via buttons or dials on the motor unit. Older models might use mechanical limit adjustment screws.
Common Limit Setting Issues
- Door Reverses Immediately: If the door starts to close and then immediately reverses and goes back up, the close limit is likely set too tightly. The opener senses that the door has hit an obstruction (even though it hasn’t) because it has traveled the programmed distance.
- Door Doesn’t Close Fully: If the door stops halfway or doesn’t reach the fully closed position, the close limit needs to be adjusted to allow for more travel.
- Door Doesn’t Open Fully: If the door stops before reaching the fully open position, the open limit needs adjustment.
- Opener Stops Mid-Travel: This could be an issue with either limit setting, or potentially an issue with the force setting, which determines how much force the opener applies before stopping.
Adjusting Limit Settings
The procedure for adjusting limit settings varies significantly by Liftmaster model. Always refer to your owner’s manual. However, the general process often involves:
- Accessing Adjustment Controls: Locate the adjustment buttons or screws on the motor unit. These are often behind a cover panel.
- Initiating Adjustment Mode: You may need to press a specific button sequence to enter the adjustment mode.
- Adjusting Close Limit:
- Manually move the door to the desired closed position (or use the opener to move it close and then stop it).
- Use the adjustment buttons/screws to set the close limit. For electronic limits, you might press an “Up” or “Down” button to fine-tune the position.
- Adjusting Open Limit:
- Manually move the door to the desired open position (or use the opener).
- Use the adjustment buttons/screws to set the open limit.
- Saving Settings: Ensure you follow the procedure to save the new settings, which often involves pressing a “Program” or “Enter” button.
- Testing: After adjustments, run the opener through a full open and close cycle several times to ensure it operates correctly and stops at the desired positions without reversing.
Example: On some Liftmaster models, you might press and hold the “Program” button until the indicator light flashes, then use the “Up” and “Down” buttons to adjust the travel, and finally press “Program” again to save.
If you are unsure about adjusting these settings, consult your manual or a professional. Incorrect adjustments can lead to the door not closing securely or damaging the opener or door.
Lockout/vacation Mode And Internal Fuses
Some Liftmaster models include a Lockout Mode or Vacation Mode feature, designed to prevent operation when you’re away from home. If this mode is accidentally activated, it will disable the remote controls, leaving you unable to open the garage door. Additionally, internal fuses within the motor unit can blow, cutting power to specific functions.
Activating And Deactivating Lockout Mode
- How it’s Activated: Lockout mode is typically activated via a button on the wall control panel. This button is often labeled with a padlock icon or the word “Lock.” Pressing and holding this button for a few seconds usually engages or disengages the mode.
- Symptoms: When lockout mode is active, the remote controls will not work. However, the wall button should still function. This is a key diagnostic indicator. If your remotes don’t work but the wall button does, lockout mode is a strong possibility.
- Deactivation: To deactivate lockout mode, simply press and hold the Lock button on the wall control panel again for a few seconds until the indicator light (if present) changes or the remotes begin to work.
- Check Your Wall Control: Examine your wall-mounted control panel for a button that looks like a lock or is labeled “Lock.” If you find one, try pressing and holding it for 5-10 seconds. Then, try your remote control again.
Internal Fuses
The motor unit of your Liftmaster opener may contain one or more internal fuses that protect the electronic components from power surges or internal malfunctions. If one of these fuses blows, it can disable the opener entirely or cause specific functions to stop working.
- Location: Internal fuses are typically located inside the motor unit housing, often near the power input or on the main logic board. You may need to remove the motor unit cover to access them.
- Diagnosis: Visually inspect the fuses. A blown fuse will often have a darkened or broken filament inside. You can also test a fuse using a multimeter set to continuity mode. If the multimeter indicates no continuity, the fuse is blown.
- Replacement: If a fuse is blown, it must be replaced with a fuse of the exact same type, voltage, and amperage rating. Using an incorrect fuse can damage the opener or create a fire hazard.
- Identifying the Cause: If an internal fuse blows, it usually indicates an underlying electrical problem within the opener’s circuitry. Simply replacing the fuse might only be a temporary fix if the root cause isn’t addressed. If you find a blown internal fuse, it’s often advisable to consult a qualified technician to diagnose the broader issue.
Pro Tip: Always unplug the garage door opener from the power outlet before opening the motor unit housing or attempting to inspect or replace internal fuses.
Troubleshooting Common Liftmaster Models
While the general principles of troubleshooting apply across most Liftmaster models, specific features and adjustment methods can vary. Understanding your model can help pinpoint the issue more quickly. Liftmaster offers a wide range of openers, including chain drive, belt drive, and screw drive systems, often categorized by series (e.
g. , 8000, 9000, 10000 series) or smart features.
Identifying Your Liftmaster Model
- Check the Motor Unit: The model number is usually located on a sticker on the side or bottom of the main motor unit housing.
- Consult Your Manual: If you still have the owner’s manual, the model number will be clearly indicated.
- Liftmaster Website: If you can’t find the model number, you can often identify your opener by its appearance or by using Liftmaster’s online resources if you know the approximate purchase date or features.
Model-specific Considerations
- Smart Control Panels (e.g., MyQ): If your opener has MyQ technology, ensure the MyQ hub and app are functioning correctly. Sometimes, connectivity issues with the MyQ system