
Is your water heater’s plastic drain valve leaking? If so, you’re probably worried about water damage, wasted energy, and costly repairs.
A small drip can quickly turn into a big problem if ignored. But don’t panic—you’re not alone, and there are simple steps you can take to fix this issue before it gets worse. Keep reading to learn why your drain valve might be leaking and how you can stop it for good.
Your home and wallet will thank you.
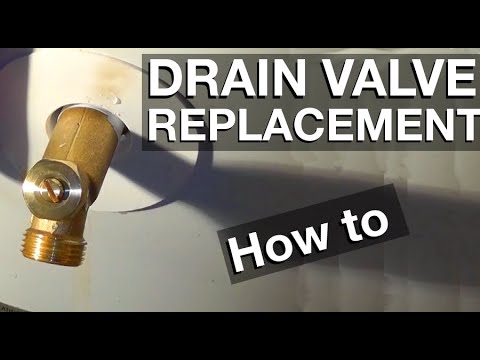
Credit: www.youtube.com
Common Causes Of Valve Leaks
Water heater plastic drain valve leaks cause water loss and damage. Knowing common causes helps fix the problem fast. Leaks often come from simple issues. Identifying the cause can save time and money. Here are the main reasons for valve leaks.
Wear And Tear Over Time
Plastic valves weaken with age. Heat and water cause material to break down. Small cracks or holes form slowly. This wear leads to slow leaks. Regular use speeds up damage. Old valves often need replacement.
Loose Or Damaged Connections
Valves connect to pipes with fittings. These can loosen from vibration or movement. Worn-out washers or seals cause leaks. Tightening connections may stop dripping. Damaged parts require new pieces. Check fittings regularly for tightness.
Cracks In Plastic Valve
Plastic valves can crack from stress or impact. Freezing temperatures make plastic brittle. Cracks let water escape easily. Even small cracks cause leaks. Inspect valves for visible damage. Replace cracked valves to prevent leaks.
Improper Installation
Poor valve installation leads to leaks. Incorrect tightening or wrong parts cause gaps. Valve not aligned properly causes strain. Installation errors create weak spots. Proper installation ensures a tight seal. Always follow manufacturer instructions carefully.
Tools And Materials Needed
Fixing a leaking plastic drain valve on a water heater needs the right tools and materials. Having these ready makes the repair quick and safe. This section lists essential items that help you handle the leak properly.
Wrenches And Pliers
Wrenches and pliers provide grip and leverage. Use an adjustable wrench for different valve sizes. Slip-joint pliers help hold the valve steady. These tools prevent damage during removal or tightening.
Teflon Tape
Teflon tape seals threaded joints. Wrap it around the valve threads to stop leaks. It creates a tight, waterproof barrier. This tape is easy to apply and inexpensive.
Replacement Valve Options
Choose the right replacement valve for your heater. Plastic valves are common but metal ones last longer. Check valve size and thread type before buying. Having the correct valve avoids fitting problems.
Sealants And Lubricants
Plumber’s sealant adds extra protection against leaks. Apply it on the threads before installing the valve. Lubricants help parts move smoothly and prevent cracking. Use products made for plumbing jobs only.
Steps To Stop The Leak Temporarily
Stopping a leak from a plastic drain valve on your water heater quickly prevents water damage. These steps help you handle the problem until a permanent fix arrives. Act fast to avoid bigger issues.
Follow these simple actions to reduce or stop the leak right now.
Turning Off Water Supply
Find the main water valve near the heater. Turn it clockwise to close. This stops water from flowing into the tank. No more water means the leak will slow or stop.
Draining The Tank
Attach a garden hose to the drain valve. Lead the hose outside or to a drain. Open the valve carefully to let water out. Draining lowers pressure inside and reduces leaking.
Tightening The Valve
Use a wrench to gently turn the valve clockwise. Tighten it just enough to stop leaks. Avoid overtightening to prevent cracking the plastic valve.
Applying Teflon Tape
Turn off the valve and remove it if possible. Wrap Teflon tape around the valve threads. Wrap 3-4 layers evenly for a good seal. Screw the valve back on tightly to stop leaks.
Credit: americanmusicabroad.com
Replacing The Plastic Drain Valve
Replacing a plastic drain valve on a water heater is a common fix for leaks. A leaking valve can waste water and cause damage. Fixing it yourself saves money and helps your heater work better. The process is simple with the right tools and steps.
Choosing The Right Replacement Valve
Pick a valve that fits your water heater model. Check the size and thread type. Most valves are either plastic or brass. Plastic is cheaper but less durable. Brass lasts longer but costs more. Choose one that matches your needs and budget.
Removing The Old Valve
Turn off the water heater first. Let it cool down to avoid burns. Drain some water from the tank to lower pressure. Use a wrench to turn the old valve counterclockwise. Be gentle to avoid breaking the valve or pipes. Remove the valve completely once loose.
Installing The New Valve
Wrap plumber’s tape around the threads of the new valve. This helps seal and prevents leaks. Screw the valve into the opening by hand at first. Tighten it with a wrench, but do not over-tighten. Over-tightening can crack the valve or tank.
Testing For Leaks
Turn the water supply back on slowly. Check around the valve for any drips or moisture. Use a dry cloth to spot small leaks. Tighten the valve slightly if needed. Watch the valve for a few minutes to ensure it holds tight.
Preventing Future Leaks
Preventing future leaks from your water heater’s plastic drain valve is important. Small leaks can cause big problems over time. Taking simple steps helps keep the valve working well. It also saves money on repairs and water bills.
Regular Maintenance Tips
Check the drain valve every few months. Look for any signs of moisture or rust. Flush the water heater annually to clear sediment. Sediment can damage the valve and cause leaks. Regular checks catch issues early before they grow.
Avoiding Over-tightening
Do not tighten the drain valve too much. Over-tightening can crack the plastic or wear out the seal. Use just enough force to stop water flow. If unsure, hand-tighten and test for leaks. This prevents damage and keeps the valve secure.
Using Quality Components
Choose high-quality valves made for your water heater. Cheap valves break or wear out faster. Quality parts fit better and last longer. Using the right valve reduces the risk of leaks. Always buy parts from trusted brands or suppliers.
Monitoring Valve Condition
Watch the valve for any changes over time. Look for cracks, corrosion, or loose fittings. Early signs mean it might need replacement soon. Replace the valve promptly to avoid water damage. Regular monitoring keeps your water heater safe and dry.
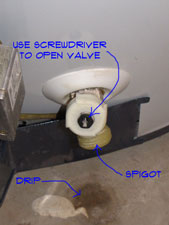
Credit: buzznews.net
When To Call A Professional
A leaking plastic drain valve on your water heater can be a small problem or a sign of something bigger. Knowing when to call a professional helps avoid further damage. Some situations need expert help to fix safely and correctly.
Signs Of Major Damage
Cracks or breaks around the valve show major damage. Water pooling under the heater is a serious warning. Rust or corrosion near the valve means the leak is worsening. Sudden or heavy leaks require immediate professional attention.
Complex Repairs
Replacing a plastic drain valve can be tricky. Sometimes the valve is hard to reach or stuck tight. A professional has the right tools and skills. Complex repairs include fixing pipes or tank issues linked to the valve.
Ensuring Safety Compliance
Water heaters must meet safety codes and standards. Incorrect repairs can cause leaks or hazards. Professionals know local rules and proper installation methods. They keep your home safe and prevent future problems.
Frequently Asked Questions
Why Is My Water Heater Plastic Drain Valve Leaking?
Plastic drain valves can crack or wear out over time, causing leaks. High water pressure or rough handling often causes damage.
How Can I Fix A Leaking Plastic Drain Valve?
Tighten the valve gently with a wrench to stop small leaks. Replace the valve if cracks or breaks appear.
Can A Leaking Drain Valve Cause Water Heater Damage?
Yes, leaking valves waste water and may cause rust or corrosion inside the heater. Prompt repair prevents bigger problems.
Is It Safe To Replace A Plastic Drain Valve Myself?
Yes, if you feel comfortable turning off the water and draining the tank. Use proper tools and follow safety steps.
How Long Does A Plastic Drain Valve Usually Last?
Typically, 5 to 10 years depending on water quality and usage. Regular checks help spot leaks early.
What Causes A Plastic Drain Valve To Crack Or Break?
High water pressure, freezing temperatures, or poor-quality plastic can cause cracks. Rough handling during maintenance can also damage it.
Should I Switch To A Metal Drain Valve For My Water Heater?
Metal valves are more durable and less likely to leak. Upgrading can be a good choice for long-term reliability.
Conclusion
A leaking plastic drain valve on your water heater needs quick attention. Small leaks can waste water and raise your bill. Tighten the valve carefully or replace it if damage shows. Watch for cracks or wear regularly to prevent bigger problems.
Taking simple steps keeps your water heater working well. Don’t ignore leaks; fixing them saves money and hassle. Keep your home safe and dry by acting fast.