
Ready to give your shelves a stunning makeover? Staining shelves is a fantastic way to add warmth, style, and personality to any room.
Whether you’re working with new wood or refreshing old ones, the right stain can transform them from drab to fab. This guide will walk you through everything you need to know to achieve a beautiful, professional-looking finish. You’ll learn the simple steps to prepare your shelves, apply the stain evenly, and protect your work for years to come.
Get ready to impress yourself and everyone who sees your newly stained shelves!
Choosing Your Stain
Selecting the right stain matters. Consider the wood type. A good stain enhances the natural beauty.
Gathering Supplies
First, gather your materials. You’ll need wood stain, brushes, and gloves. Ensure good ventilation.
Proper preparation is key. Get your supplies ready before you start. This makes the staining process smooth. You will have everything you need.Essential Tools
You need a few basic tools. Get a good quality paintbrush. A foam brush works well too. You will also need sandpaper. Get a fine-grit sandpaper. A clean cloth is important. You might need a tack cloth. This removes dust. A stir stick is useful. Use it to mix the stain. A small container holds the stain.Safety Gear
Safety comes first. Always protect yourself. Wear disposable gloves. This keeps your hands clean. Protect your eyes. Use safety glasses. They prevent splashes. Good ventilation is vital. Work in a well-ventilated area. Open windows. Use a fan.Cleanup Kit
Have cleaning supplies ready. This makes cleanup easy. Mineral spirits are good. They clean up oil-based stains. Water works for water-based stains. Have plenty of rags. Use old t-shirts. They are perfect for wiping. Dispose of rags properly. They can be flammable.Prepping Your Shelves
Clean your shelves well. Remove dust and grease. This step prepares them for stain.
Applying The Stain
Apply stain evenly with a brush or cloth. Wipe off excess stain. Let it dry completely before the next coat.
Adding A Protective Topcoat
You have stained your shelves. Now, protect your hard work. A topcoat seals the stain. It prevents scratches. It adds a beautiful finish. This step is very important. It makes your shelves last longer. It keeps them looking great.
Varnish Vs. Polyurethane
Choose your protective layer. Varnish offers good protection. Polyurethane is tougher. It resists water well. Polyurethane is a popular choice. It works for most projects. Consider the shelf’s use. High-traffic areas need strong protection. Polyurethane is often best here.
Application Methods
Apply the topcoat carefully. You can use a brush. A foam brush works too. Some prefer a clean rag. Wipe on thin, even coats. Avoid drips and puddles. Work in a well-ventilated area. Good airflow is essential. Let each coat dry fully. This prevents smudging.
Multiple Coats For Durability
One coat is not enough. Build up protection slowly. Apply two or three coats. This creates a strong barrier. It ensures lasting beauty. Sand lightly between coats. Use fine-grit sandpaper. Wipe away dust. Then apply the next coat. This creates a smooth surface. It makes shelves very durable.
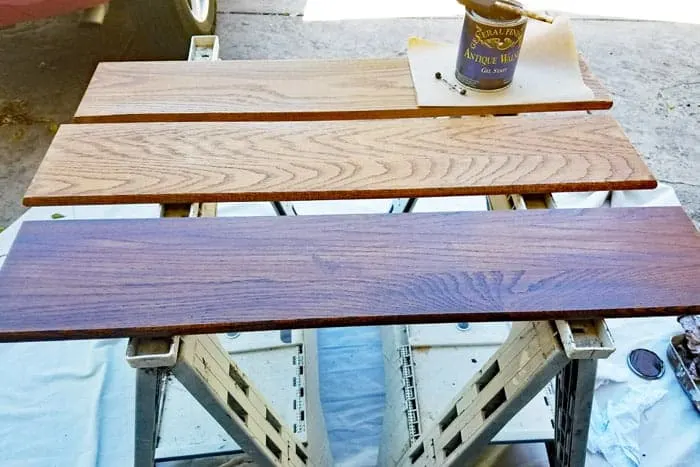
Credit: www.girljustdiy.com
Troubleshooting Common Issues
Staining shelves can present a few challenges. Dealing with uneven color or drips is common. Simple steps can fix these problems for a beautiful finish.
Caring For Stained Shelves
Proper care keeps your stained shelves looking great. Protect your hard work. These steps ensure lasting beauty.
Regular Cleaning
Dust shelves often. Use a soft, dry cloth. This prevents grit buildup. For tougher spots, use a damp cloth. Wipe gently. Dry immediately. Avoid harsh chemicals. They can strip the stain.
Preventing Damage
Use coasters for drinks. Protect the surface. Avoid placing hot items directly. Use trivets. Don’t drag heavy objects. Lift them instead. This prevents scratches. Sunlight can fade wood. Consider blinds or curtains. This protects the stain from UV rays.
Touch-up Tips
Minor scratches happen. Don’t worry. You can fix them. Get matching wood stain. Apply a small amount. Use a fine brush. Dab it into the scratch. Let it dry completely. Buff gently with a soft cloth. For deeper gouges, use wood filler. Match its color. Sand it smooth. Then, reapply stain. A little care goes a long way.
Credit: www.woodsnap.com

Credit: www.youtube.com