
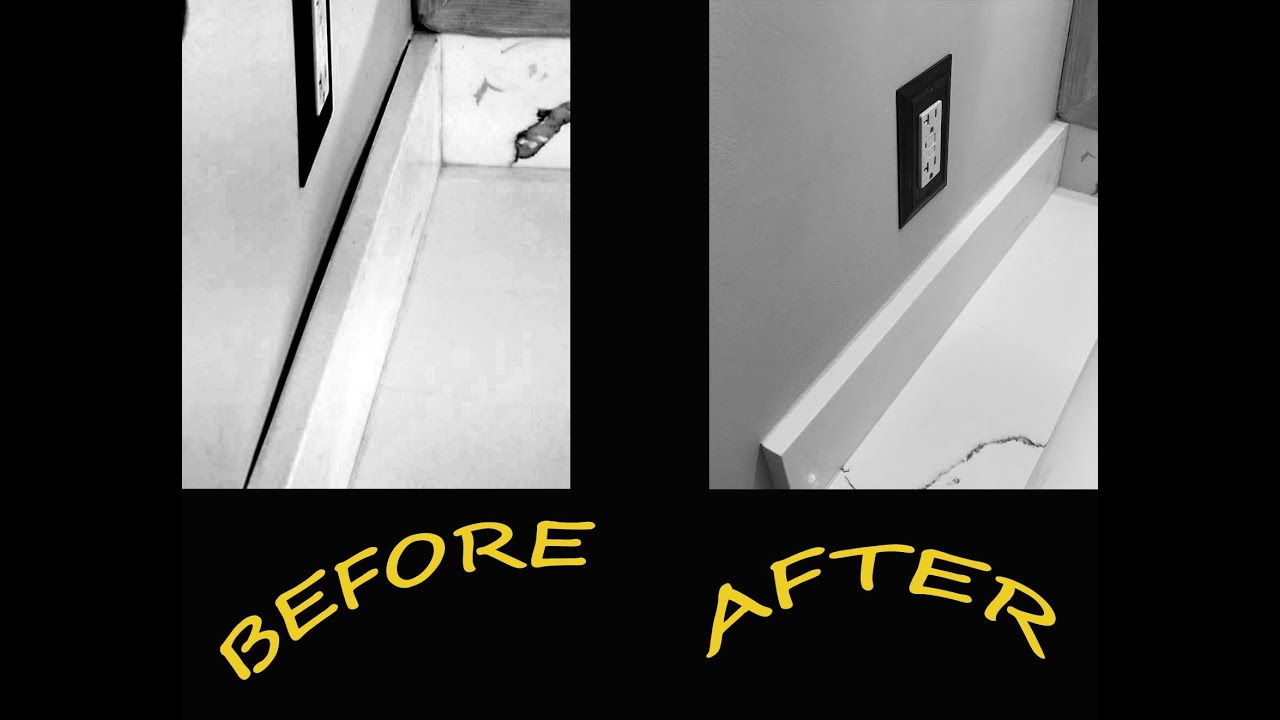
Have you noticed an annoying gap between your backsplash and the wall? That small space might seem harmless, but it can trap dirt, invite moisture, and even damage your kitchen over time.
Don’t let this tiny problem turn into a big headache. You’ll discover simple, effective ways to fix that gap quickly and keep your kitchen looking flawless. Ready to tackle it yourself and save money? Let’s get started!
Credit: www.youtube.com
Identify The Gap Cause
Before fixing the gap between your backsplash and wall, find out what caused it. Understanding the root cause helps you choose the right fix. Sometimes, the gap is small and easy to solve. Other times, it shows a bigger problem that needs more attention.
Start by looking closely at how the wall and backsplash meet. Check for any uneven surfaces or misalignment. Also, inspect the wall structure to see if it has any damage. These steps make your repair work more effective and long-lasting.
Check Wall And Backsplash Alignment
Look carefully where the backsplash meets the wall. Use a level tool to see if both surfaces are straight. Sometimes, the backsplash is not installed evenly. This can cause a visible gap.
Check if the wall surface is flat. Walls with bumps or dents push the backsplash out. Measure the distance between the backsplash and wall at several points. This helps identify if the gap is consistent or varies.
Inspect For Structural Issues
Look for cracks or damage in the wall near the backsplash. These signs can mean the wall is shifting or settling. Moisture damage behind the backsplash might cause the wall to swell or shrink.
Check for loose drywall or plaster. These problems can make the backsplash move away from the wall. Fixing these structural issues first prevents the gap from returning.
Gather Necessary Tools And Materials
Fixing the gap between your backsplash and wall is easier with the right tools and materials. Gather everything before you start. This saves time and helps the job go smoothly.
Common Tools For Diy Repairs
You need a few basic tools for this project. A caulk gun helps apply sealant evenly. A utility knife trims old caulk and cleans the gap. A putty knife smooths the filler for a neat finish. Painter’s tape protects your backsplash and wall from mess. A damp cloth cleans excess material quickly. Gloves keep your hands clean and safe. A small brush can remove dust or debris from the gap.
Recommended Sealants And Fillers
Choose sealants that stick well to tile and wall surfaces. Silicone caulk is flexible and water-resistant. Acrylic latex caulk is easy to apply and paintable. For wider gaps, use a backer rod before caulking. Spackle or wood filler works for small cracks in drywall. Make sure the products dry fast and resist mold. Read labels to match your wall and backsplash materials.
Clean The Gap Area
Cleaning the gap between the backsplash and wall is the first step in fixing it. Dirt and grime can stop repair materials from sticking well. A clean space ensures a smooth, long-lasting repair.
Remove Dirt And Debris
Start by removing loose dirt and debris from the gap. Use a small brush or vacuum to clear dust. Wipe the area with a damp cloth to remove stubborn grime. Let the gap dry completely before moving on.
Prepare Surface For Repair
Check the gap for old caulk or peeling paint. Use a scraper or utility knife to remove these. Sand the edges gently to create a smooth surface. Wipe away dust with a clean, dry cloth. A clean surface helps repair materials stick better.

Credit: www.reddit.com
Fill The Gap With Caulk
Filling the gap between the backsplash and wall with caulk is a simple way to improve your kitchen’s look. Caulk seals the space, stopping dirt and moisture from getting in. This keeps your backsplash clean and helps prevent damage.
Choosing the right type of caulk and applying it smoothly makes the job easier. A neat finish looks professional and lasts longer. Follow these tips to fill the gap perfectly.
Choose The Right Caulk Type
Use a caulk made for kitchens or bathrooms. Silicone caulk is waterproof and flexible. It sticks well to tile, glass, and painted surfaces. Acrylic latex caulk is easier to clean up and paint over. Check the label for mold and mildew resistance. Pick a color that matches your backsplash or wall. Clear caulk works well if you want it to be invisible.
Apply Caulk Smoothly
Cut the caulk tube’s tip at a 45-degree angle. Use a small opening to control the flow. Hold the tube at a steady angle. Slowly squeeze out caulk into the gap. Move the tube along the gap evenly. Use a damp finger or a caulk smoothing tool. Smooth the caulk to fill the space and remove excess. Wipe off extra caulk with a cloth. Let it dry fully before touching or cleaning.
Use Backer Rod For Larger Gaps
Using a backer rod is a smart way to fix larger gaps between your backsplash and wall. It fills the space and helps the caulk stick better. This method stops cracks and keeps water from getting behind the backsplash. It also saves caulk because less is needed to cover the gap.
Select Proper Backer Rod Size
Choose a backer rod that fits snugly in the gap. The rod should be slightly wider than the space. This way, it stays in place without falling out. Measure the gap’s width before buying a backer rod. Foam rods come in different sizes for different gaps. Using the right size makes the repair last longer.
Install Backer Rod Before Caulking
Push the backer rod into the gap using a putty knife or your finger. Make sure it sits just below the backsplash surface. The rod should fill most of the gap, leaving room for caulk on top. Do not push it too deep or leave it sticking out. After placing the rod, apply caulk over it. This seals the gap and holds everything tightly together.
Apply Trim Or Molding
Applying trim or molding is a simple way to hide the gap between your backsplash and wall. It adds a clean, finished look to your kitchen or bathroom. Trim can cover uneven edges and protect the wall from moisture and dirt. This method is quick and affordable, making it a popular choice for many homeowners.
Select Suitable Trim Style
Choose a trim style that matches your backsplash and room design. Flat, square trims work well for modern kitchens. Rounded or decorative moldings fit traditional spaces. Measure the gap width before buying trim. Make sure the trim is wide enough to cover the gap completely. Pick a material that resists moisture, like PVC or painted wood.
Install Trim To Cover Gap
Start by cutting the trim to the correct length. Use a miter saw for clean, straight cuts. Apply a strong adhesive or construction glue to the back of the trim. Press the trim firmly against the wall and backsplash. Hold it in place until it sticks well. For extra security, use small finishing nails or brads. Fill any nail holes with wood filler. Sand smooth and paint the trim to match your wall or backsplash color.
Paint And Finish Touches
Painting and finishing the repair between your backsplash and wall adds the final touch. It helps the area look neat and clean. The right paint and smooth finish hide any gaps or uneven spots. This step improves the overall look of your kitchen or bathroom. It also protects the repaired area from moisture and dirt.
Match Paint Color
Choose paint that matches your existing wall or backsplash color. Test a small area first to check the match. Use the same paint type, like satin or semi-gloss. This keeps the surface consistent. Avoid colors that look too bright or dull compared to the surrounding area. Matching paint color makes the repair blend naturally.
Smooth And Seal The Repair
Use fine sandpaper to smooth the repaired area gently. This removes rough spots and uneven edges. Wipe off dust with a damp cloth before painting. Apply paint with a small brush for control. Let the paint dry fully before adding a second coat. Seal the area with a clear, waterproof finish if needed. This protects the repair from water and stains.
Prevent Future Gaps
Preventing gaps between the backsplash and wall saves time and money. Small cracks can grow larger if not controlled early. Keeping the area stable helps maintain a clean, smooth look. Follow these tips to avoid future gaps and protect your kitchen walls.
Control Moisture Levels
Moisture causes walls and backsplashes to expand and contract. This movement can create gaps over time. Use a good kitchen exhaust fan to reduce humidity. Wipe down wet surfaces quickly after cooking or cleaning. Avoid letting water sit near the backsplash for long periods. Keep the kitchen well ventilated to limit moisture buildup.
Maintain Wall And Backsplash Integrity
Check the wall and backsplash regularly for signs of damage. Repair cracks or loose tiles as soon as you notice them. Use quality caulk to seal edges properly. Avoid heavy impacts or pressure on the backsplash area. Keep the wall paint and tiles in good condition with routine cleaning. Strong, intact surfaces prevent gaps from forming later.
Credit: www.houzz.com
Frequently Asked Questions
What Causes Gaps Between Backsplash And Wall?
Gaps occur due to uneven wall surfaces or improper backsplash installation. Shrinking or settling of materials can also create gaps over time.
How Can I Measure The Gap Size Accurately?
Use a ruler or tape measure to check the gap width. Measure at several points for the most accurate assessment.
What Materials Fill Backsplash-to-wall Gaps Best?
Silicone caulk is ideal for filling small to medium gaps. For larger gaps, use backer rod before caulking.
Can Paint Hide The Gap Between Backsplash And Wall?
Paint can mask small gaps but won’t fill or seal them. Proper filling with caulk is necessary for a clean finish.
Is Silicone Caulk The Best Option For Sealing Gaps?
Yes, silicone caulk is flexible, waterproof, and lasts long. It prevents water damage and mold growth.
How Do I Prepare The Gap Before Sealing?
Clean the gap area thoroughly and remove dust and grease. Dry the surface well for better caulk adhesion.
Can Gaps Cause Water Damage Behind The Backsplash?
Gaps allow water to seep behind tiles, causing mold or damage. Sealing gaps prevents leaks and keeps walls safe.
How Long Does Caulk Take To Dry Before Use?
Caulk usually dries to the touch in 30 minutes. Full curing can take up to 24 hours depending on type and humidity.
Can I Use Grout Instead Of Caulk To Fill Gaps?
Grout is rigid and can crack in gaps between backsplash and wall. Caulk remains flexible and is better for this use.
Should I Call A Professional To Fix Large Gaps?
For large or uneven gaps, a professional can ensure proper repair. Small gaps can usually be fixed with simple DIY steps.
Conclusion
Fixing the gap between your backsplash and wall is simple. Use the right tools and materials for a clean finish. Take your time to apply caulk or sealant carefully. This small fix can improve your kitchen’s look a lot. It also stops dirt and moisture from getting in.
A neat backsplash makes your space feel fresh and tidy. Try these steps soon to keep your kitchen looking its best. Small repairs can make a big difference.