
Need to move your office? Or maybe you’re just reconfiguring your workspace?
Whatever the reason, taking apart office cubicles can feel like a daunting task. But don’t worry, it’s more manageable than you think. This guide will walk you through exactly how to disassemble office cubicles, step-by-step. You’ll learn how to do it safely and efficiently, saving you time and potential frustration.
Ready to get started? Let’s dive in.

Credit: offisavvy.com
Prep For Disassembly
Prepare for cubicle takedown. Gather your tools first. Know each part’s location. This makes removal much easier.
The first step to taking apart office cubicles is preparation. Good preparation makes the job easier. It prevents damage to the cubicles. It also keeps your team safe. Let’s get ready to disassemble.Gather Your Tools
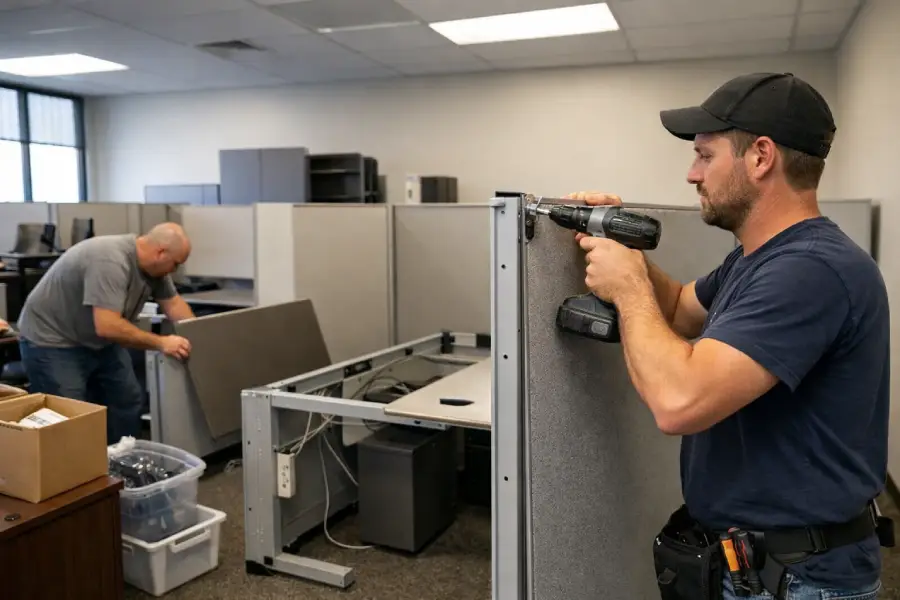
You need the right tools. A cordless drill is essential. Get a set of screwdrivers. You will also need a rubber mallet. Pliers are helpful. A utility knife is a good idea. Don’t forget safety glasses. Work gloves protect your hands.Clear The Workspace
Move everything out of the cubicle. Take out chairs and desks. Remove all personal items. Pack them carefully. Clear the floor space. You need room to work. This prevents tripping hazards. It protects your belongings too.Document The Setup
Take photos before you start. Capture how the cubicle looks. Note how panels connect. Photograph the wiring. This is very important. It helps with reassembly. You can see how it all fits. It’s like a blueprint.Deconstruct The Panels
Disassembling office cubicles requires a methodical approach. Carefully identify all fasteners and connections. Then, gently remove each panel.
The panels form the core of your cubicle. They are the walls. Careful deconstruction is key. This section guides you through it. Take your time. Safety first.Remove Trim And Caps
Look for plastic trim pieces. They often cover panel edges. Gently pry them off. Use a flathead screwdriver. Some caps might snap on. Wiggle them loose. Be patient. Avoid forcing them. This reveals the panel’s structure. It makes the next steps easier.Detach Panels
Panels connect to a frame. They might have clips or screws. Find the connection points. Unscrew any visible fasteners. Some panels slide out. Lift them slightly. Then pull them away. Have a helper nearby. Panels can be heavy. Work together. Keep them upright. Avoid dropping them.Handle Wiring Safely
Cubicles often have electrical wiring. Power cords run through them. Locate all wires first. Unplug everything connected. Never force wires. Gently disconnect them. If unsure, stop. Consult an electrician. Protect exposed wires. Tape them securely. Prevent accidental contact. Safety is paramount here.Dismantle The Frame
Disassemble office cubicles safely. Follow these steps to take them apart. You’ll need basic tools.
The cubicle frame forms its skeleton. Removing it requires careful steps. Protect your workspace. This section guides you through frame removal.Loosen Support Beams
You will find support beams. They hold the frame together. Use your screwdriver. Turn screws counter-clockwise. This loosens the beams. Gently pull them away. Some beams may slide out.Separate Vertical Posts
Vertical posts stand tall. They connect to horizontal pieces. Look for connection points. Unscrew any fasteners. Posts might have clips. Release these clips carefully. Pull posts straight up. They should detach easily.Address Connectors
Connectors join frame parts. These can be nuts or bolts. Use a wrench for nuts. Turn them counter-clockwise. For bolts, use a screwdriver. Remove all connectors. Keep them in one place. This makes reassembly easier.
Credit: www.rosiinc.com
Remove The Base
First, detach the cubicle base. This usually involves loosening screws. Gently lift the panel away.
Removing the base is the next crucial step. This part secures the cubicle panels. It often hides leveling feet. Careful removal prevents damage. It makes panel lifting easier.Disconnect Leveling Feet
Locate the leveling feet. These help stabilize the cubicle. They screw into the base. Turn them counterclockwise. This loosens their grip. Some feet might be stuck. A little wiggling helps. Remove all feet completely.
Lift Panels From Base
The base holds the panels. It might have clips. Or it could have screws. Check for attachment points. Release any clips gently. Unscrew any securing screws. Now, lift the panels. Lift them straight up. They should slide out. Some bases have channels. Slide the panel out of its channel. Get help for heavy panels. This step is easier with two people.
Handle Attachments
Cubicles often have many attached items. These need careful removal. Proper handling prevents damage. It also makes the main cubicle easier to take apart.
Remove Shelving
Look for shelves. They might slide out. Some shelves use clips. Gently pry these clips loose. Some shelves have screws. Unscrew them completely. Keep all removed screws together.
Detach Filing Cabinets
Filing cabinets are heavy. Some are built-in. Others may be separate. Check for mounting brackets. Remove any screws holding them. Slide the cabinet out slowly. Get help if it is too heavy. Prevent any tipping. Secure the cabinet on the floor.
Take Down Accessories
Many accessories attach to cubicles. Think about coat hooks. Consider monitor arms. These often use clamps. Loosen the clamp knobs. Remove the accessory from the panel. Some accessories have small screws. Unscrew these carefully. Store all small parts safely.
Credit: collaborative-office.com
Organize And Store
Disassembling office cubicles requires a plan. Carefully label all parts. Store them safely for reuse or disposal.
Organizing cubicle parts is crucial. This step prevents loss. It makes reassembly easier. Proper storage protects your components. It saves time later.Group Similar Parts
Gather all similar items. Put all panels together. Collect all fasteners in one place. Keep all hardware in a pile. This simplifies identification.Label Components
Tag each distinct part. Use a marker for labels. Write clear, simple names. Label panels “side” or “top.” Label fasteners “screws” or “bolts.” This avoids confusion.Secure For Transport
Wrap delicate pieces. Use bubble wrap or blankets. Secure loose items with tape. Bundle cables together neatly. Use sturdy boxes for small parts. This ensures safe movement.Frequently Asked Questions
How To Safely Remove Office Cubicle Walls?
Start by identifying the panel connectors. Gently twist or slide them to release the panels. Always have a helper for stability.
What Tools Are Needed For Cubicle Disassembly?
You will need a screwdriver and a rubber mallet. A utility knife can also be helpful. Safety glasses are a must.
Can I Reassemble Cubicles After Moving?
Yes, cubicles are designed for relocation. Keep all hardware organized. Follow the reverse of the disassembly steps.
How To Handle Electrical Components In Cubicles?
First, always disconnect power to the unit. Then, carefully detach any electrical wiring. Label wires for easier reassembly.
What’s The Best Way To Store Cubicle Parts?
Store panels flat or upright. Keep hardware in labeled bags. Protect parts from dust and moisture.
Is Cubicle Disassembly A Difficult Task?
It requires some patience and care. Basic tools are all you need. With a friend, it’s manageable.
Where To Find Cubicle Disassembly Instructions?
Check the cubicle manufacturer’s website. Many provide online guides. Sometimes, the cubicle itself has labels.
Conclusion
Disassembling cubicles takes time. Follow these steps carefully. Safety first, always. Organize parts as you go. This makes reassembly easier. You can do it. Enjoy your new space.