
Building a pvc bike rack takes about 90 minutes, costs around thirty to forty dollars in standard hardware parts, and rates as easy for any adult with a basic hand saw. You need flat ground to assemble the parts, but you won’t need specialized workshop tools. Check the print on your pipe at the home store to confirm you’re buying rigid Schedule 40 plastic.
Gather your bike rack materials
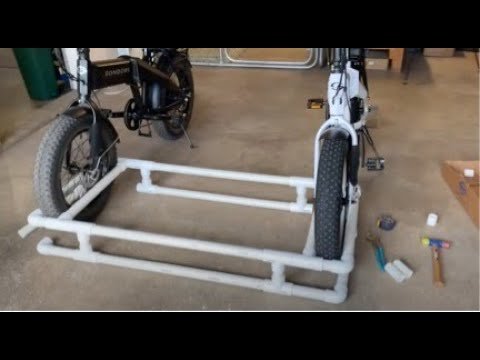
| Item | How much | Why it’s needed | A substitute |
|---|---|---|---|
| Schedule 40 PVC pipe, 1-inch size | Two 10-foot long pieces | Forms the entire rack frame | none — don’t swap this |
| PVC 90-degree elbows, 1-inch | 6 pieces | Turns the rack base corners | none — don’t swap this |
| PVC T-fittings, 1-inch | 8 pieces | Connects crossbars to upright uprights | none — don’t swap this |
| Hand saw or PVC cutter | 1 tool | Cuts the plastic cleanly | Fine-tooth wood hand saw |
| Tape measure | 1 piece | Measures pipe lengths before cuts | Steel yardstick or ruler |
| PVC primer and cement | One 4-ounce can set | Bonds the plastic joints permanently | none — don’t swap this |
Before you start
- Clear a flat workspace that’s at least six feet by six feet so the base sits level.
- Wipe dirt, oil, and dust off all pipe lengths with a dry cotton rag.
- Keep open solvent cans away from flames, and follow the OSHA ventilation guidance by working only in an open garage or outdoors to keep solvent vapor levels safe.
- Measure your bike tire widths with a ruler; fat tire bikes need wider gaps than narrow road bikes.
- If a bike weighs over 50 pounds, like an electric cargo bike, this light plastic stand isn’t for that vehicle; buy a welded steel floor mount instead.
Step by step
-
Measure your pipe and cut four base lengths to 18 inches each using your hand saw. Brush away loose plastic burrs so each cut edge is completely flat.
-
Cut six upright vertical pieces to 12 inches each with your saw. Compare all six cut pieces against each other to confirm their heights match evenly.
-
Cut four cross-connector pieces to 2.5 inches each for standard road or hybrid bike tires. Check that your cut pipe fits through your bike’s front wheel without rubbing.
-
Dry-fit the base frame without any glue on your garage floor. Push the pipes firmly into the bottom T-fittings and 90-degree elbows until they stop moving.
-
Insert the 12-inch vertical pipes into the upward openings of the bottom T-fittings. Look straight down from above to verify the vertical tubes stand straight up.
-
Place top elbows and T-connectors over the upright tubes to complete the wheel slots. Tap each corner down lightly with your palm so the rack rests flat.
-
Roll your bike wheel into the dry-assembled slot to test the fit. If the tire pinches, swap in longer cross-pieces; if it leans sideways, cut shorter cross-pieces.
-
Mark every joint line with a pencil mark across the pipe and fitting. These lines show your alignment angles so pieces don’t twist during final assembly.
-
Apply PVC primer then PVC cement to one joint, twist it into place, and hold it firmly for 15 seconds. Repeat this gluing process on each joint until finished.
How to know it worked
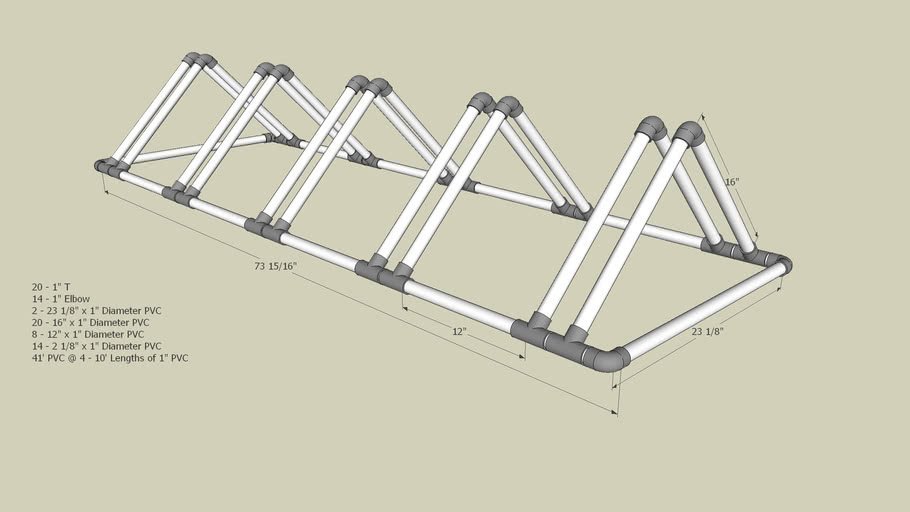
The finished rack sits completely flat on the floor with all four base corners touching the ground at once. You shouldn’t see any wobble when you press downward on the top rails with your hands. When you roll a bicycle into the wheel slot, the front tire slides into the slot smoothly and the bike stays upright without tipping. The glue joints set hard and rigid after about two hours on a warm afternoon. If the rack rocks back and forth when empty, one of the base pipes wasn’t pushed deep into its socket before the glue cured, which means that corner sits higher than the rest.
If something goes wrong
| What happened | Why | What to do |
|---|---|---|
| Bike falls over sideways | Slot crossbar is cut too wide | Cut shorter crossbars for tires |
| Rack rocks on floor | Pipes didn’t seat fully into joints | Cut high corner and rebuild |
| Glue dried before assembly | Solvent cement dries within seconds | Buy replacement fittings and re-glue |
| Tire rubs rack sides | Crossbar length is cut too short | Rebuild slot with longer pipe |
| Frame cracks outdoors | Freezing cold and sun degrade plastic | Keep rack stored inside garage |
How often to do this
Build this rack once, and inspect the joints regularly for hairline cracks or loose sockets. A rack kept inside a dry garage easily lasts five to eight years without maintenance. Two main factors change how long it lasts: sunlight and bike weight. Direct sun makes PVC brittle over time, and parking heavy steel bikes against thin plastic pipes flexes the joints until the cement fails. This design is built for lightweight standard bikes, not heavy motor setups. It’s a trade-off: you get a very cheap, light stand that you can carry in one hand, but you lose the heavy-duty impact strength of metal floor racks.
Frequently asked questions
Can this hold a fat tire bike?
Yes, but you must cut wider connector pieces. Standard 2.5-inch spacers only fit tires up to 2.2 inches wide. For a fat bike, cut your crossbar pipes to 4.5 or 5 inches instead. Measure your tire with a ruler before cutting any plastic.
Is it safe to skip the glue?
No, the friction fit loosens after a few weeks of use. The weight of parking bikes repeatedly pushes the plastic joints outward. If you skip cement, the rack will eventually pull apart and drop your bicycle. A single glued joint holds its shape under continuous daily use.
How long does the rack take to dry?
About two hours for light use, but wait 24 hours for full strength. The cement bonds quickly to the touch within minutes, yet the joint needs several hours to cure completely. Read the label on your specific cement can to confirm exact cure times for your room temperature.
Does it matter if I use thin PVC pipe?
Yes, using thin drain pipe will ruin the build. Thin Schedule 20 or Class 200 pipe bends easily under sideways pressure. A mistake people actually make is buying a cheap part to save money, which costs them the entire project when the rack bends.
What happens if the rack is kept outside in winter?
The plastic becomes brittle and can shatter if struck. Freezing weather combined with daytime sunlight weakens rigid PVC. Keep the rack indoors during cold seasons, or paint the plastic with an exterior outdoor spray paint to block harmful UV rays if it must stay outdoors.
Can you build it for three or four bikes?
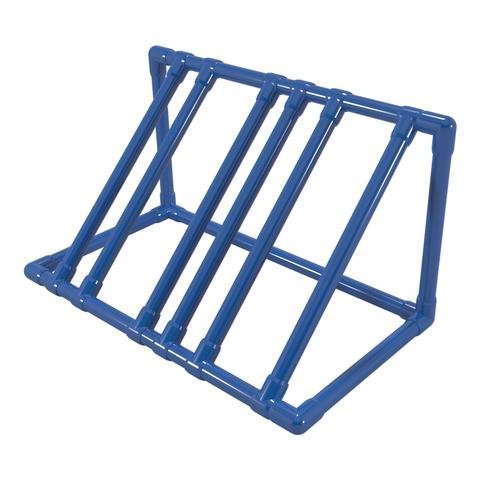
Yes, you just add more T-fittings and upright pipes along the base. Extend the length of the base tubes by cutting extra connector pieces for each new slot. Keep the base wide so multiple bikes don’t knock handlebars together when parked side by side.
Final Thoughts
Once the glue has fully cured, you shouldn’t worry about the rack sliding around while you park your wheels. It’s a sturdy, low-maintenance solution that’ll keep your garage organized for years. If you’ve got extra pipe left over, try building a matching shelf to hold your helmets and water bottles, too.
Related guides