
Ready to create a stunning epoxy table that will be the centerpiece of your home? You’ve seen those incredible, glossy tables with vibrant colors and unique designs, and you’re wondering, “Can I really make one myself?”
The answer is a resounding yes! The secret to a flawless epoxy pour lies in the mold. Get yours wrong, and your beautiful project could end up a sticky, warped mess. But don’t worry, we’re going to show you exactly how to make a sturdy, reliable epoxy table mold that will set you up for success.
Keep reading to discover the simple steps to building your own mold, ensuring your epoxy table dreams become a reality.
Choosing Your Mold Material
Choosing the right mold material is crucial. It affects your epoxy table’s finish. It also impacts ease of use. Consider durability and flexibility. Your material choice sets the stage. It ensures a smooth, successful pour. Let’s explore your options.
Silicone: The Flexible Favorite
Silicone molds are popular. They offer great flexibility. Epoxy releases easily from silicone. This prevents tearing. It ensures a clean edge. Silicone molds are reusable. They are a good investment. You can find pre-made molds. You can also make custom ones. They are ideal for intricate designs. They handle curves well. Silicone is a forgiving material.
Melamine: The Sturdy Choice
Melamine offers strength. It is a stable material. It creates sharp, straight edges. Melamine is less flexible. You might need mold release spray. This helps prevent sticking. It is a good choice for rectangular tables. Building melamine molds is straightforward. They are cost-effective. They are durable for many pours.
Plywood & Mdf: Diy Options
Plywood and MDF are versatile. You can build custom molds. They are readily available. These materials are budget-friendly. You will need to seal them well. Use caulk for seams. This prevents leaks. A good sealant is essential. Plywood and MDF offer control. You design the exact shape. They are great for larger projects.
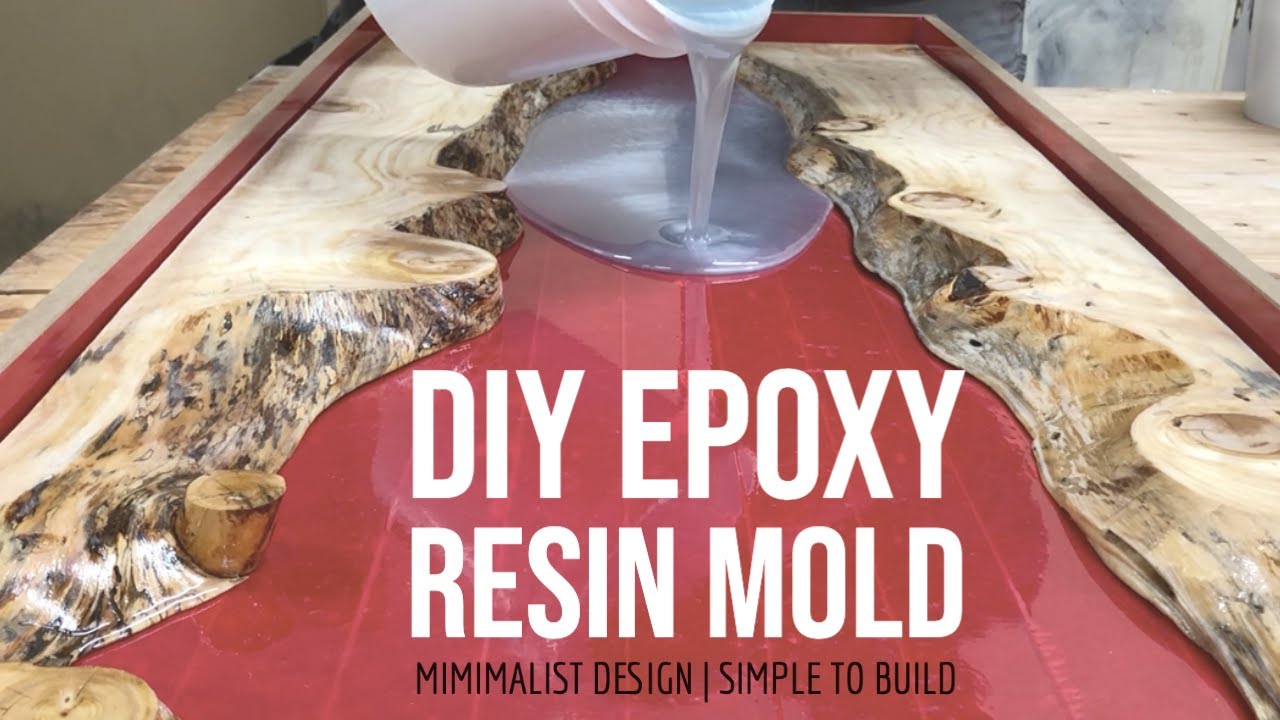
Credit: www.youtube.com
Designing Your Mold
Designing your epoxy table mold is a crucial step. A good design ensures a smooth process. It also leads to a beautiful final product. Think carefully about your mold’s features. This planning prevents many common problems. Your mold is the foundation of your table. Make it strong and smart.
Shape And Size Considerations
What shape do you want? A simple rectangle is easiest. Complex shapes are harder. Consider the table’s purpose. A dining table needs more space. A coffee table is smaller. Measure your desired tabletop size. Your mold must match these dimensions. Bigger molds need more epoxy. This impacts your budget. Plan for your wood slabs. They must fit inside the mold. Ensure there is enough room around them.
Draft Angles For Easy Release
Draft angles are very important. They help remove the mold. A slight angle on the sides works. This is called a taper. It should be a small degree. Think about a slight slope inward. This prevents the epoxy from sticking. It makes demolding much easier. Without draft, you might damage your table. Or you might break your mold. Smooth edges are essential.
Adding Reinforcements
Large molds need support. Epoxy can be heavy. It exerts pressure on the sides. Add extra bracing. Use wood strips for support. Place them on the outside. This prevents the mold from bowing. It keeps the shape true. Stronger molds last longer. They also prevent leaks. Reinforce corners well. They take a lot of stress. This ensures a perfect pour.
Building A Silicone Mold
Building a silicone mold is a crucial step. It protects your epoxy. It also gives your table a smooth finish. This part takes care. Precision is important here. Follow these steps carefully. Your mold will be perfect.
Creating A Master Piece
First, make your table design. This is your master piece. It can be wood or foam. Sand it very smooth. Remove all imperfections. A good master means a good mold. Clean it thoroughly. No dust or debris.
Preparing The Mold Box
Next, build a mold box. Use melamine or plywood. Seal all the seams well. Use hot glue or silicone caulk. Make the box slightly larger. It should surround your master piece. Ensure it is level. This prevents leaks. The box holds the silicone.
Mixing And Pouring Silicone
Now, mix the silicone carefully. Read the manufacturer’s instructions. Measure parts precisely. Mix them slowly and thoroughly. Avoid whipping air into it. Pour it in a thin stream. Start from one corner. Let it flow over the master. Cover the entire piece. Use a vacuum chamber. This removes air bubbles. Bubbles ruin the finish.
Curing And Demolding
Let the silicone cure completely. This takes time. Check the product guidelines. Do not rush this process. Once cured, remove the box. Gently peel the mold away. Your silicone mold is ready. Inspect it for flaws. It should be smooth and strong. You are set for the epoxy pour.
Constructing A Melamine Mold
Building a melamine mold is key. This creates your epoxy table mold. It ensures a smooth, finished edge.
Building your own epoxy table mold is a rewarding project. Melamine is a great material for this. It is strong and smooth. You can create a professional-looking mold. This guide walks you through the steps.Cutting Melamine Panels
Measure your desired table dimensions carefully. You need a base and four sides. Use a circular saw for clean cuts. Always wear safety glasses. Cut the melamine precisely. This ensures a tight-fitting mold. Double-check your measurements. Accuracy prevents leaks later.Assembling The Mold Box
Lay out your cut melamine pieces. The base forms the bottom. The four sides attach to the base. Use wood screws to join the pieces. Drill pilot holes first. This stops the melamine from splitting. Make sure corners are square. A carpenter’s square helps. Build a sturdy box. It must hold heavy epoxy.Sealing The Joints
Leaky molds ruin epoxy pours. Seal all interior joints thoroughly. Use 100% silicone caulk. Apply a generous bead. Smooth it with your finger. A wet finger works well. Ensure no gaps remain. Let the caulk cure completely. This creates a watertight seal. Patience here is key.Adding A Release Agent
The epoxy will stick to melamine. You need a release agent. This prevents sticking. Apply a mold release spray. Wax-based products also work. Cover all interior surfaces. Coat the base and sides. Apply a thin, even layer. Let it dry completely. This step is crucial. Your table will pop out easily. `Crafting A Plywood/mdf Mold
Build your epoxy table mold with plywood or MDF. Secure the pieces tightly. This creates a sturdy base for your pour.
Building your own epoxy table mold is rewarding. Plywood and MDF are excellent choices for this. They are sturdy and readily available. This section guides you through mold creation. Let’s get started.Material Selection
Choose good quality plywood. Baltic birch is a strong option. MDF is also suitable. It offers a smooth surface. Ensure the material is flat. Avoid warped sheets. This prevents leaks.Cutting And Joining
Measure carefully for your mold. Use a saw to cut pieces. Make precise cuts. This ensures tight joints. Assemble the mold walls. Use screws for strong connections. Wood glue adds extra strength. For a leak-proof seal, consider caulk.Sealing And Finishing
Seal all interior seams. Silicone caulk works well. Apply a smooth, even bead. Let the caulk cure fully. This prevents epoxy leaks. Sand any rough edges. A smooth mold creates a smooth table.Applying Release Agents
A release agent is vital. It stops epoxy from sticking. Spray wax is a common choice. Apply a thin, even coat. Let it dry. A second coat is often best. This makes demolding easy.
Credit: bakkerijebbers.nl
Essential Mold Features
Sure, here is an engaging section for your blog post about making epoxy table molds.Your epoxy table mold needs specific features. These ensure a strong, clean pour. They prevent leaks and mistakes. A good mold is key to success. Think about these essential elements.
Leveling And Support
Your mold must sit perfectly flat. Use a level to check. Shim any uneven spots. This stops epoxy from flowing out. Support the mold walls too. Use clamps and braces. This prevents bowing under pressure. A stable mold is crucial.
Reinforcing Corners
Corners are weak points. They can pull away from the wood. Add extra support here. Use silicone caulk. Seal all inside corners carefully. This creates a strong seal. It prevents leaks effectively. Reinforce them well.
Creating Overflow Ports
Overflow ports are important. They let excess epoxy escape. This prevents bubbles. It also stops pressure buildup. Drill small holes near the top. These act as vents. They guide excess resin out. This ensures a smooth finish.
Preparing For Epoxy Pour
Preparing for your epoxy pour is crucial. It guarantees a flawless finish. Take your time here. This step sets up success.
Cleaning The Mold Interior
Your mold needs to be spotless. Dust is epoxy’s enemy. Wipe the inside well. Use a lint-free cloth. Alcohol works great. Get rid of all debris. No specks allowed.
Final Release Agent Application
Apply a release agent now. This prevents sticking. Spray a thin, even coat. Don’t overdo it. A light mist is best. Let it dry fully. This is very important.
Ensuring A Level Surface
Your mold must be perfectly level. Use a spirit level. Check all sides. Adjust as needed. Epoxy flows and settles. A level surface means even thickness. Avoid dips and humps. This keeps your pour flat.
Troubleshooting Common Mold Issues
Mold making is not always smooth sailing. You might face problems. Let’s fix them. Troubleshooting common mold issues helps your project. You get a better final product. Avoid frustration. Learn from these tips.
Leaks And Sealing Problems
Your mold might leak. This is a common issue. Epoxy can escape. It ruins your tabletop. Check all seams carefully. Look for tiny gaps. Use strong tape. Seal all edges well. Painter’s tape works great. Apply it firmly. Press down hard. Ensure no cracks remain. Consider silicone caulk. It provides a strong seal. Let it dry completely. Test the seal before pouring. A small amount of water helps. Pour it into the mold. Watch for drips. Fix any leaks found. A good seal is vital.
Sticking And Release Difficulties
Epoxy can stick to the mold. This is a big problem. You cannot remove your table. Release agent is key. Apply it generously. Cover all mold surfaces. Mold release spray is effective. Silicone-based sprays work well. Apply thin, even coats. Let it dry fully. Some people use petroleum jelly. It can also work. Make sure it is smooth. No bumps or streaks. Reapply if needed. A clean mold helps release. Dust and debris cause sticking. Inspect your mold before pouring. A well-prepared mold is crucial.
Surface Imperfections
Your mold surface matters. It affects the table finish. Bumps and bubbles are bad. They transfer to your epoxy. Ensure the mold is clean. Remove all dust particles. Use compressed air. A soft brush helps too. Avoid fingerprints. Wear gloves when working. Smooth surfaces create smooth tables. Check for scratches. Small imperfections grow. They become noticeable flaws. A perfectly smooth mold is ideal. This leads to a perfect pour. Take your time with preparation.
Mold Maintenance And Reuse
Making an epoxy table is exciting. You create something beautiful. Your mold is a key tool. Good care extends its life. Proper maintenance means more tables. You can reuse your mold many times. This saves you money. It also helps the environment. Learn how to care for your mold.
Cleaning After Use
Clean your mold right away. Epoxy cures quickly. Dried epoxy is hard to remove. Use a plastic scraper. Gently lift off excess epoxy. Isopropyl alcohol works well. It dissolves uncured resin. Dampen a soft cloth. Wipe down the mold interior. Get into all the corners. Avoid abrasive cleaners. They can scratch the mold surface. A clean mold makes a clean pour.
Inspection For Damage
Check your mold after cleaning. Look for any nicks or cuts. Small imperfections can happen. Tears are a big problem. They let epoxy leak out. They can ruin your table. Minor scratches are usually okay. Major damage needs repair. Sometimes you must replace a mold. Early detection saves your project.
Proper Storage Techniques
Store your mold flat. This prevents warping. Keep it out of direct sunlight. Heat can damage the material. Protect it from dust. A clean plastic bag works. You can also use the original box. Store it in a cool, dry place. This keeps it ready for next time. Your mold will last longer. You can make more amazing tables.

Credit: www.youtube.com
Frequently Asked Questions
What Is An Epoxy Table Mold?
An epoxy table mold holds liquid epoxy. It gives your table its shape. Think of it as a custom container.
What Materials Are Needed For A Mold?
You will need melamine or plywood. Silicone caulk seals the edges. Screws hold the mold together.
How Do I Build A Basic Epoxy Mold?
Cut your material to size. Screw the pieces together firmly. Seal all inside edges with caulk.
Can I Reuse An Epoxy Table Mold?
Yes, with careful removal. Clean out all old epoxy. Check for damage before reusing.
How Do I Prevent Epoxy Leaks?
Use plenty of silicone caulk. Make sure it fills all gaps. Let the caulk dry completely.
What Size Mold Should I Make?
Measure your desired table size. Add a little extra room. Your mold should fit your project.
How Do I Remove The Table From The Mold?
Gently pry the mold apart. Use a plastic putty knife. Take your time to avoid damage.
Conclusion
Your epoxy table mold is ready. Building it is simpler than you think. Follow these steps carefully. You will create a beautiful table. Enjoy your new creation. This project brings satisfaction. Your custom table awaits. Start building today.