
Is your beautiful epoxy table top scratched, chipped, or looking a little dull? Don’t worry, it happens!
Epoxy is tough, but even the best surfaces can get damaged over time. You don’t need to replace your whole table. In fact, with a few simple steps, you can bring your epoxy table top back to life. Ready to make it look as good as new?
Keep reading to find out exactly how to repair your epoxy table top.
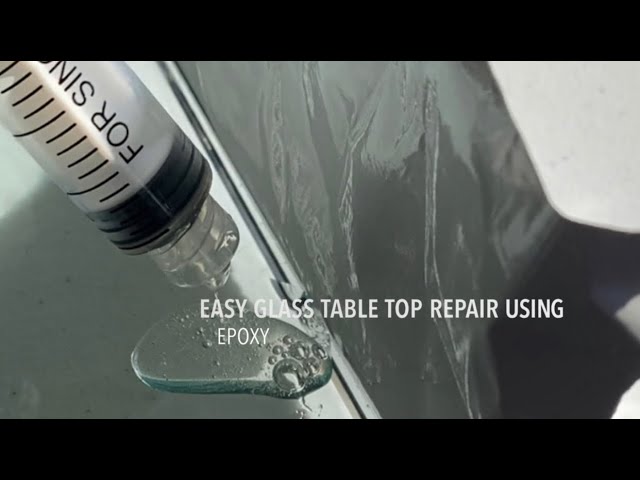
Credit: www.youtube.com
Assessing The Damage
First, check the epoxy table top for scratches or chips. Identify any dull spots or unevenness. This helps plan your repair steps.
Before you grab your repair kit, take a close look. Understanding the damage is key. This step guides your entire repair process. It ensures you use the right methods. You want a perfect finish.Identifying Scratch Depths
Run your finger over the surface. Feel the roughness. Shallow scratches feel light. Deeper scratches feel more pronounced. You can often see them clearly. Light can reveal their true depth. This helps choose your sandpaper grit.Spotting Chip Locations
Look for missing pieces. Chips are often at edges. They can be small or large. Inspect the entire tabletop. Note every chipped area. This tells you where to focus. It shows how much epoxy you need.Determining Epoxy Type
What kind of epoxy is it? Is it clear or colored? Some epoxies yellow over time. Others maintain their clarity. Knowing the type is vital. It affects your repair material. You need a matching product. This prevents color mismatches.Gathering Your Tools
Before you begin fixing your epoxy table, gather your supplies. Having everything ready saves time. It prevents interruptions. This makes the repair process smoother. It ensures a better final result.
Safety Gear Essentials
Protect yourself first. Always wear safety glasses. They shield your eyes. Use chemical-resistant gloves. They keep your hands safe. Work in a well-ventilated area. Consider a respirator mask. This is important for fumes. Good ventilation is key.
Cleaning Supplies
Clean the damaged area well. You need rubbing alcohol. It cuts through grease. Use a soft, lint-free cloth. Absorbent paper towels also work. A mild soap and water solution helps. Scrub gently. Remove all dirt and debris. A clean surface is vital.
Repair Materials
Get the right epoxy product. Choose one for tabletops. It should match your existing epoxy. Have a mixing stick ready. Use clean plastic cups for mixing. A plastic putty knife is useful. It helps apply the epoxy. Fine-grit sandpaper is necessary. It smooths the repaired area. Clean rags are for wiping. Have them nearby.
Scratch Repair Techniques
Scratches on your epoxy table top? Don’t worry. Simple scratch repair techniques can fix them. Learn how to make your table look new again.
Repairing scratches on your epoxy tabletop keeps it looking its best. Minor marks and deep gouges need different approaches. We cover simple fixes and more involved methods. Follow these steps for a flawless finish.Buffing Light Scratches
Light scratches are common. They dull the shine. You can often buff them out. Use a soft cloth. Apply a small amount of toothpaste. Gently rub the scratched area. Use small, circular motions. Wipe away residue. Inspect the surface. Repeat if needed. This brings back the gloss.Filling Deeper Scratches
Deeper scratches need more attention. They go through the top layer. You need a filler. Epoxy repair kits work well. Choose a clear epoxy filler. Follow the kit instructions carefully. Mix the epoxy components. Apply the mixture to the scratch. Use a small spatula. Smooth it flush with the surface. Let it cure completely. This fills the void.Sanding And Polishing
After filling, you might see a slight difference. Sanding smooths the repair. Use very fine-grit sandpaper. Start with 1000-grit paper. Wet sanding is best. This prevents dust. Gently sand the repaired spot. Move to higher grits. Use 2000-grit, then 3000-grit. This polishes the area. Use a plastic polish compound. Rub it in with a cloth. Buff until it shines. Your tabletop looks new again.
Credit: www.youtube.com
Fixing Chips And Cracks
Your beautiful epoxy table top may get chips. It might develop small cracks. Do not worry. These issues are fixable. You can restore your table’s look. This guide shows you how. We focus on repairing damage.
Preparing The Chipped Area
First, clean the damaged spot. Remove all loose debris. Use a soft brush. A vacuum cleaner works too. Ensure the area is totally dry. Moisture can ruin the repair. You might need a clean cloth. Dab it gently. Make sure it is spotless.
Applying Epoxy Filler
Get a good epoxy filler. It should match your table’s color. Mix the filler as directed. Use a small, flat tool. Apply the filler into the chip. Press it in firmly. Fill the crack completely. Build it up slightly. The filler will shrink a bit. Let it sit for a moment. Scrape off any excess filler. Use your flat tool.
Smoothing And Curing
Let the filler cure fully. Check the product instructions. This takes time. Be patient. Once cured, it is hard. Sand the repaired area smooth. Use fine-grit sandpaper. Work gently. Avoid sanding too much. The area should be level. Wipe away any dust. Your repair is now complete. Enjoy your table again.
Restoring The Shine
Scratched epoxy table? Bring back its gleam. Learn simple steps to fix your epoxy tabletop. Restore its beauty with ease.
Your epoxy table top repair is almost done. Now, bring back its brilliant shine. This final step makes your table look new. It’s exciting. Watch the transformation.Cleaning The Repaired Area
First, clean the mended spot. Use a soft cloth. A mild soap works well. Wipe away any dust. Remove all residue. Ensure the area is dry. A clean surface is key.Applying A New Top Coat
Next, apply a new top coat. Choose a quality epoxy coating. Follow the product instructions. Work in a well-ventilated space. Apply it evenly. A thin layer is best. Let it cure fully. This protects your repair.Polishing For A Glossy Finish
Finally, polish for a glossy finish. Use a fine-grit polishing compound. Apply it with a clean cloth. Rub in small circles. Buff gently. See the shine emerge. Your table looks amazing. Enjoy its new gleam.Preventing Future Damage
Protect your repaired epoxy tabletop. Use coasters for drinks. Avoid placing hot items directly on the surface. Regular cleaning prevents new scratches and wear.
Protecting your epoxy tabletop keeps it looking great. Simple steps prevent scratches and stains. This saves you repair time later. Your table will last much longer.Daily Care Tips
Wipe spills immediately. Use a soft, damp cloth. Dry the surface thoroughly. Avoid abrasive cleaners. Gentle cleaning is best. Dust it regularly. This keeps it shiny.Protective Measures
Use coasters for drinks. Place placemats for meals. Trivets protect from hot dishes. Consider a tabletop protector. These barriers stop damage. They are a wise investment.Avoiding Harsh Chemicals
Acetone can damage epoxy. Ammonia is also bad. Bleach can cause yellowing. Stick to mild soap. Water is often enough. Protect your table’s finish. Gentle care is key.
Credit: ihbv.at
Frequently Asked Questions
What Causes Epoxy Table Damage?
Scratches, heat, and harsh chemicals can harm your epoxy. Dropping heavy objects also causes chips. Sunlight can fade the color over time.
How To Fix Scratches On Epoxy?
Light scratches can be buffed out. Use a soft cloth and polish. For deeper scratches, you may need more epoxy.
Can I Repair A Chipped Epoxy Table?
Yes, chips can be fixed. Clean the chipped area well. Apply a small amount of new epoxy. Let it cure fully.
How To Remove Bubbles From Epoxy?
Bubbles often rise on their own. A quick pass with a heat gun helps. Avoid over-heating the surface.
What Is The Best Epoxy For Tables?
Use a high-quality tabletop epoxy. Look for one that is UV resistant. It should also be food safe if needed.
How Long Does Epoxy Repair Take?
Curing times vary by product. Most need 24-72 hours. Always check the manufacturer’s instructions.
Can I Sand And Refinish Epoxy?
Yes, you can sand epoxy. Start with rough grit sandpaper. Move to finer grits for smoothness. Then, apply a new top coat.
Conclusion
Your epoxy table is now beautiful again. Repairing it was achievable. Follow these steps carefully. You can fix scratches and chips. Enjoy your restored tabletop. It looks amazing. Simple repairs make a big difference. Your table is ready.