
Thinking about a workspace refresh? Maybe you’re reconfiguring your office layout or moving to a new location.
Whatever the reason, those office partitions can feel like a stubborn obstacle. Don’t let them hold you back! This guide will show you exactly how to dismantle office partitions safely and efficiently. You’ll be surprised at how straightforward it can be with the right steps.
Get ready to reclaim your space and prepare for your next move, all with confidence. Read on to learn how!
Safety First
Dismantling office partitions requires careful planning. Always prioritize safety. Wear protective gear. Follow steps precisely to avoid injury.
When you dismantle office partitions, safety is key. It protects you and others. Proper preparation prevents accidents. Think safety first, always.Essential Tools
Gather your tools before starting. You will need a screwdriver set. A utility knife is also important. A rubber mallet might be helpful. Wrenches are sometimes necessary. Make sure tools are in good condition.Personal Protective Equipment (ppe)
Protect your eyes. Wear safety glasses. Protect your hands. Use sturdy work gloves. Protect your feet. Wear closed-toe shoes. This gear is vital.Clearing The Area
Make space around the partitions. Move desks and chairs away. Clear all clutter. Ensure no one walks through. Keep children and pets out. A clear zone is a safe zone.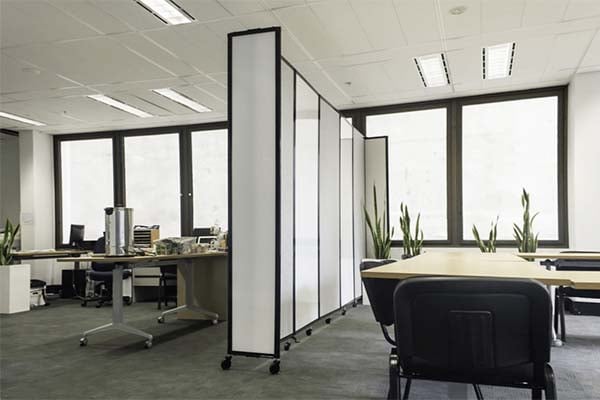
Credit: portablepartitions.com.au
Identify Partition Type
Before you start dismantling, know your partition. This step is crucial. It ensures safety. It makes the process smoother. Different partition types need different methods.
Modular Systems
These are common. They use pre-made panels. Connectors hold them together. Look for visible fasteners. These systems often disassemble easily. Panels might slide out. Screws may hold uprights. Check for leveling feet.
Framed Glass
Glass partitions have frames. Frames are often aluminum. They hold glass panels securely. Look for trim pieces. These might cover screws. Sometimes, clips hold the glass. Be very careful with glass. It can break easily. Safety glasses are a must.
Drywall
Drywall partitions are solid. They look like regular walls. They are built on a frame. This frame is usually wood. Or it can be metal studs. You will need to cut them. A utility knife works well. A drywall saw is also useful. Expect dust. Lots of dust.
Disassembling Modular Panels
Dismantling modular panels is straightforward. First, loosen the connecting hardware. Then, carefully lift each panel away. This process makes office reconfiguration simple.
Modular panels offer flexibility. They allow easy office reconfiguration. Dismantling them requires a methodical approach. Follow these steps for a smooth process.Locate Connectors
Find where panels meet. Look for clips or screws. These are your connection points. They hold the panels together.Release Panel Locks
Some panels have locking mechanisms. You might see levers or buttons. Press or slide them to unlock. This frees the panels.Carefully Remove Panels
Once unlocked, lift gently. Panels can be heavy. Support them as you pull. Avoid forcing anything. This prevents damage.Removing Framed Glass Partitions
Removing framed glass partitions requires careful work. Safety is the top priority. Glass can break easily. You need the right tools. Follow these steps for a smooth removal.
Secure Glass
First, make the glass safe. Use painter’s tape. Apply it in an X pattern. This holds shattered glass together. It prevents sudden falls. This step is very important.
Access Frame Fasteners
Next, find the frame screws. These hold the frame in place. Look along the edges. You might see decorative caps. Pry these caps off gently. Underneath, you will find screws.
Dismantle Frame Sections
Now, loosen the screws. Turn them counter-clockwise. Do this for all screws. The frame will start to loosen. Work from top to bottom. Carefully remove each frame piece. This is the final step.
Tackling Drywall Partitions
Drywall partitions are common. They create office spaces. Removing them requires a plan. This section guides you. We will tackle drywall partitions. Follow these steps carefully. Safety comes first. Wear protective gear always.
Locate Studs
Studs are vertical wood. They support the drywall. Find the studs first. Use a stud finder tool. Mark stud locations clearly. This helps with cutting. You know where to cut. You know where to pry.
Cut And Score Drywall
A utility knife works well. Cut the drywall carefully. Score along your marks. Go deep enough to cut. This makes panels easier. Cut horizontally and vertically. Create manageable sections. Be precise with your cuts.
Remove Drywall Sections
Pry bars are useful here. Gently pry the drywall. Work it away from studs. Remove the cut sections. They can be heavy. Handle them with care. Discard them safely. You see the framing now.
Extract Framing
The wood studs are next. They are usually nailed. Use a pry bar again. Loosen the nails slowly. Pull the framing away. Remove all wood pieces. Clear the area completely. Your partition is gone now.
Dealing With Electrical And Data Lines
Dealing with electrical and data lines requires careful attention. Safety is paramount. You must understand these systems. Mishandling them causes serious harm. Always prioritize caution. This section guides you through it.
Power Down Circuits
Find your building’s breaker box. Locate the correct circuit. Flip the breaker switch off. This cuts all power. Confirm the power is truly off. Use a voltage tester. Test the outlets. Ensure no electricity flows.
Disconnect Wiring
Examine the partition’s wiring. Identify power cables. Find data cables, too. Gently disconnect each wire. Use appropriate tools. Avoid pulling too hard. Protect the wires from damage. Keep them neat.
Label And Route Cables
Tag every disconnected cable. Use clear, simple labels. Note its original location. This helps with reassembly. Bundle the labeled cables together. Secure them with ties. Route them safely away. Prevent tripping hazards. Keep them organized.
Handling Doors And Hardware
Doors and their hardware need careful attention. Removing them is a key step. This section guides you through this process. Handle these parts with care. You will make the dismantling easier.
Remove Door Stops
Locate the door stops. These prevent the door from swinging too far. They are usually small metal pieces. Some are screwed into the floor. Others attach to the wall. Use a screwdriver. Turn the screws counter-clockwise. This loosens the stops. Gently pull them away. Keep the screws in a safe place.
Take Off Hinges
Hinges hold the door in place. They connect the door to the frame. You will see pins in the hinges. Tap the bottom of a pin. Use a hammer and a nail set. Gently push the pin upwards. Remove it completely. Do this for all hinge pins. The door will now be free. Get help lifting the door. It can be heavy.
Detach Door Handles And Locks
Door handles are next. Look for screws on the handle. These are often on the inside. Use a screwdriver to remove them. The handle should then come apart. Locks may have a separate mechanism. Unscrew any visible lock parts. Some locks have a cylinder. You might need a special tool. Remove the strike plate. This is on the door frame. It aligns with the lock bolt. Take out all screws holding it.
Cleanup And Disposal
Once your office partitions are down, a new task begins. Cleanup and disposal are crucial steps. Proper handling ensures a tidy space. It also protects the environment. Let’s look at how to manage this phase effectively.
Sort Materials
Separate different materials. Wood, metal, and glass need sorting. Cardboard and plastic also need grouping. This makes recycling easier. It also simplifies trash disposal.
Recycling Options
Explore local recycling centers. Many accept building materials. Check what they will take. Some companies specialize in office furniture. They can often reuse or recycle parts. This reduces landfill waste. It’s a responsible choice.
Proper Waste Disposal
Dispose of non-recyclable items. Use your local waste services. Follow their guidelines strictly. Large items may need special pickup. Avoid illegal dumping. This harms the environment. It can also lead to fines.
Reassembly Tips (optional)
Planning for reassembly makes dismantling easier. Think ahead. This optional section helps you rebuild later. It saves time and frustration. You will thank yourself.
Label Components
Mark every part. Use clear labels. Number panels and frames. Note connections too. This prevents mix-ups. It makes rebuilding simple.
Store Parts Safely
Find a dry, secure spot. Protect panels from damage. Keep hardware in labeled bins. Avoid moisture and extreme temperatures. Safe storage ensures good condition.
Consult Manufacturer Guides
Locate original instructions. Manufacturer guides are best. They show exact assembly steps. Find them online. Or check original packaging. These guides are invaluable.

Credit: www.youtube.com

Credit: www.youtube.com
Frequently Asked Questions
What Tools Are Needed To Remove Office Partitions?
Gather essential tools like a screwdriver, utility knife, and safety glasses. You might also need a wrench or pliers. Having the right gear makes the job easier.
How Do I Safely Detach Wall Panels?
Carefully loosen screws holding the panels. Gently pry them away from the frame. Watch out for any hidden wires or connections.
Can I Remove Floor-mounted Partitions Myself?
Yes, with caution. Locate the base fasteners securing the partition. Unscrew them slowly and steadily. This prevents damage to your floor.
What’s The Best Way To Disconnect Electrical Components?
Always turn off power at the breaker first. Then, disconnect wires from the junction box. Ensure all connections are secure before proceeding.
Is It Hard To Take Down Ceiling-hung Partitions?
It can be tricky. You’ll need a ladder for access. Carefully detach the support cables or rods. Have someone help steady the panels.
How Should I Dispose Of Old Office Partitions?
Check local recycling options first. Some materials can be reused. For disposal, follow your area’s waste guidelines.
Can I Reassemble Office Partitions Elsewhere?
Certainly, with planning. Document how they came apart. Ensure all parts are accounted for. Reassembly requires similar tools and care.
Conclusion
Dismantling office partitions is manageable. Follow these steps carefully. Safety first always. Gather your tools. Work with a partner. Label each part. Store components neatly. You have successfully removed them. Now, enjoy your open space.