

Credit: www.getusb.info
Why Label Thumb Drives?
Thumb drives hold important data. Losing them is a problem. Labeling them solves many issues. It keeps your files safe. It saves you time. It prevents confusion.
The Case Of The Missing Files
You have many thumb drives. They look the same. One holds work files. Another has photos. You need a specific file. Which drive is it? You search through them all. This wastes precious time. A simple label fixes this. It tells you the contents. No more guessing games.
Preventing Accidental Overwrites
Mistakes happen easily. You plug in the wrong drive. You start saving new work. Oh no! You just deleted old files. This is a common error. Labels prevent this disaster. You see “Project Alpha” on one. You know not to overwrite it. Labeling keeps your data secure.
Organization Is Key
A tidy desk helps focus. A tidy digital life matters too. Labeling thumb drives brings order. Group them by project. Color-code them for categories. Find what you need quickly. This reduces daily stress. It makes your workflow smooth.
Sharing Becomes Simple
You lend a drive to a friend. What is on it? You need to explain. A label does the talking. “Vacation Photos” is clear. “Important Documents” is helpful. Sharing becomes much easier. No more awkward questions.

Credit: iusb.com.au
Choosing The Right Label
Labeling thumb drives helps you find files fast. Clear labels prevent mix-ups. Organize your data with simple, readable tags.
Choosing the right label is important. It keeps your thumb drives organized. Clear labels save you time. You find files faster. Good labeling prevents mix-ups. This makes your digital life easier.Adhesive Labels
Small adhesive labels work well. They stick directly onto drives. Choose durable labels. They resist wear and tear. Write clearly on them. Use a fine-tip pen. These labels are a simple choice.Permanent Markers
Permanent markers offer a quick option. Just write on the drive’s plastic. Ensure the surface is clean. The ink will not smudge. This method is very direct. It works for most drives.Tags And Keychains
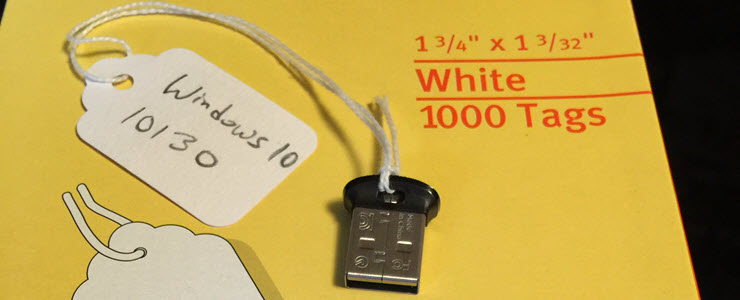
Attach tags or keychains. These hang from the drive. You can write on the tag. Some keychains have small labels. This keeps the drive itself clean. It adds a bit of flair.Color-coding Systems
Use a color-coding system. Assign colors to categories. For example, blue for work files. Red for personal projects. Green for school assignments. This offers visual organization. It makes finding drives quick.What To Write On Labels
Labeling your thumb drives is crucial. It helps you find files fast. Clear labels prevent confusion. You save time. You avoid mistakes. Good labels organize your data. This section explains what to write.
Content Description
What is on the drive? Be specific. Write a short description. Example: “Project Alpha Docs.” Or “Vacation Photos 2026.” This tells you the main topic. It is very helpful. You know what to expect inside.
Date Created/modified
When was the data last updated? Add the date. Use a clear format. Example: “2026-10-27.” Or “Oct 27, 2026.” This shows the newest version. You can track changes easily. Avoid old, outdated files.
Owner’s Name
Who owns this drive? Put your name. Example: “Owned by John Smith.” Or just “John S.” This is important for shared drives. It helps return lost drives. People know who to ask. It prevents mix-ups.
Security Level
Is the data sensitive? Mark its security. Use simple terms. Example: “Confidential.” Or “Personal.” Avoid “Top Secret.” Use what makes sense. This warns others. They know to be careful. Protect private information.
File Type
What kind of files are here? Mention the file type. Example: “Reports Only.” Or “Images.” You can also write “Software.” This helps sort drives. You know where to look. Find the right files quickly.
Labeling Techniques
When you label thumb drives, good techniques make them easy to find. Clear labels save you time. They prevent confusion. You can grab the right drive fast. This makes managing your data simple.Keep It Concise
Use short words. Write only key details. Include the project name. Add a date if needed. Avoid long descriptions. Get straight to the point.Be Consistent
Use the same style. Label all drives alike. This builds good habits. Your system stays organized. It becomes predictable.Use Clear Fonts
Choose readable fonts. Avoid fancy styles. Simple fonts are best. Print labels clearly. Make sure they are legible.Placement Matters
Label the drive’s body. Avoid covering the port. The label should not peel. Stick it securely. Ensure it stays put.Advanced Labeling Strategies
Basic labeling is good. Advanced strategies take it further. You organize better. You find files faster. These methods save time. They prevent mistakes. Let’s explore them.
Digital Labeling
Physical labels are not enough. Digital labels are crucial. Use clear file names. Include dates. Add project names. This makes searching easy. Digital labels are searchable. They live within your files. This is powerful organization. Think beyond the USB stick.
Labeling For Backups
Backups need special care. Label drives clearly. Use “Backup” in the name. Add the date of backup. Specify what is backed up. For example, “Photos Backup 2026-10-27.” This prevents confusion. You know which backup is current. Never overwrite old backups. Use separate drives for versions. This is smart data protection.
Labeling For Collaboration
Working with others? Labeling is key. Use project names. Include your initials. Add a version number. For example, “ProjectX_JD_v3.” This shows ownership. It tracks changes easily. Everyone knows the latest file. Avoid naming conflicts. Clear labels promote teamwork. It makes sharing simple.
Credit: tinkertry.com
Troubleshooting Label Issues
Labeling thumb drives helps organization. Sometimes labels cause problems. Troubleshooting label issues keeps drives accessible. These tips solve common labeling headaches. Your data stays easy to find.
Fading Labels
Ink can fade over time. This makes labels hard to read. Use a permanent marker. Avoid ballpoint pens. Consider printing labels. They often last much longer. Store drives away from sunlight. Direct sun causes fading fast. UV protection helps your labels.
Sticky Residue
Labels can leave sticky spots. This happens when you remove them. Goo Gone works well. Rubbing alcohol can also help. Use a soft cloth for cleaning. Be gentle with the drive. Avoid scratching the surface. Sometimes, a bit of patience is needed. Wipe away the stickiness slowly.
Unreadable Text
Text might become smudged. Moisture can ruin labels. Use waterproof label paper. Write clearly and boldly. Large print is best. Check your writing often. A quick glance confirms legibility. Ensure the marker ink is dry. Smudging ruins text quickly. Keep labels dry and protected.
Conclusion
Labeling thumb drives is simple. It saves you time. Find files faster. Use clear, short labels. Write the content name. Date it if needed. This habit helps organization. Your digital life gets easier. Try labeling today. See the difference.