
Ready to give your kitchen or bathroom cabinets a fresh look? Installing new cabinet hardware can make a huge difference, but getting those pulls and knobs perfectly aligned can feel tricky.
What if there was a simple way to guarantee straight lines and even spacing every single time? You’re in luck! This guide will show you exactly how to install cabinet hardware using a template. Forget guesswork and wobbly handles – you’ll be a pro in no time, transforming your cabinets with confidence and ease.
Let’s get started!
Gather Your Tools
First, gather your supplies. You’ll need your template, a drill, and your cabinet hardware. Having everything ready makes the job easier.
Before you start installing hardware, gather your tools. Proper preparation makes the job easier. It ensures accurate placement. You avoid mistakes.Essential Hardware Installation Tools
You need a few key items. A template is vital. It guides your drilling. Get a measuring tape. A pencil marks positions. A drill with bits is necessary. Screwdrivers fit your hardware. Safety glasses protect your eyes.Choosing Your Template
Templates simplify hardware placement. Many hardware sets include one. You can also buy universal templates. Some templates are adjustable. They fit different knob spacings. A good template ensures alignment. It saves you time.Drill Bits And Screwdrivers
Select the right drill bit. It matches your screw size. Too small, and screws won’t fit. Too large, and holes get too big. Use the correct screwdriver. It fits the screw head. This prevents stripping screws.Choose The Right Template
Selecting the correct template is crucial. It ensures accurate placement for your cabinet hardware. A good template makes installation simple.
Choosing The Right Template
Selecting the perfect template makes hardware installation easy. It ensures perfect alignment. A good template saves you time. It prevents costly mistakes.Template Material Matters
Templates come in different materials. Plastic templates are common. They are durable and reusable. Cardboard templates work too. They are often included with hardware. Metal templates offer the most precision. They are excellent for professional results. Consider the template’s thickness. Thicker templates resist bending. This guarantees accurate drilling.Template Design For Your Hardware
Templates match your hardware style. Knobs need a single hole. Pulls require two holes. Check the template’s hole spacing. This is called the center-to-center measurement. It must match your pull’s dimensions. Some templates are universal. They fit many hardware types. Others are specific. They are designed for one product. Always verify compatibility. Ensure the template fits your chosen hardware.Template Clarity Is Key
Clear markings are essential. Look for sharp, visible lines. Measurements should be easy to read. Some templates have guides. These help center the template. They also help keep it straight. A well-marked template reduces confusion. It makes the process straightforward. You will drill holes accurately.Prepare The Cabinet Doors
First, prepare your cabinet doors. Ensure they are clean and ready. This step is crucial for accurate hardware placement.
This step is crucial. Proper preparation ensures perfect placement. Your hardware will look professional. Let’s get your cabinet doors ready.Clean The Doors
Dirt hides mistakes. Wipe all doors clean. Use a damp cloth. Remove any grease or grime. Dry them thoroughly. A clean surface is essential.Inspect For Flaws
Check for dents or scratches. Minor flaws can be fixed. Fill small holes. Sand them smooth. You want a perfect canvas. Hardware looks best on smooth doors.Determine Placement
Decide where hardware goes. Measure carefully. Consider door size. Think about drawer fronts too. Consistent placement is key. This makes a big difference.Position The Template
Place the template precisely. Align it with cabinet edges. This ensures perfect hardware placement.
Placing the template is critical. It ensures perfect hardware alignment. This step makes your cabinets look professional. A well-placed template saves you headaches later.Find The Cabinet Center
Locate the cabinet’s exact middle. Measure the cabinet’s width. Divide that number by two. Mark this point lightly. This is your center guide.Align The Template Mark
Match the template’s center mark. Line it up with your cabinet mark. Ensure it sits perfectly. This alignment is key.Check For Level And Square
Use a level tool. Make sure the template is straight. It must be perfectly horizontal. It should also be perfectly vertical. A square template is important.Consider Hardware Placement
Think about the hardware’s look. Where do you want it to sit? Visualize the final result. Adjust the template as needed. Aesthetics matter greatly.Secure The Template Firmly
Once aligned, hold it steady. Use painter’s tape. Tape all edges securely. The template should not move. This prevents errors.Double-check All Measurements
Measure again. Verify all template positions. Ensure it matches your plan. Accuracy is paramount. Do not skip this check.Mark Drilling Points
Use a pencil. Mark the template’s drill holes. Make clear, visible marks. These marks guide your drill. They are your reference points.Mark The Screw Holes
Next, mark your screw holes precisely. Use a pencil for clear, easy-to-see marks. This ensures perfect alignment for your new hardware.
This step is crucial. Accurate marks ensure perfect hardware placement. Your template guides these marks.Align The Template
Place your template carefully. Ensure it sits flat. Check the edges align well. This prevents crooked hardware.Transfer The Marks
Use a pencil. Mark the small holes. These are for your screws. Make clear, visible marks.Double-check Your Marks
Look at your marks closely. Are they straight? Do they match the template? A quick check saves rework. It’s worth the effort.Drill Pilot Holes
Drill pilot holes next. This step prevents wood splitting. Use the template to guide your drill.
Drilling pilot holes is a crucial step. It prevents wood splitting. Your hardware will sit straight. This makes a big difference.Prepare Your Drill Bit
Choose the correct drill bit size. It should match your screw size. A bit too large weakens the hole. A bit too small makes driving hard. Your template guides the placement.Set Drill Depth
Mark your drill bit. Use painter’s tape. The tape shows how deep to go. You want the screw to grip. Do not drill too deep. This can damage the cabinet.Drill Straight
Hold the drill firmly. Keep it perpendicular. A straight hole is vital. This ensures hardware alignment. Your template helps here. It keeps you on track.Drill The First Hole
Start drilling slowly. Apply steady pressure. Let the drill do the work. You are creating a guide. This makes screw insertion easy.Drill The Second Hole
Repeat for the other hole. Ensure consistent depth. Both holes must align. This secures your hardware well. Your template makes this simple.Attach The Hardware
Now, attach your hardware. Use the template to mark drill holes. This ensures perfect placement every time.
This is the exciting part. You finally get to see your work pay off. Attaching the hardware makes cabinets look finished. It’s a satisfying step. You’ve done the hard part. Now for the easy part.Position The Hardware
Line up your hardware. Use the template you made. Ensure perfect alignment. This step is crucial for a professional look. Take your time here. A slight shift can look wrong. Double-check the position.Secure The Hardware
Insert screws through holes. These holes are in the template. They are also in the cabinet. Tighten the screws gently. Do not overtighten them. This can strip the screw. It can also damage the wood. Ensure the hardware feels snug. It should not wobble.Final Check
Step back and look. Does the hardware look straight? Is it centered properly? Admire your handiwork. You did it. Your cabinets look amazing. The hardware completes the design. Enjoy your updated cabinets.Tips For Perfect Placement
Perfect placement matters. It makes cabinets look professional. Your hardware should be straight. It should be level too. These tips help achieve that. You will get beautiful results.
Use A Level For Straightness
A level is your best friend. Place it on the template. Ensure the bubble is centered. This guarantees a straight line. Your hardware will look perfect. No more crooked pulls.
Measure Twice, Drill Once
Accuracy is very important. Measure the template’s position. Use a tape measure. Double-check all measurements. Mistakes are hard to fix. Measure twice. Drill only once.
Consider Cabinet Style And Size
Hardware should match cabinets. Small cabinets need small hardware. Large cabinets can take larger pieces. Think about the overall look. Proportion is key. Your hardware will fit well.
Test Hardware Before Drilling
Hold the hardware up. See how it looks. Imagine it installed. Does it feel right? This simple step avoids regret. It ensures you like the final look.
Troubleshooting Common Issues
Mistakes happen. Even with a template, problems can arise. Don’t worry. We cover common issues here. Fix them easily. Get perfect hardware placement.
The Template Isn’t Straight
Your template might be crooked. This throws off measurements. Realign the template carefully. Use a level. Make sure it’s perfectly straight. This ensures accurate holes.
Holes Don’t Line Up
Hardware won’t fit. The holes are off. Did you drill too deep? Check the drill bit stop. Did you move the template? Re-check template placement. Use a small drill bit first. This makes adjustments easier.
Hardware Wobbles
Your new handle is loose. It feels wobbly. The screw holes might be too big. This can happen. Try larger screws. You can also use wood filler. Fill the hole. Let it dry. Then re-drill.
Template Holes Are Too Small
The drill bit won’t fit. The template holes are tiny. This is frustrating. Use a pencil. Mark the center of the hole. Ignore the template hole size. Just use the template’s position. This works well.
Template Sticks To The Cabinet
The template won’t come off. It’s stuck fast. This is annoying. Try gently prying. Use a thin putty knife. Be careful not to scratch. You can also use a little water. It might help loosen it.
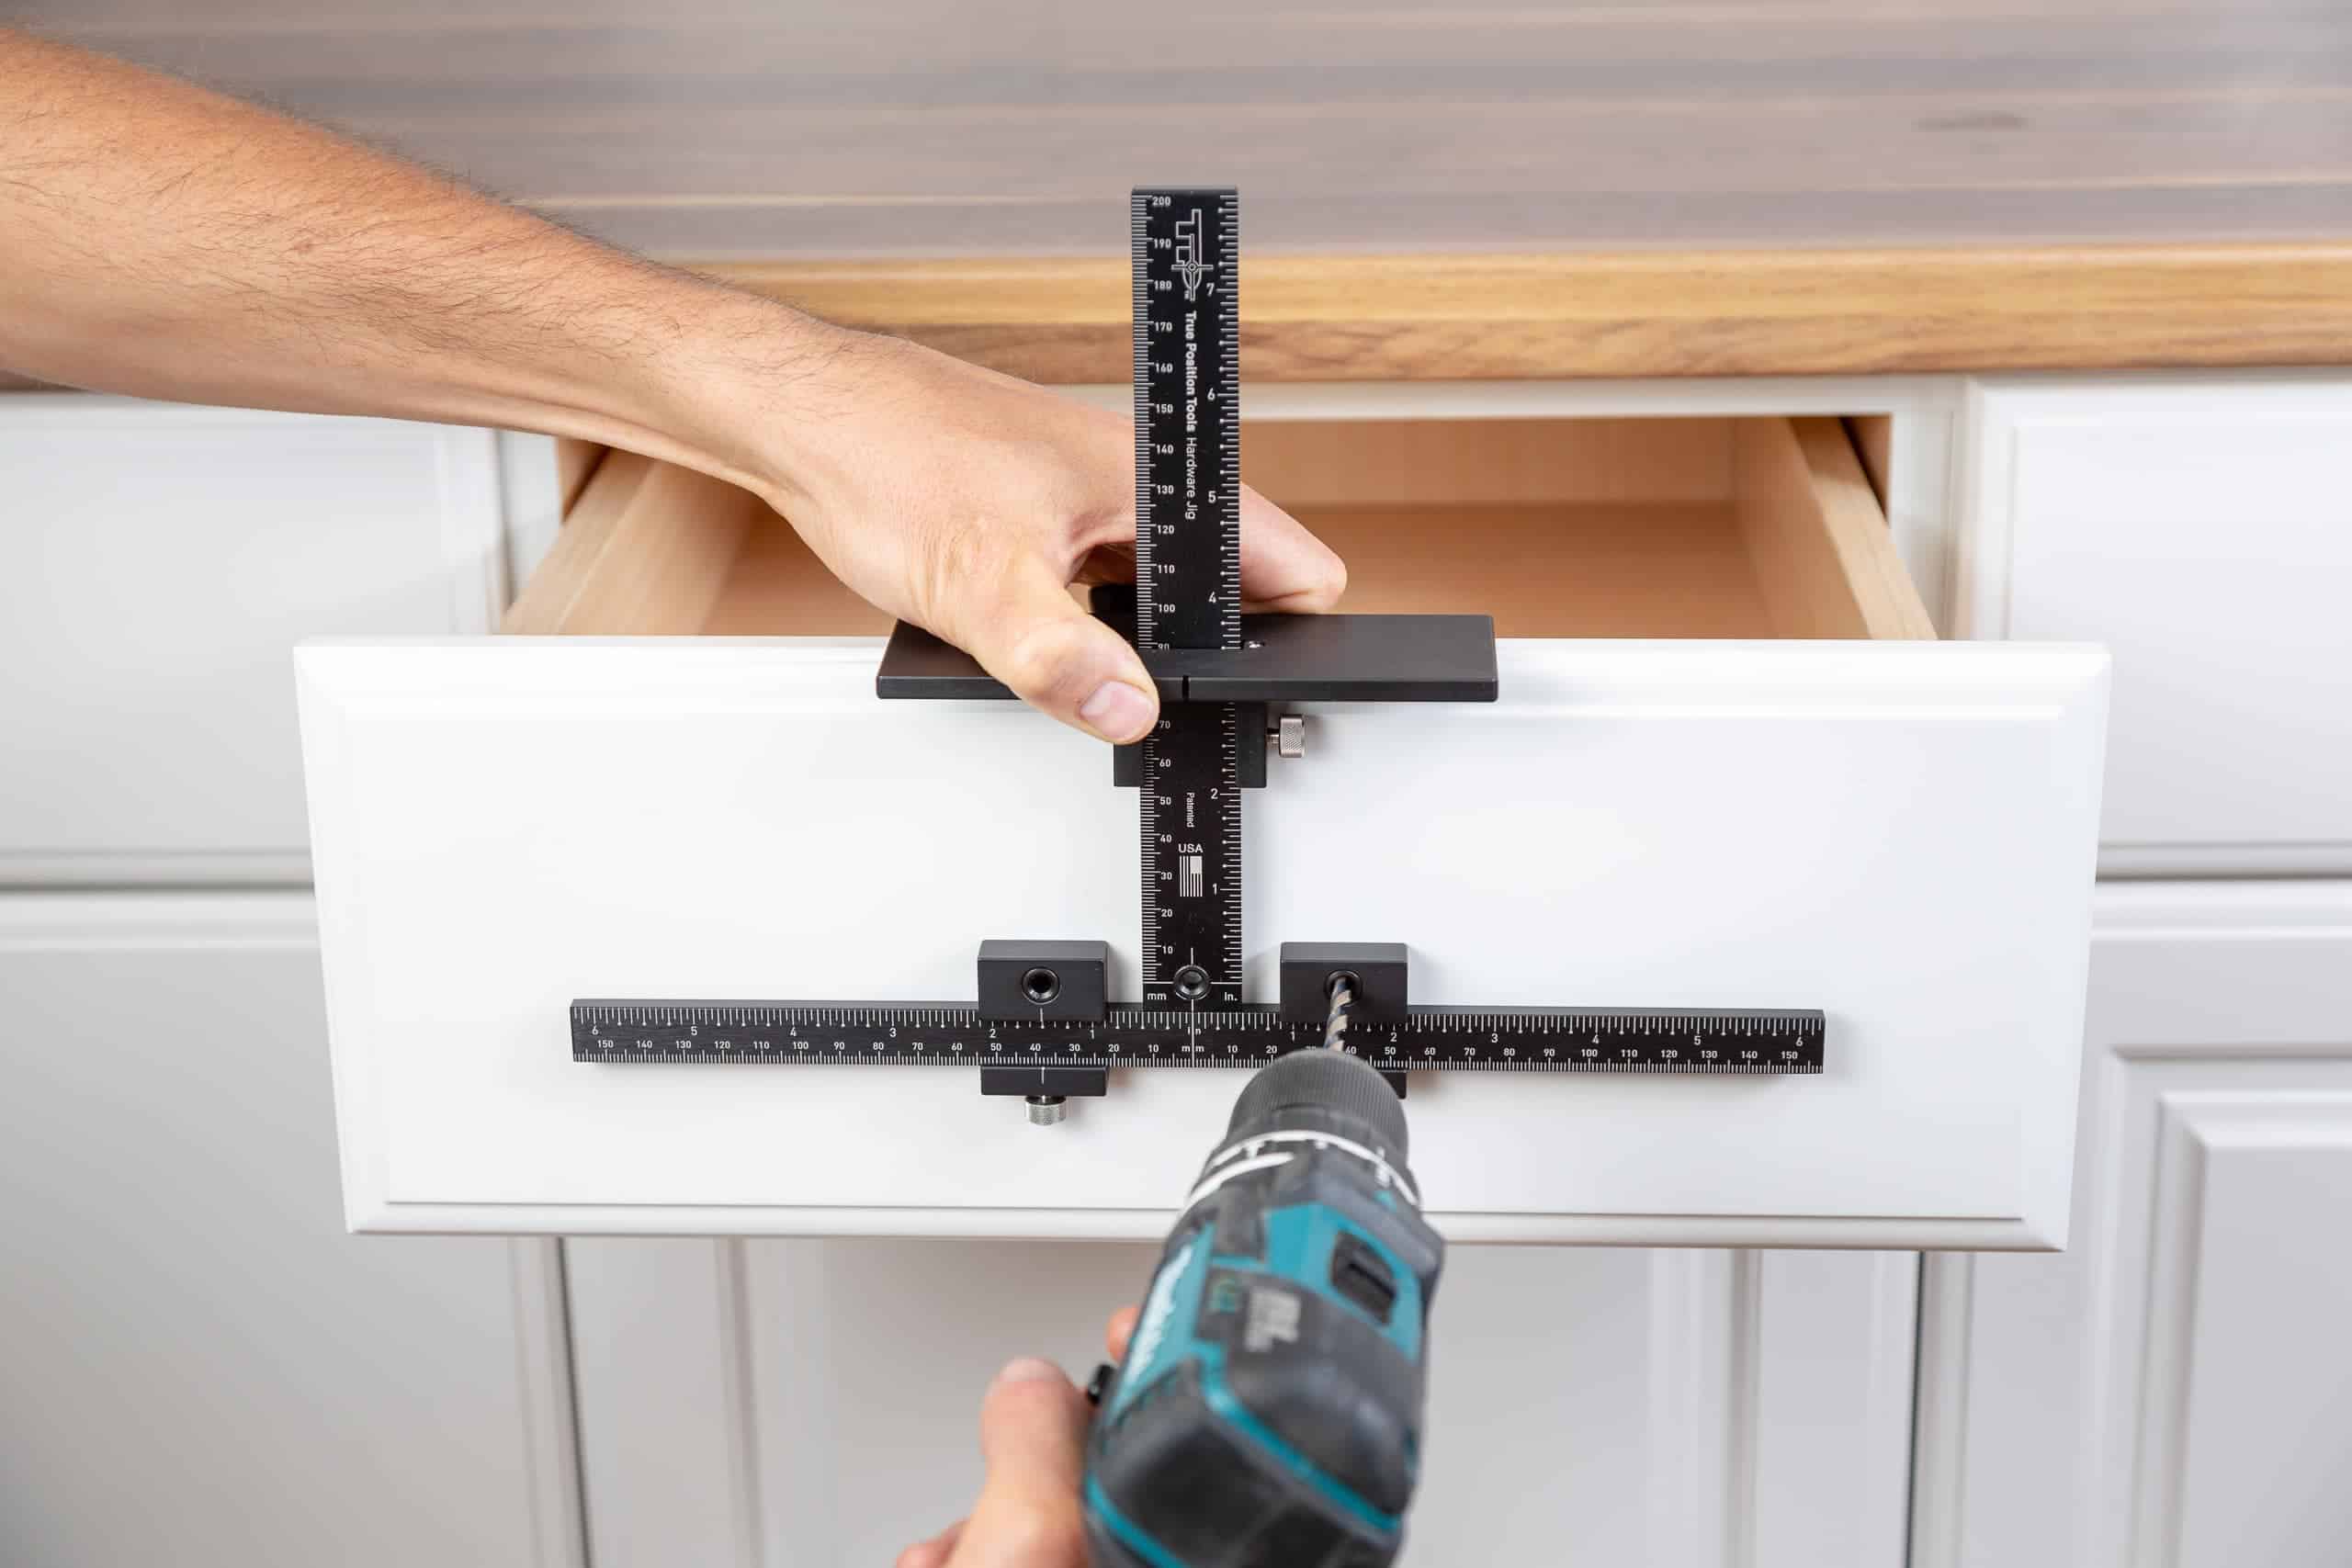
Credit: truepositiontools.com
Frequently Asked Questions
What Is A Cabinet Hardware Template?
A template is a guide. It helps you place knobs and pulls evenly. It ensures perfect spacing every time.
Why Use A Template For Cabinet Hardware?
Templates prevent mistakes. They make drilling holes easy. Your hardware will look professional.
Can I Make My Own Cabinet Hardware Template?
Yes, you can. Use sturdy paper or cardboard. Measure carefully for accuracy.
How Do I Use A Cabinet Hardware Template?
Align the template on your cabinet. Mark the hole locations. Then drill your holes.
What If My Template Holes Are Wrong?
Check your measurements first. Ensure the template is straight. You might need to fill small errors.
Are Templates Needed For All Hardware Types?
Templates are most helpful for pulls. They ensure consistent spacing. Knobs might not need them.
How To Ensure Template Accuracy On Cabinets?
Measure twice, mark once. Use a level for straightness. Double-check alignment before drilling.
Conclusion
Installing cabinet hardware is easy. Use a template for perfect placement. Measure twice, drill once. Your cabinets will look great. No more crooked handles. Enjoy your updated kitchen. This simple trick saves time. It makes a big difference. Try it yourself today.